

 WhatsApp: +86 16626708626
 Email:
  Phone: +86 16626708626
Description
- Key Technical Specifications
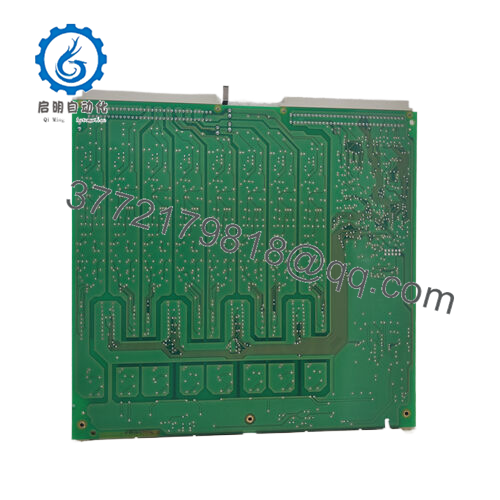
- Part Number: 3BHT300051R1
- Alternate Designation: AO650 / A0650
- Channels: 8 analog outputs
- Resolution: 12 bits
- Isolation: Opto-isolated per channel
- Output Ranges: 0-20 mA, 4-20 mA, ±20 mA, 0-5 V, 0-10 V, 1-5 V, ±10 V (configurable per channel)
- Accuracy: Typically ±0.1% of span (verify per calibration)
- Update Time: Dependent on controller scan (typically ms range)
- Supply Voltage: 24 V DC (from I/O bus/backplane)
- Power Consumption: Approx. 5–8 W (full load)
- Operating Temperature: 0 to +55 °C (standard industrial)
- Storage Temperature: -40 to +70 °C
- Mounting: DIN rail or rack in S600 I/O station
- Dimensions: Standard S600 module size (approx. 120 × 75 × 130 mm)
- Weight: Approx. 0.5–0.7 kg
- Product Introduction The ABB AO650 (3BHT300051R1) is an 8-channel analog output module in the S600 I/O family, used with Advant Controller 110/160 systems for precise setpoint transmission in process control loops. It drives actuators, positioners, or indicators in industries like chemicals, oil & gas, and power.
Per-channel isolation protects against ground loops and transients—critical in noisy plants. Engineers favor it for backward-compatible replacements in legacy setups, maintaining signal integrity without rewiring or major reconfiguration. It’s legacy hardware, available mainly through surplus channels.

- AO650 3BHT300051R1
- Installation & Configuration Guide
Stage 1: Pre-Installation Preparation (10–15 minutes) ⚠️ Safety First: Coordinate process downtime. Confirm loops in manual/safe mode. Lock out/tag out 24 V DC to I/O station. Wait 5 minutes for discharge. Tools Required: ESD wrist strap, PH1 screwdriver, Fluke multimeter, wire labels, smartphone for photos. Data Backup: Use Advant engineering tool (e.g., Control Builder or AC 110 configurator) to export hardware config and output scaling. Photograph module front (LEDs, labels), terminal wiring, channel assignments, and any jumpers/DIPs if present. Document range settings per channel.
Stage 2: Removing the Old Module (5–10 minutes)
- Remove front cover or bezel if present.
- Label and disconnect field wiring terminals (current/voltage loops)—note polarity and shielding.
- Release DIN rail clip or rack locking tabs; pull module straight out to avoid backplane pin damage.
- Inspect backplane connector for dust, bent pins, or oxidation—clean with compressed air. ⚠️ Note: Retain old module for reference until new one is commissioned.
Stage 3: Installing the New Module (10–15 minutes)
- Ground yourself with ESD strap. Confirm part number matches AO650 3BHT300051R1.
- Configuration Clone (critical): Match any hardware jumpers or range selectors from photos (if applicable; most ranges software-configured). Verify slot position matches original.
- Align with guides; insert firmly until seated (click/lock). Secure clip/tab.
- Reconnect field wiring per labels—torque terminals (typically 0.5–0.8 Nm); ensure shielding grounded correctly. Self-Checklist: [ ] Jumpers/range match photo, [ ] Wiring secure and polarized, [ ] Module fully seated, [ ] No crossed loops.
Stage 4: Power-On & Testing (15–30 minutes) Pre-Power Check: Multimeter test for shorts on 24 V rail and output channels (open loops). Power-On Steps:
- Power I/O station only (keep field isolated initially).
- Observe LEDs: Power green, status per channel (no faults).
- Connect engineering tool; confirm module detected, check firmware if applicable, verify channel configs.
- Force output values (e.g., 4 mA, 20 mA, 0 V, 10 V); measure at terminals with multimeter or loop calibrator.
- Enable field loops; monitor for stable operation and no drift. ⚠️ Troubleshooting Note: Channel fault LED? Check wiring continuity or range mismatch. No detection? Reseat module, verify slot addressing. Output stuck? Confirm software scaling and controller scan.
- Frequently Asked Questions (FAQ)
Can this module be hot-swapped? No. S600 I/O doesn’t support live insertion—risks backplane faults or transient errors. Power down the station first. I’ve seen attempts cause channel faults across the rack.
Is this model obsolete, and is your stock new? Yes, legacy—not in current ABB catalogs. We source new surplus from decommissioned systems or excess stock. Each unit gets visual/serial check, 24+ hour powered test in S600 rack simulation (channel output forcing, accuracy check), insulation resistance (>10 MΩ at 500 V), and config verification. Test photos/videos on request.
What is the direct replacement if out of stock? No exact drop-in; migrate to newer S800 I/O series (e.g., AO810 or AO815) but requires adapters, reconfiguration, and possibly controller updates. Confirm channel count, isolation, and ranges match your loops. Check ABB migration guides.
Will swapping lose my analog output configurations? No—scaling and assignments live in the controller project. The module handles physical conversion. Reload config post-swap; test forced outputs. Backup project before removal.
Why is the price lower than OEM list? Surplus from phased-out installations, not active production. We test rigorously (full range forcing, thermal run, electrical isolation), with our 1-year warranty on function—not ABB factory.
How do you test before shipping? Power each in S600 I/O setup >24 hours, force all channels across ranges, measure accuracy with calibrator, check isolation, and monitor thermals. Firmware/config documented; report included.
Photograph terminals, channel labels, and config screens before removal. Mirror exactly, force-test each output—you’ll skip most loop commissioning issues.


