
 WhatsApp: +86 16626708626
 Email:
  Phone: +86 16626708626
Description
3. Key Technical Specifications
- Number of Channels: 16 (isolated in two groups of 8)
- Signal Type: Current sinking (PNP/NPN compatible)
- Rated Voltage: 24 V DC (process power supply range 18–30 V DC)
- Input Current: 6 mA at 24 V DC
- Input Voltage Thresholds: “1” signal ≥12 V DC, “0” signal ≤5 V DC (typical)
- Filtering Time: Configurable 0.5–8 ms (via engineering tool)
- SOE Resolution: 1 ms (Sequence of Events timestamping)
- Isolation: Group-to-group 50 V, channel-to-channel within group none; rated isolation voltage 50 V
- Power Consumption: Typ. 3 W (from ModuleBus)
- Operating Temperature: −25 to +70 °C (extended range for S800)
- Storage Temperature: −40 to +85 °C
- Dimensions (HxWxD): Approx. 119 × 45 × 102 mm
- Weight: Approx. 0.3 kg (without TU)
- Mounting: On compatible MTU (TU810, TU812, TU814, TU818, TU830, TU833, TU838, TU850)
- Compatibility: S800 I/O for AC 800M, Compact 800, 800xA systems
4. Product Introduction
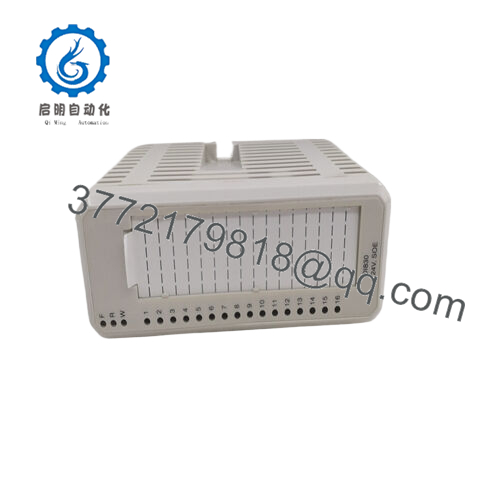
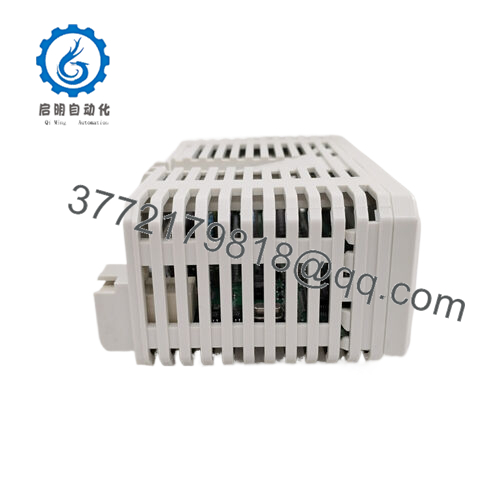
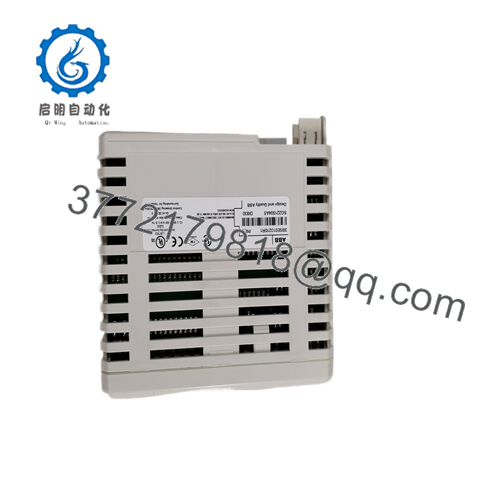
The ABB DI830 (3BSE013210R1) is a 16-channel 24 V DC digital input module within the S800 remote I/O family, designed for AC 800M-based controllers in System 800xA or Compact Product Suite. It reads binary signals from field devices like limit switches, pushbuttons, or proximity sensors, with built-in SOE for precise event sequencing and diagnostics.
This module provides solid isolation in two groups of eight channels, configurable input filtering, and millisecond-level timestamping essential for trip analysis or post-event review. Engineers favor it over basic DI modules (like DI810) when SOE is required for fault tracing or regulatory reporting—reliable in harsh environments, though newer S800L or Ethernet I/O variants may suit greenfield projects.

- DI830 3BSE013210R1
5. Installation & Configuration Guide
Stage 1: Pre-Installation Preparation (10–15 minutes) ⚠️ Safety First: Coordinate planned downtime; de-energize field signals and ModuleBus power. Lock out/tag out 24 V DC supply. Wait 5 minutes for discharge. Tools Required: Grounded ESD wrist strap, PH1 screwdriver, Fluke multimeter, wire labels, smartphone for photos. Data Backup: Use Control Builder or 800xA Engineering to export I/O configuration, hardware tree, and any SOE settings. Photograph MTU terminal wiring, channel assignments, and grounding.
Stage 2: Removing the Old Module (5–10 minutes)
- Power down the I/O station/rack.
- Label every field wire and MTU terminal position.
- Disconnect field wiring carefully (torque typically 0.5–0.6 Nm).
- Release locking tabs/clips; pull module straight out from MTU to avoid pin damage.
- Inspect MTU for dust, corrosion, or bent pins; clean with dry air. ⚠️ Note: Keep the old module labeled until the new one operates fault-free for 24+ hours.
Stage 3: Installing the New Module (10–15 minutes)
- Ground yourself with ESD strap. Verify replacement is DI830 3BSE013210R1 (check nameplate).
- Configuration Clone (Crucial): Pre-configure in engineering tool if possible—match channel types, filtering, SOE enablement. No DIP switches; all via software.
- Align and insert firmly into MTU until it seats with click; secure if required.
- Reconnect field wiring per photos/labels; torque terminals to spec. Self-Checklist: [ ] Model matches, [ ] Wiring exact to original, [ ] Module fully seated.
Stage 4: Power-On & Testing (15–30 minutes) Pre-Power Check: Multimeter—no shorts on 24 V field supply, verify ground continuity. Power-On Steps:
- Energize ModuleBus and field power (isolate critical loops initially).
- Observe module LEDs: Green PWR/OK; no red ERR.
- Connect engineering tool; go online, verify module status, no faults/diagnostics.
- Force inputs via test switches or secondary simulation; confirm scan and SOE timestamps in diagnostics.
- Monitor for alarms; dry-run logic affected by these inputs. ⚠️ Troubleshooting Note: Red ERR often means MTU mismatch, wiring fault, or firmware incompatibility—check hardware type in config. No input detection? Verify field voltage >12 V and polarity (sinking). SOE missing? Ensure enabled in I/O definition.
6. Frequently Asked Questions (FAQ)
Can the DI830 be hot-swapped? In redundant I/O setups with optical ModuleBus extension, yes for non-critical stations—but kill field power first to avoid signal noise or false trips. Standard single stations require power-off. I’ve seen live swaps cause phantom events in SOE logs.
Is this model obsolete, and are your units genuinely new? Still active in 2026 per ABB selectors, but Classic in many lifecycle docs—production continues with limited new builds. New surplus from excess OEM stock; we verify unused via serials, visual inspection (no rework/UV damage), 24-hour powered test with input simulation and comms check. Test photos/videos available.
What is a direct replacement if this exact module is unavailable? DI831 or DI885 for similar 24 V with SOE, but check channel count, isolation, and MTU compatibility. Not always drop-in—re-validate wiring and config. For non-SOE, DI810 is cheaper but lacks timestamping.
Will swapping the DI830 lose my I/O configuration or SOE data? No—the config lives in the controller, not the module. Export hardware definition first and reload if needed. SOE history is buffered in controller; swapping doesn’t erase it unless you clear buffers.
Why is the price lower than ABB factory new? Surplus stock skips full OEM distribution costs. Units are authentic ABB, serial-traced, not refurbished or copies—we run functional tests and provide our 1-year warranty after burn-in. No official ABB seal, but proven in field swaps.
Double-check MTU compatibility and latest ABB hardware selector before commissioning—these details catch most rework.


