
 WhatsApp: +86 16626708626
 Email:
  Phone: +86 16626708626
Description
2. Product Core Brief
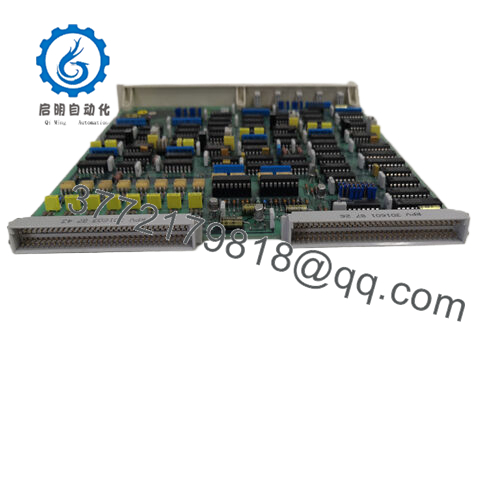
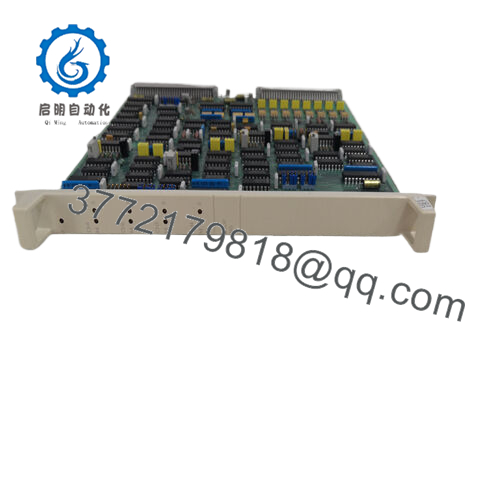
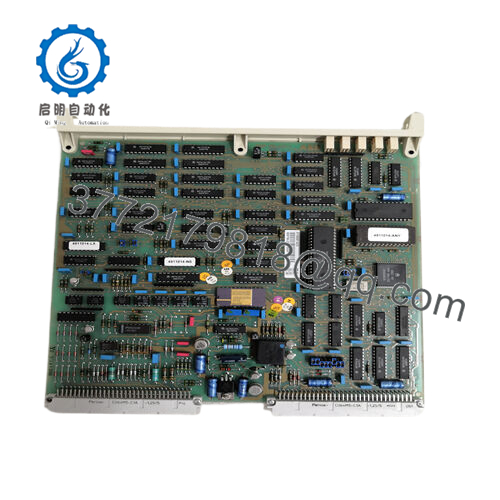
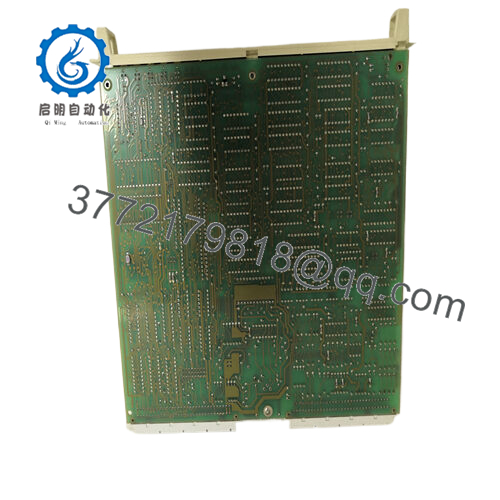
- Model: DP640 (3BHT300057R1)
- Brand: ABB
- Series: Advant Controller 400 / AC400 family
- Core Function: Profibus DP fieldbus communication interface
- Product Type: Communication / Fieldbus Interface Module
- Key Specs: Profibus DP interface, DIN rack mount, Advant Controller compatibility
- Condition: New Original (New Surplus)
3. Key Technical Specifications
| Parameter | Value |
|---|---|
| Model Number | DP640 |
| Order Code | 3BHT300057R1 |
| Manufacturer | ABB |
| Product Type | Fieldbus Communication Module |
| Supported Protocol | Profibus DP |
| Controller Compatibility | ABB Advant Controller 400 series |
| Mounting Type | Controller rack / module slot |
| Communication Speed | Up to 12 Mbps (Profibus DP standard) |
| Power Supply | Supplied from controller backplane |
| Operating Temperature | 0 to +55 °C typical industrial rating |
| Storage Temperature | −25 to +70 °C |
| Weight | ~0.5 kg |

- DP640 3BHT300057R1
4. Product Introduction
The ABB DP640 (3BHT300057R1) is a Profibus DP communication interface module designed for ABB Advant Controller 400 series control systems. It provides deterministic fieldbus connectivity between the controller and distributed I/O or intelligent field devices using the Profibus DP protocol.
In field deployments of Advant-based DCS systems, DP640 modules are typically installed to integrate remote I/O stations or third-party drives. Engineers select this module when a plant requires stable cyclic fieldbus communication at up to 12 Mbps, while maintaining compatibility with legacy ABB Advant control racks.
5. Installation & Configuration Guide
Stage 1: Pre-Installation Preparation (10 minutes)
⚠️ Safety First
- Notify operations of the planned downtime window.
- Bring the process to a safe operational state.
- Apply lockout/tagout (LOTO) to the control cabinet power supply.
- Wait at least 5 minutes for DC power capacitors to discharge.
Tools Required
- ESD wrist strap and ESD mat
- PH1 screwdriver
- Multimeter (Fluke 115 or equivalent)
- Wire labels or masking tape
- Smartphone (for wiring and DIP switch photos)
Data Backup
- Export the controller configuration from the engineering workstation.
- Record Profibus node addresses and baud rate configuration.
- Take clear photos of wiring and DIP switch settings before touching anything.
Stage 2: Removing the Old Module (5–10 minutes)
- Remove the controller rack front cover if installed.
- Label every cable connected to the DP640 module.
- Disconnect the Profibus connector and any auxiliary wiring.
- Release the rack locking mechanism.
- Pull the module straight out of the rack slot to avoid bending the backplane connector pins.
- Inspect the rack slot for dust buildup or bent contacts.
⚠️ Important: Keep the old module nearby until the replacement is fully operational. It is your best configuration reference.
Stage 3: Installing the New Module (10 minutes)
- Wear an ESD strap before handling the new module.
- Confirm the model number DP640 3BHT300057R1 matches the removed unit.
Configuration Clone (Critical Step)
- Replicate all DIP switch or jumper settings from the old module photo.
- Pay attention to:
- Profibus node address
- Bus termination settings
- Any diagnostic configuration switches
- Slide the module into the rack slot until the connector seats fully.
- Engage the locking tab or screw retainer.
- Reconnect the Profibus cable and shield grounding.
Self-Checklist
- DIP switches match original module
- Profibus connector secured
- Module seated fully in rack
- Retention latch locked
Stage 4: Power-On & Testing (10–15 minutes)
Pre-Power Electrical Check
- Use a multimeter to verify no short on the 24 V DC rail.
Power-Up Procedure
- Restore power to the controller rack only.
- Observe the module LEDs.
Typical behavior:
- Green RUN LED: Communication active
- Red ERR LED: Configuration or bus issue
- Connect the engineering workstation.
- Confirm the Profibus master detects the DP640 module.
- Verify all remote I/O nodes return to cyclic data exchange.
- Perform a dry I/O test before releasing the process.
⚠️ Troubleshooting Tip
If the module stays in fault:
- Check node address conflict on the Profibus network.
- Verify bus termination at the last node.
- Confirm the controller firmware supports the module revision.
6. Frequently Asked Questions (FAQ)
Q1: Can the ABB DP640 be hot-swapped while the controller is powered?
No. The Advant Controller rack does not support hot-swapping for this module. Pulling it live can corrupt the backplane bus or damage the controller interface. Shut down rack power before removal.
Q2: Is the DP640 an obsolete model?
Yes. The Advant Controller 400 platform is considered legacy hardware. ABB has shifted focus toward AC800M and System 800xA platforms. New Original surplus modules still circulate through industrial surplus supply channels, but inventory is limited.
Q3: Is this unit genuinely new or refurbished?
This listing refers to New Original (New Surplus) stock. That typically means:
- Manufactured by ABB years ago
- Never installed in a running system
- Stored in warehouse inventory
Each unit should still undergo functional testing before shipment.
Q4: Will I lose controller configuration when replacing this module?
No. The DP640 does not store the primary controller program. The logic resides in the Advant controller CPU. Replacing the communication module does not erase program logic.
However, verify network configuration parameters after replacement.
Q5: What causes most communication failures after replacing a Profibus module?
Three common issues:
- Node address mismatch between the new module and network configuration.
- Missing bus termination at the last device.
- Shield grounding errors on the Profibus cable.
I’ve seen plants lose half a day chasing a fault that turned out to be a loose Profibus connector shield.
Q6: Why is surplus hardware often cheaper than OEM factory pricing?
Because OEM list prices include long-term support overhead, inventory risk, and service agreements. Surplus vendors are typically selling warehouse stock without manufacturer support contracts.


