

 WhatsApp: +86 16626708626
 Email:
  Phone: +86 16626708626
Description
2. Product Core Brief
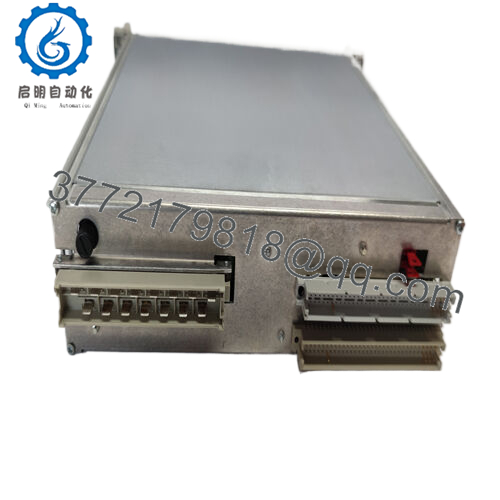
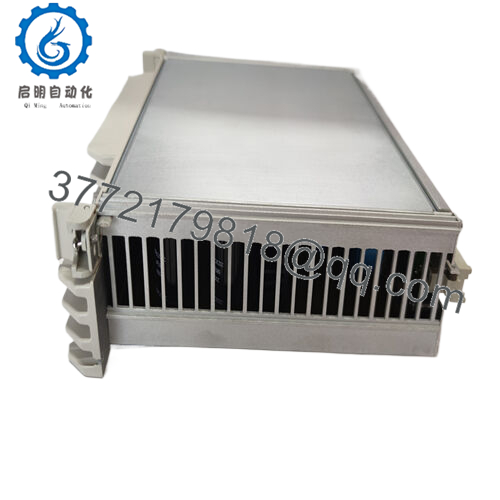
- Model: NWX511a-2/R (HESG112548R12)
- Brand: ABB
- Series: ABB Industrial Control / DCS Module Family
- Core Function: Distributed control system processing node
- Product Type: Control Module / Control Station
- Key Specs: 24 V DC supply, DCS network node, industrial temperature rating
- Condition: New Original (New Surplus)
3. Key Technical Specifications
| Parameter | Value |
|---|---|
| Model Number | NWX511a-2/R |
| Order Code | HESG112548R12 |
| Manufacturer | ABB |
| Product Type | Industrial Control Module / DCS Node |
| Supply Voltage | 24 V DC |
| Installation | Control cabinet / rack or DIN installation |
| Operating Temperature | −25 to +70 °C typical industrial rating |
| Dimensions | Approx. 25 × 15 × 10 cm |
| Weight | Approx. 2.5 kg |
| Application | Distributed control systems, process automation |
4. Product Introduction
The ABB NWX511a-2/R (HESG112548R12) is an industrial control module used within ABB distributed control environments to handle field-level control or protection tasks. It typically functions as a local control node responsible for processing I/O signals and executing control logic within a DCS architecture.
In practical plant deployments, modules of this class are installed inside control cabinets where they coordinate field device data, monitor electrical parameters, or supervise equipment such as motors or process equipment. Engineers usually deploy them where localized control improves system fault tolerance, preventing a single controller failure from affecting the entire process network.
5. Installation & Configuration Guide
Stage 1: Pre-Installation Preparation (10 minutes)
⚠️ Safety First
- Inform the control room that the cabinet will be powered down.
- Bring the process to a safe state and isolate the equipment.
- Apply lockout/tagout (LOTO) to the cabinet power feed.
- Wait 5 minutes to allow DC bus capacitors to discharge.
Tools Required
- ESD wrist strap and mat
- PH1 screwdriver
- Multimeter (Fluke 115 recommended)
- Wire labels or marking tape
- Smartphone for configuration photos
Data Backup
- Export system configuration from the engineering workstation.
- Record network parameters and node addresses.
- Photograph terminal wiring and switch settings.
Stage 2: Removing the Old Module (5–10 minutes)
- Open the control cabinet door and remove the protective cover if present.
- Label all field wiring before disconnecting anything.
- Disconnect communication cables and I/O wiring.
- Release the locking clip or rack retaining screws.
- Pull the module straight out to protect the backplane connector.
- Inspect the rack connector for dust or bent pins.
⚠️ Tip: Do not discard the old module until the replacement has passed operational testing.
Stage 3: Installing the New Module (10 minutes)
- Wear the ESD strap before handling the board.
- Verify the replacement part number HESG112548R12 matches the original.
Configuration Clone (Critical)
- Copy any DIP switch or jumper settings from the old module.
- Confirm the correct node address or network configuration.
- Insert the module firmly into the rack until it seats fully.
- Secure the retaining latch or screws.
- Reconnect all wiring according to labels.
Self-Checklist
- Correct model installed
- DIP switches match original
- Wiring secured
- Module fully seated
Stage 4: Power-On & Testing (10–15 minutes)
Pre-Power Check
- Measure the cabinet 24 V DC rail for shorts.
Startup Procedure
- Restore power to the control rack.
- Observe the module status LEDs.
Typical indications:
- RUN / OK LED: Normal operation
- ERR / FAULT LED: Configuration or communication issue
- Connect the engineering workstation.
- Confirm the module appears on the system network.
- Verify field signals are updating correctly.
- Perform a controlled functional test of connected equipment.
⚠️ Troubleshooting
If the module fails to communicate:
- Verify node address configuration.
- Check fieldbus termination.
- Confirm firmware compatibility with the host controller.

- HESG112548R12
6. Frequently Asked Questions (FAQ)
Q1: Can the HESG112548R12 module be replaced while the system is energized?
No. This class of control module should not be hot-swapped unless the specific rack design supports it. Most legacy ABB control systems require a full power shutdown before removal.
Q2: Is the ABB HESG112548R12 still manufactured?
Generally no. Modules with the HESG prefix typically belong to older ABB control platforms, and production has largely stopped. Most units available today are surplus inventory or refurbished stock.
Q3: Is this module actually new?
“New Original” usually means new surplus — genuine ABB hardware that remained unused in warehouse inventory. It was manufactured years ago but never installed in a running system.
Q4: Will replacing this module erase my control logic?
No. Control logic normally resides in the primary CPU or engineering workstation database, not in auxiliary modules like this one. However, network parameters or device addressing may need verification.
Q5: Why do failures often occur after replacing a DCS module?
From field experience, three causes show up repeatedly:
- Address conflicts on the control network.
- Improper DIP switch settings copied incorrectly.
- Loose shield grounding on communication cables.
I’ve watched engineers spend hours chasing a “hardware failure” that turned out to be a mismatched node address.
Q6: Why are surplus modules cheaper than buying from ABB directly?
OEM pricing includes long-term support, engineering assistance, and lifecycle management. Surplus vendors only supply the hardware itself. That difference in service scope is why pricing can vary significantly.


