
 WhatsApp: +86 16626708626
 Email:
  Phone: +86 16626708626
Description
3. Key Technical Specifications
| Parameter | Value |
|---|---|
| Supply Voltage | 24 V DC |
| Power Consumption | ≤ 6 W |
| Form Factor | Plug-in PCB module |
| Mounting | Rack / backplane slot |
| Communication Interface | Proprietary control bus |
| Signal Type | Mixed I/O (application dependent) |
| Operating Temperature | 0 to +60°C |
| Storage Temperature | −20 to +70°C |
| Isolation Rating | 500 V |
| Connector Type | Edge connector |
| Processing Role | Signal interface / logic handling |
| Lifecycle Status | Discontinued (EOL) |
4. Product Introduction & Supply Chain Strategy
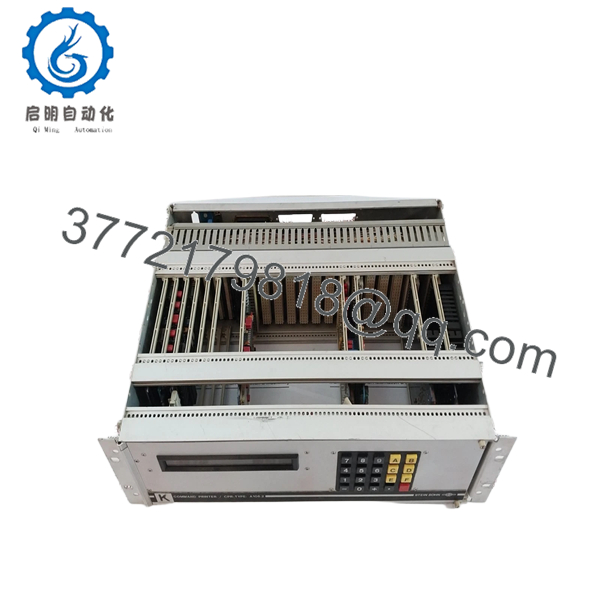
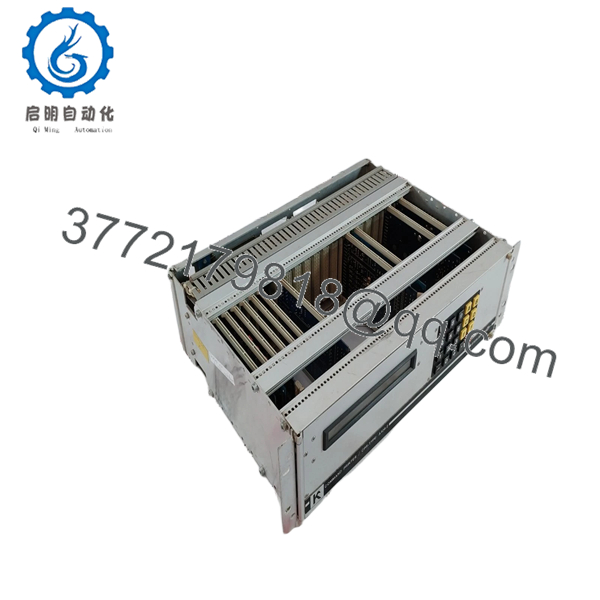
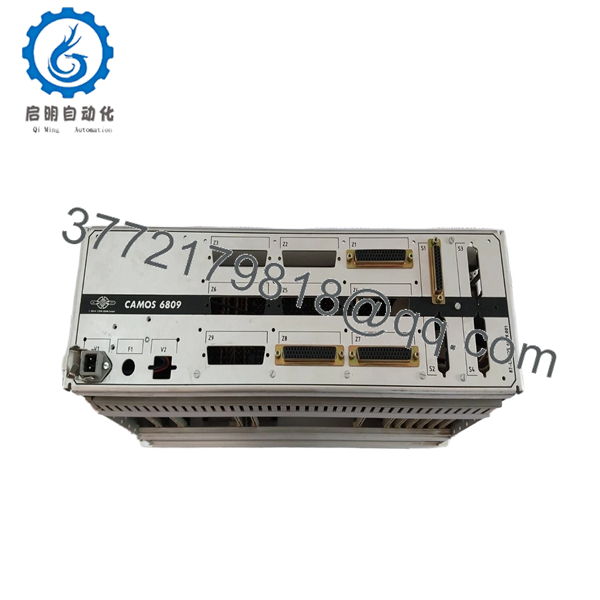
The H.M. STEIN SOHN A106.2 is an industrial control module used in legacy automation systems for signal interfacing and control logic integration within rack-mounted architectures.
This product is a Brand New Surplus unit. It is not used, not pulled from a decommissioned plant, and not refurbished. For EOL modules like A106.2, securing buffer stock is a risk mitigation strategy against lead time variability and unexpected failures. From a Total Cost of Ownership (TCO) standpoint, New Surplus inventory eliminates the failure risks associated with refurbished electronics and prevents costly downtime events.
5. Installation & Configuration Guide
Stage 1: Pre-Installation (Prep & Safety)
- Apply lock-out/tag-out (LOTO) procedures.
- Use an ESD wrist strap and grounded workspace.
- Photograph wiring connections and DIP/jumper settings.
- Verify model number and hardware compatibility.
Stage 2: Removal
- Release retaining clips or screws.
- Pull the module straight out to avoid bending pins.
- Inspect backplane connectors for damage or contamination.
Stage 3: Installation (Clone & Seat)
- Replicate all DIP switch and jumper settings exactly.
- Align module with guide rails and insert evenly.
- Ensure full seating to prevent intermittent faults.
Stage 4: Power-On & Testing
- Restore power and confirm stable 24 V DC supply.
- Check LED indicators (RUN vs ERR status).
- Verify communication with the control system.
- Perform functional validation or I/O checks before full operation.

- A106.2
- A106.2
- A106.2
6. Firmware/Software Versions & Upgrade Notes
- Recommended Firmware: Match the firmware version of the existing installed module.
- Compatibility Risk: Firmware mismatches can cause communication errors in legacy systems.
- Upgrade Advisory:
- Upgrading firmware may break compatibility with older PLC/DCS drivers.
- Downgrading may remove required functionality.
- Best Practice: Document firmware version and configuration before removal; maintain version parity during replacement.
7. Frequently Asked Questions (FAQ)
Q1: Is this module new or surplus?
This is a New Surplus unit from OEM-authorized supply channels. It has no prior use, no repairs, and no wear on connectors.
Q2: Why is New Surplus better than refurbished?
Refurbished modules often contain aged internal components that can fail unpredictably. The cost of downtime far exceeds any initial savings.
Q3: Is the A106.2 still manufactured?
No. This is a discontinued (EOL) product. A last-time-buy strategy is recommended to secure future availability.
Q4: How many units should we keep in stock?
Maintain 1–2 units as buffer stock per critical system. For multi-site operations, use cross-site sharing to improve inventory turnover and reduce carrying cost.
Q5: Can this module be hot-swapped?
No. Always power down the system before replacement to prevent hardware damage or system faults.
Q6: Will system configuration be affected during replacement?
Configuration depends on system settings and DIP switches. Ensure all settings are replicated exactly from the original module.
Q7: What warranty and QC verification are included?
Each unit includes a 12 month warranty, full functional and electrical testing, firmware verification, and traceable serial documentation to ensure OEM-level reliability.


