
 WhatsApp: +86 16626708626
 Email:
  Phone: +86 16626708626
Description
Key Technical Specifications
| Parameter | Value |
| Manufacturer | H.M. Stein Sohn (Germany) |
| Part Number | A206.3 |
| Circuit Design | Analog Logic / Comparator |
| Input Type | 4-20mA / 0-10V DC (Application Dependent) |
| Supply Voltage | 24 V DC (System Backplane) |
| Form Factor | Standard Eurocard (100mm x 160mm) |
| Connector | DIN 41612 / Type F or H (Verify Pinout) |
| Adjustment | On-board Multi-turn Trimmer Potentiometers |
| Application | Engine Temperature/Pressure Monitoring, Tank Level Gauging |
Product Introduction
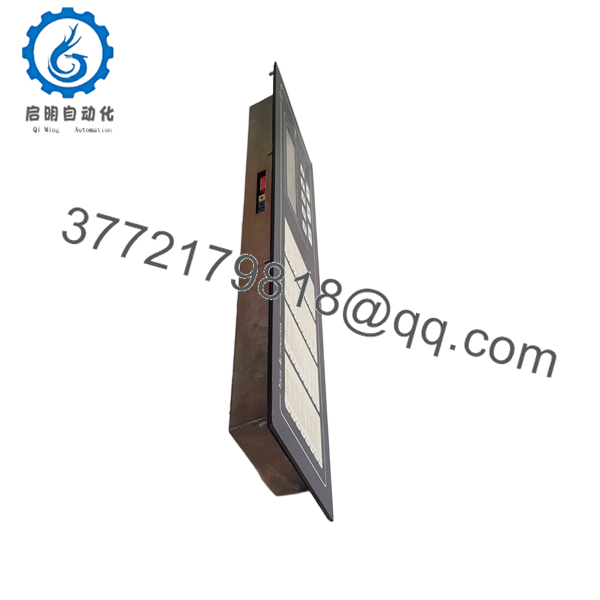
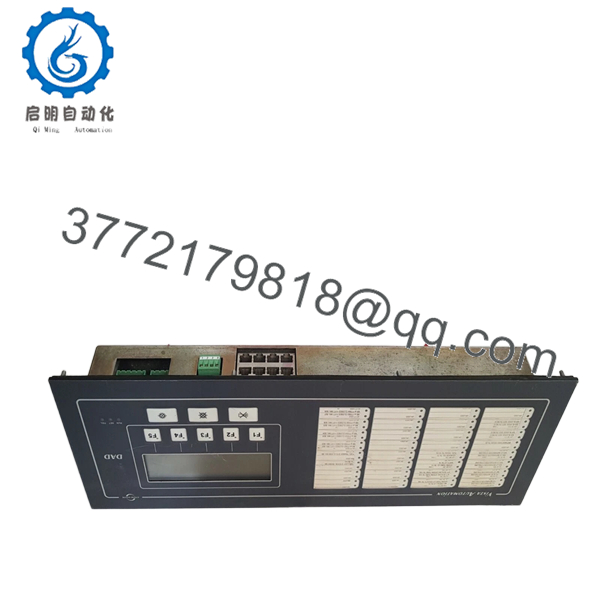
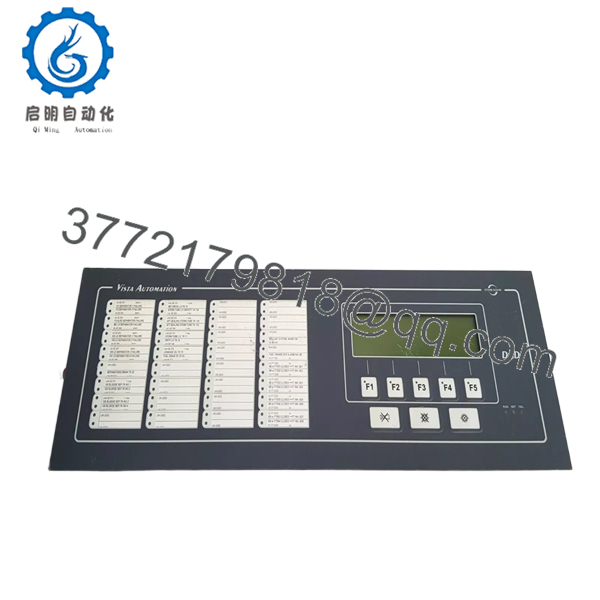
The H.M. Stein Sohn A206.3 is a high-precision analog interface module designed for legacy marine automation and industrial control systems. It serves as a critical link in signal conditioning, translating raw sensor data from engine or boiler rooms into actionable logic for alarm systems and monitoring consoles.
Engineers choose the A206.3 for its proven reliability in high-vibration maritime environments. Unlike modern digital-only modules, the A206.3 utilizes robust analog circuitry that offers excellent electromagnetic interference (EMI) resistance. As an obsolete component, securing a factory-sealed unit is essential for maintaining system integrity without the massive capital expenditure of a full console digital migration.

- A206.3
- A206.3
- A206.3
Installation & Configuration Guide
Stage 1: Pre-Installation Preparation (Estimated Time: 15 mins)
- ⚠️ Safety First: Ensure the monitoring system is inhibited. Power down the rack to prevent “hot-plug” arcing. Notify the bridge or control room that sensor loops will be offline.
- Tools Required: ESD wrist strap, small flat-head (jeweler’s) screwdriver, and a calibrated multimeter.
- Data Backup: This is an analog board. Crucial: Measure and record the resistance or voltage settings of all on-board potentiometers (trimmers) on the old board before removal. This ensures your trip points and scaling remain consistent.
Stage 2: Removing the Old Module
- Secure your ESD strap to a grounded chassis point.
- If the board has a faceplate, unscrew the retaining bolts.
- Use the card pullers to extract the A206.3 straight out. Inspect the gold-plated edge connectors on the old board; if they show green corrosion, the backplane may also need cleaning.
- Place the old board in an anti-static bag immediately.
Stage 3: Installing the New A206.3
- Calibration Pre-Check: Compare the potentiometer positions. If the new board is factory-set to defaults, you may need to adjust the trimmers to match the “as-found” values from Stage 1.
- Align the board with the rack plastic guides.
- Push firmly until the board clicks into the backplane connector. Do not force it; if you feel resistance, check for bent pins in the rack.
- Tighten faceplate screws to prevent vibration-induced “fretting” corrosion on the contacts.
- Self-Checklist: [ ] Trimmers matched/checked, [ ] Fully seated, [ ] Screws tight.
Stage 4: Power-On & Testing (Estimated Time: 20 mins)
- Apply 24V DC power to the rack.
- Use a signal generator or a known sensor input to verify the board scales correctly.
- Check for the “OK” status LED on the rack’s master module.
- ⚠️ Troubleshooting Note: If the signal is “drifting,” check the ambient temperature in the cabinet. These analog boards require stable thermal conditions. If the signal is pegged at maximum, suspect a wiring short in the 4-20mA loop.
Frequently Asked Questions (FAQ)
Can I swap an A206.3 with an A206.1 or A206.2?
Generally, no. The decimal suffix (.3) usually denotes a specific hardware revision or a change in the input/output scaling logic. While they look identical, the pinouts or the voltage thresholds often differ, which could lead to false alarms or sensor failure.
Does the board come pre-calibrated?
New Original boards are typically factory-calibrated to a standard range (e.g., 0-100%). However, because every ship and sensor loop has different line resistance, you should always perform a “fine-tune” calibration using the on-board potentiometers once the board is installed in your specific rack.
What is the most common failure mode for the A206.3?
Over decades of service, the electrolytic capacitors and the multi-turn trimmers are the first to go. If your readings are “jumping” or inconsistent, the trimmer carbon track has likely worn out or oxidized. Replacing the whole board with a New Surplus unit is the most reliable fix.
Why is my board showing a fault even though it’s brand new?
Check the backplane connector. Marine environments lead to salt-air oxidation on the rack pins. A “New” board cannot overcome a poor physical connection. Clean the rack-side pins with an approved electronic contact cleaner and re-seat the board.
Is this part genuinely “New”?
Yes. While Stein Sohn has moved on to newer generations, we maintain “New Surplus” stock. This means the boards have never been commissioned and have been stored in climate-controlled, ESD-safe environments to preserve the component life.


