
 WhatsApp: +86 16626708626
 Email:
  Phone: +86 16626708626
Description
Key Technical Specifications
- Platform Compatibility: Alcatel-Lucent 1830 PSS (PSS-8 / PSS-16 / PSS-32)
- Function Type: Optical transponder / add-drop (A/D OT card)
- Line Rate: 100 Gbps (coherent DWDM typical)
- Optical Technology: DWDM (C-band / extended band variants possible)
- Modulation: Coherent (e.g., QPSK / advanced modulation depending on revision)
- Client Interfaces: Depends on card type (10GE / OTU2 / aggregated services)
- Backplane Interface: High-speed OTN switching fabric
- Protocols Supported: OTN (ODU/OTU), Ethernet, SDH/SONET transport
- Power Consumption: Slot-dependent (~200–240 W typical per card class)
- Operating Temperature: −5 to +55 °C (standard indoor deployment)
- Management: SNMP, TL1, CLI via 5620 SAM
4. Product Introduction
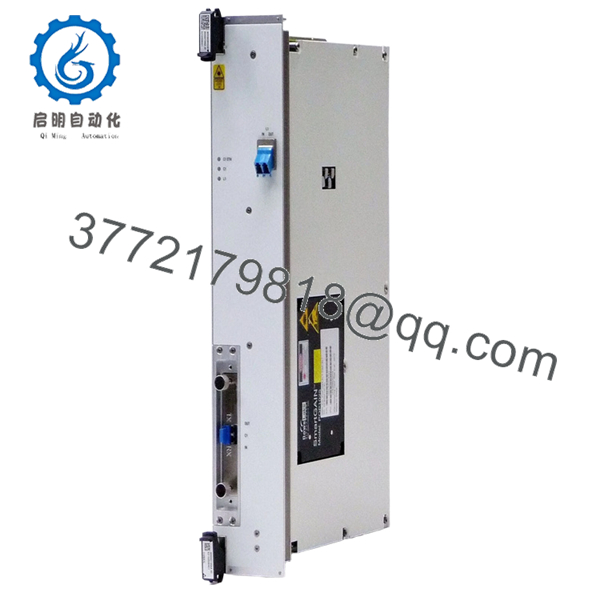
Alcatel-Lucent 8DG60739AA is a 100G optical line card used within the 1830 PSS DWDM transport platform. It provides wavelength-level transport, add/drop functionality, or transponder capability for metro and long-haul optical networks.
In deployed networks, these cards sit in PSS-8/16/32 shelves and handle OTN-based transport over DWDM wavelengths. Engineers keep them in service because they integrate directly with existing photonic layers and ROADMs, avoiding major fiber re-engineering. Hardware variants (A/D OT vs muxponder) must match the network design.
5. Installation & Configuration Guide
Stage 1: Pre-Installation Preparation (Estimated: 15 minutes)
- ⚠️ Safety First: Notify NOC, reroute traffic if possible, disable affected wavelengths. Optical systems carry live traffic—plan carefully.
- Tools Required: ESD strap, optical power meter, fiber cleaning kit, inspection scope, multimeter, smartphone.
- Data Backup: Export node config from 5620 SAM, record wavelength plan, capture optical power levels (Tx/Rx).
Stage 2: Removing the Old Module (Estimated: 10 minutes)
- Disable associated ports via NMS.
- Disconnect fiber (label direction and wavelength).
- Release ejector levers evenly.
- Pull module straight out — avoid stressing the backplane.
- Inspect slot and airflow path.
- ⚠️ Note: Keep the original card for optical baseline comparison.
Stage 3: Installing the New Module (Estimated: 10–15 minutes)
- Apply ESD protection. Verify exact model (8DG60739AA).
- Insert along guide rails until fully seated.
- Lock ejector levers firmly.
- Clean and reconnect fiber connections.
- Self-Checklist:
- Correct slot type
- Fiber polarity verified
- Module fully seated
- Cooling airflow unobstructed
Stage 4: Power-On & Testing (Estimated: 15–30 minutes)
- Pre-Power Check: Verify no fiber bends or connector contamination.
- Power-On Steps:
- Enable slot from NMS/CLI.
- Confirm card recognition in system inventory.
- Check optical parameters (Tx/Rx power, OSNR).
- Verify wavelength lock and channel alignment.
- Run traffic or BER test.
- ⚠️ Troubleshooting Note:
- No optical lock → wavelength mismatch or ROADM config issue
- High BER → OSNR degradation or dirty fiber
- Card not detected → firmware or shelf compatibility mismatch

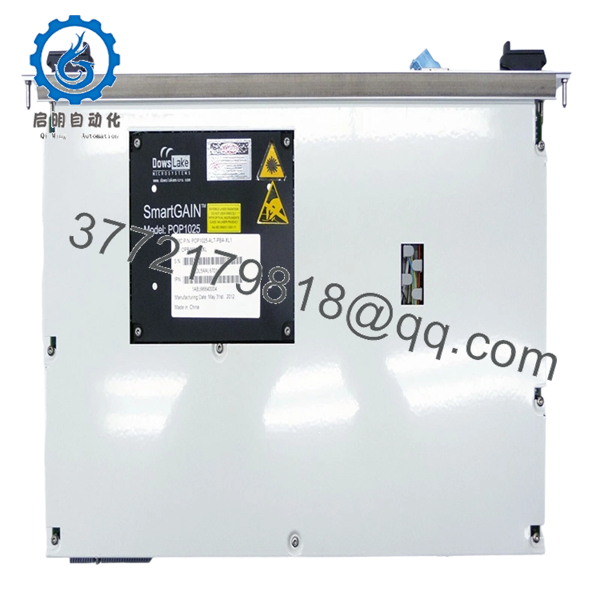
- 8DG60739AA
- 8DG60739AA
6. Frequently Asked Questions (FAQ)
Q1: Can this card be hot-swapped?
Yes, most 1830 PSS systems support hot-swapping. That said, I’ve seen transient traffic hits during insertion. For critical links, drain traffic first.
Q2: Is this module obsolete?
Yes. The 1830 PSS platform is still widely deployed, but newer builds use higher-density coherent optics (200G/400G). Availability is mainly surplus stock.
Q3: What happens if I install the wrong card variant?
❗ It won’t just “kind of work.”
You can get:
- No wavelength lock
- ROADM incompatibility
- Unsupported service mapping
Always match card type (transponder vs muxponder vs amplifier).
Q4: Why is my optical link unstable after replacement?
Typical causes:
- Incorrect wavelength provisioning
- Dirty connectors
- Mismatch with ROADM configuration
I’ve seen engineers replace a card when the real issue was a misaligned wavelength plan.
Q5: Will replacing this card affect network configuration?
No, configuration is stored at node level. However, the card must match the provisioned service profile, or it won’t come online correctly.
Q6: Why is pricing inconsistent?
These cards come from:
- Carrier decommissioning
- Network upgrades (100G → 200G/400G)
Condition varies. Always request test reports and optical performance data.
Q7: What’s the most common installation mistake?
❗ Not verifying wavelength assignment.
I’ve seen teams install perfectly good hardware and spend hours troubleshooting, only to realize the channel plan didn’t match the ROADM configuration.
SOP Quality Transparency (Inspection & Testing Process)
1. Inbound Inspection & Traceability
- Verified against carrier decommission records
- Serial number validation and label integrity check
- Microscopic inspection of optical ports (no scratches or contamination)
- PCB inspection for rework or oxidation
2. Live Functional Testing
- Installed in a real 1830 PSS test shelf
- Power-on diagnostics and LED sequence verified
- Optical loopback test performed
- Wavelength lock and OTN traffic verified
- 24-hour continuous load test with BER monitoring
- Test report generated (available upon request)
3. Electrical Parameter Testing
- Insulation resistance >10 MΩ @ 500 V
- Ground continuity verified
- Power draw measured using Fluke 115
4. Firmware & Configuration Verification
- Firmware compatibility checked with 5620 SAM
- Hardware revision logged
- Slot and card type documented
5. Final QC & Packaging
- QC sign-off with traceable record
- ESD-safe packaging
- Shock-protected export carton
- QC Passed label with inspection date
Test photos and videos available upon request.
Technical Pitfall & Survival Guide
1. Firmware Revision Mismatch
❗ I’ve seen nodes reject perfectly good cards.
A swap introduced a newer firmware revision — system flagged incompatibility.
Avoidance: Check node software release before ordering.
2. Wavelength Plan Errors
❗ This one wastes hours.
Installed correctly, but no signal — wrong DWDM channel.
Avoidance: Document channel plan before removal.
3. Fiber Handling Issues
❗ Dirty connectors = high BER.
I’ve watched teams chase phantom faults that were just contamination.
Avoidance: Always clean and inspect fiber.
4. Power Budget Miscalculation
100G coherent optics are sensitive to OSNR.
Avoidance: Validate link budget before swap.
5. ESD Damage
❗ These boards are expensive.
Static discharge can silently damage optics.
Avoidance: Use grounded wrist strap and ESD mat.


