

 WhatsApp: +86 16626708626
 Email:
  Phone: +86 16626708626
Description
Key Technical Specifications
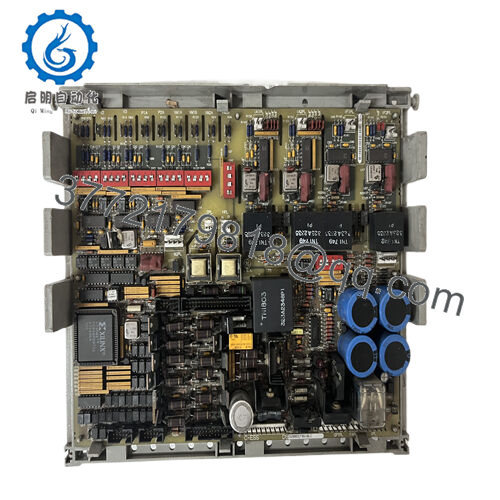
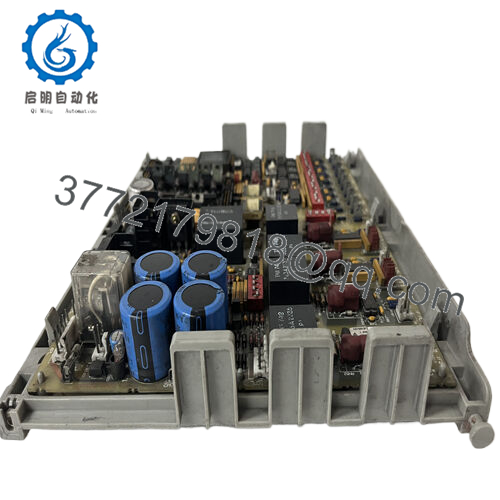
- Model: DS3820PSCC1D1B
- Manufacturer: GE
- Product Type: Power Supply Module
- System Family: Mark IV / DS3800
- Application: Turbine control power supply
- Weight: 13.00 lb
- Temperature: -30 to 65 C
- Input Voltage Range: 60 V AC to 277 V AC
- Output Current Capacity: 30 A
- Power Factor Correction: Greater than 0.95
Product Introduction
GE DS3820PSCC1D1B is a Mark IV power supply module used in GE turbine control systems. It provides regulated control power for legacy industrial racks, especially where DS3800/Mark IV architecture is still in service.
This part is typically ordered as a direct replacement for obsolete installed hardware. The main checks are exact suffix matching, rack compatibility, and cabinet power requirements. In the field, these legacy supplies are often swapped to avoid broader controller changes that would extend downtime.
Installation & Configuration Guide
Stage 1: Pre-Installation Preparation
- Notify operations and isolate the equipment. Confirm the process is safe, apply lockout/tagout, and wait at least 5 minutes for capacitor discharge.
- Gather tools: ESD strap, PH1 screwdriver, multimeter, wire labels, and a smartphone for photos.
- Back up the running logic if applicable, record cabinet labels, and photograph all wiring, jumper positions, and any selector settings.
Stage 2: Removing the Old Module
- Remove the front cover or bezel.
- Label and disconnect wiring carefully. Do not force terminals.
- Release the rack or mounting latch and pull the board straight out to protect the pins.
- Inspect the backplane, connector fingers, and cabinet for bent pins, dust, or heat damage.
- Keep the old module until the new one is fully running.

- DS3820PSCC1D1B
Stage 3: Installing the New Module
- Put on the ESD strap and verify the exact model number matches before insertion.
- Clone the configuration exactly. Copy every jumper and switch position from your photo.
- Insert the board evenly until it seats fully.
- Reconnect wiring using the original labels and the correct torque for the terminal hardware.
- Check that all tabs are locked and the module sits flat.
- Self-check: [] settings match, [] wiring secured, [] connectors seated, [] tabs locked.
Stage 4: Power-On & Testing
- Measure the 24 V rail with a multimeter before energizing.
- Power up the rack first, not the field devices.
- Watch the LEDs. Green RUN is generally good; red ERR means stop and verify.
- Connect the engineering software, confirm the hardware is seen correctly, and verify the firmware version.
- Reload the backup logic if required.
- Run a dry test of the I/O and confirm no alarms, comms loss, or unexpected trips.
- If the ERR LED stays solid red, suspect a firmware mismatch first.
Frequently Asked Questions
Q: Can I hot-swap the DS3820PSCC1D1B?
No, I would not treat this as a hot-swap part. Kill power first and let the cabinet discharge. Pulling a live power module can damage the rack or the module.
Q: Is this model obsolete?
Yes, it is a legacy Mark IV part. Stock is usually limited, so buyers should confirm the exact suffix and condition before placing an order.
Q: Is this a direct replacement for every DS3820PSCC1D variant?
No. The family is close, but suffix differences matter. Verify the installed part number, rack type, and cabinet wiring before swapping it in.
Q: Will I lose my programming when I replace this power supply?
Usually no, because this is a power module, not the controller CPU. Still, backup the system configuration before the swap. That is cheap insurance if the original unit has been running for years.
Q: Why is the price lower than OEM list price?
Because this is normally legacy surplus or new-old-stock, not current factory production. Lower price should come with clear condition reporting, test status, and return terms.
Q: What condition should I expect?
For this part, the usual offering is New Original / New Surplus. If it is refurbished, that should be stated plainly along with test results.
Q: What should I verify before installation?
Check the exact model suffix, rack compatibility, input supply range, and cabinet cooling. I have seen plenty of failures come from “close enough” replacements that were not actually equivalent.


