
 WhatsApp: +86 16626708626
 Email:
  Phone: +86 16626708626
Description
Key Technical Specifications
| Parameter | Value |
|---|---|
| Model | cPCI-8211 |
| Manufacturer | ADLINK Technology |
| Product Type | 3U CompactPCI Fast Ethernet interface card |
| Form Factor | 3U CompactPCI, 100 × 160 mm, 1 slot wide |
| CompactPCI Standard | PICMG 2.0 R3.0 |
| CompactPCI Bus | 32-bit / 33 MHz |
| I/O Voltage | 5 V |
| Ethernet Controller | Intel 82559 |
| Ethernet Standard | 10BASE-T / 100BASE-TX |
| Ethernet Mode | Auto-negotiation; full-duplex support |
| Front Connector | RJ-45 |
| PXI Compatibility | Yes |
| Rear I/O | No on standard cPCI-8211; rear I/O is provided by cPCI-8211R |
| PXE | Supported |
| Maximum Power | 5 V, 100 mA maximum |
| Supported Legacy OS | DOS, Windows 95/98/ME/NT/2000/XP, Linux kernel 2.4, Solaris, QNX |
| Lifecycle | End of Life |
| Recommended Replacement | ADLINK cPCI-3E10/3E12 |
The published ADLINK specifications identify the cPCI-8211 as a 3U, 1-slot CompactPCI card using the Intel 82559 Ethernet controller, with 10/100 Mbps Ethernet and a front RJ-45 interface. The cPCI-8211R is the related rear-I/O version and should not be treated as mechanically or functionally identical to the standard cPCI-8211.
The original manual specifies approximately 5 V at 100 mA maximum for the cPCI-8211/cPCI-8211R.
Product Introduction
The ADLINK cPCI-8211 is a 3U CompactPCI Fast Ethernet interface card designed for embedded industrial computers and CompactPCI systems. It uses the Intel 82559 controller and provides 10BASE-T/100BASE-TX Ethernet through a front-panel RJ-45 connector. The card uses a 32-bit/33 MHz CompactPCI interface and supports PXI-compatible applications.
This is an important legacy-maintenance part rather than a current-generation Ethernet adapter. ADLINK has marked the cPCI-8211 as End of Life, so replacement work should verify the existing chassis, slot architecture, driver environment, connector arrangement, and required Ethernet speed before substituting another card.
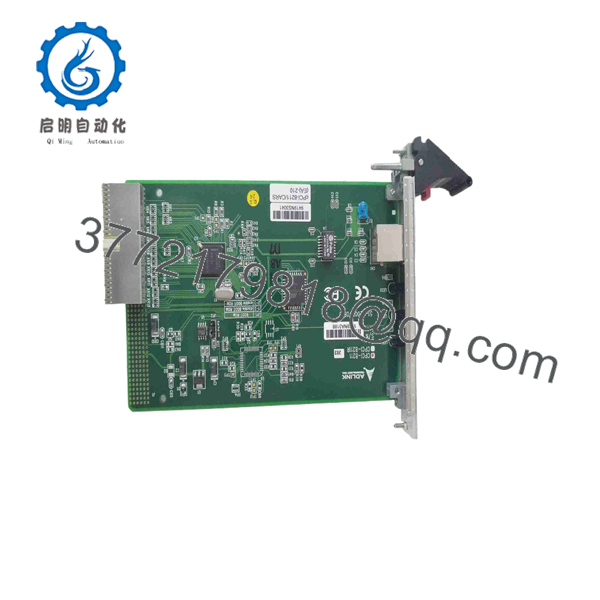
cPCI-8211
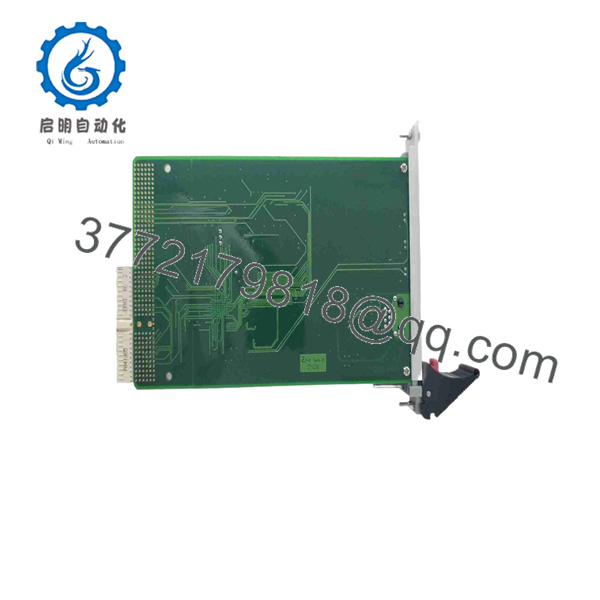
cPCI-8211
Installation & Configuration Guide
Stage 1: Pre-Installation Preparation — Approximately 5 Minutes
⚠️ Safety First: Notify operations before removing the card. Place the controlled equipment in its approved safe state, follow site LOTO procedures, remove rack power where required, and allow the system to discharge before handling the CompactPCI board.
Tools Required
- ESD wrist strap
- PH1 screwdriver where applicable
- Digital multimeter
- Wire/port identification labels
- Smartphone or camera for configuration records
Data Backup
- Record the existing Ethernet card model and revision.
- Photograph the complete front-panel arrangement.
- Record the Ethernet cable connection and switch-port number.
- Record the host computer’s IP configuration.
- Save operating-system and network configuration where applicable.
- Photograph any board-specific jumpers or configuration components before removal.
⚠️ Important: The standard cPCI-8211 has a front RJ-45 Ethernet connection. Do not substitute the cPCI-8211R merely because the model numbers look similar; the R version adds rear I/O through J2 and an RTM arrangement.
Stage 2: Removing the Old Module — Approximately 5 Minutes
- Shut down the host system according to the CompactPCI chassis manufacturer’s procedure.
- Remove the Ethernet cable from the RJ-45 connector.
- Release the CompactPCI ejector handles or retaining mechanism.
- Pull the board straight out along the card guides.
- Do not twist the PCB while removing it.
- Inspect the backplane connector and card-edge contacts for contamination, bent contacts, or mechanical damage.
- Place the removed board in an ESD-safe bag.
⚠️ Keep the original cPCI-8211 available for comparison until the replacement has completed POST, driver initialization, and network testing.
Stage 3: Installing the New Module — Approximately 5 Minutes
- Put on the grounded ESD wrist strap.
- Verify that the replacement label reads ADLINK cPCI-8211.
- Check the board revision and physical connector arrangement against the removed unit.
- Align the card with the CompactPCI slot guides.
- Insert the card straight into the backplane connector.
- Close the ejector handles and secure the retaining hardware.
- Reconnect the Ethernet cable.
- Confirm that the cable is connected to the same network port or VLAN as the original installation.
Self-Checklist
- Exact cPCI-8211 model verified
- Standard version confirmed rather than cPCI-8211R
- Backplane connector inspected
- Card fully seated
- Retaining mechanism secured
- Ethernet cable reconnected
- Original configuration documented
Stage 4: Power-On & Testing — Approximately 10–15 Minutes
- Restore chassis power.
- Allow the CompactPCI host to complete its normal boot sequence.
- Check the Ethernet interface status from the host operating system.
- Confirm that the expected Ethernet adapter is detected.
- Install or restore the appropriate legacy driver if the operating system does not recognize the controller.
- Verify the assigned IP address, subnet mask, gateway, and other network parameters.
- Check Ethernet link status.
- Perform a controlled ping test to the approved network endpoint.
- Test communication with the actual application host or industrial network service.
- Monitor the system for communication errors before returning it to normal operation.
The cPCI-8211 uses the Intel 82559 Ethernet controller and supports 10/100 Mbps Ethernet with auto-negotiation. The original documentation also lists legacy operating-system support, so driver availability can become a practical replacement constraint on old systems.
⚠️ Troubleshooting Note: If the card is not detected, first check CompactPCI seating, slot power, BIOS/device enumeration, and driver support. If the card is detected but Ethernet communication fails, verify the cable, switch port, IP configuration, duplex/speed negotiation, and host application settings before assuming the replacement board is defective.
Technical Pitfalls to Check Before Commissioning
1. Firmware/Driver Mismatch
The cPCI-8211 is an older Ethernet interface based on the Intel 82559. Its documented operating-system support is centered on legacy environments. Do not assume that a modern operating system will automatically provide the required driver.
2. Wrong Variant
❗ cPCI-8211 and cPCI-8211R are not interchangeable by model number alone. The R variant provides rear I/O through J2 and a 50 mm RTM arrangement. Confirm the chassis backplane and I/O architecture before ordering.
3. Network Configuration
A replacement Ethernet card may work electrically while the application still cannot communicate. Record the original IP configuration and switch connection before removal.
4. CompactPCI Slot Compatibility
The card is specified for a 32-bit/33 MHz CompactPCI bus and a 5 V I/O environment. Verify the host chassis and backplane before installation.
5. ESD
❗ Handle the board by its edges. Use a grounded ESD strap and an appropriate ESD work surface. Do not touch the connector contacts or exposed circuitry unnecessarily.
Frequently Asked Questions (FAQ)
Can the ADLINK cPCI-8211 be hot-swapped?
Do not assume hot-swap capability. The published cPCI-8211 documentation identifies it as a standard 3U CompactPCI peripheral card and does not establish hot-swap operation for this model. Follow the chassis manufacturer’s hot-swap specifications; otherwise, remove power before replacing the board.
Is the cPCI-8211 obsolete?
Yes. ADLINK lists the cPCI-8211[R] as End of Life and states that discontinuation was scheduled for March 9, 2010. ADLINK identifies the cPCI-3E10/3E12 as its recommended replacement family.
Is the cPCI-8211 the same as the cPCI-8211R?
No. The standard cPCI-8211 uses the front-panel RJ-45 connection. The cPCI-8211R adds rear I/O through J2 and works with a rear-transition arrangement. If your existing system uses rear I/O, verify the exact variant before purchasing.
What Ethernet speed does the cPCI-8211 support?
It supports 10BASE-T and 100BASE-TX Fast Ethernet through the Intel 82559 controller. The controller supports automatic speed detection and duplex operation.
Will replacing the card erase my application programming?
The cPCI-8211 is an Ethernet interface card rather than the host system’s primary CPU or application storage. Replacing the Ethernet card therefore does not normally erase host application files. However, network configuration and operating-system driver settings may need to be restored or verified.
Can I replace it with a modern Ethernet card?
Potentially, but this requires an engineering compatibility check. Confirm the CompactPCI mechanical format, bus architecture, I/O voltage, operating system, driver availability, application requirements, and connector arrangement. A newer Ethernet card that fits the slot mechanically is not automatically a functional replacement.
Why is an original cPCI-8211 often more expensive than a newer Ethernet adapter?
This is common with discontinued industrial computing hardware. The current requirement may be to keep an existing CompactPCI chassis and legacy software environment operating without redesigning the platform. Pricing therefore reflects availability of the discontinued part rather than simply the Ethernet bandwidth of a modern network adapter. For surplus stock, confirm whether the unit is factory sealed, new surplus, or refurbished and tested before purchase.



