
 WhatsApp: +86 16626708626
 Email:
  Phone: +86 16626708626
Description
3. Key Technical Specifications
- Part Number: LC110-M2
- Manufacturer: ALSTOM / Converteam
- Product Category: PLC Module / Machine Control Module
- Module Function: Excitation fault detector and excitation limits monitoring
- Compatible System: C10/120-M2 control platform
- Application: Industrial excitation and motor/generator control systems
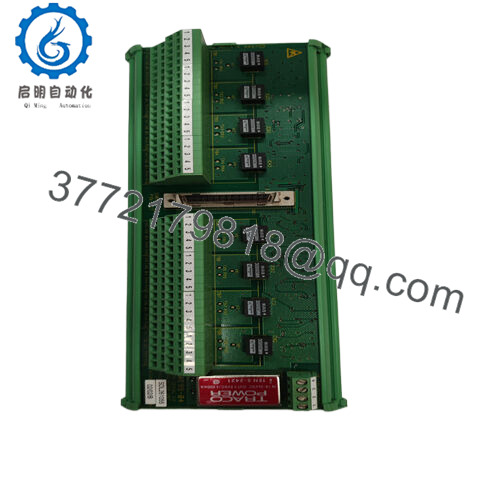
- Module Type: Control circuit board assembly
- Weight: Approx. 3.53 lb (1.6 kg)
- Installation: Industrial control cabinet / rack mounting
- Status: Discontinued by manufacturer
- Replacement Availability: Surplus and refurbished supply channels
4. Product Introduction
The ALSTOM LC110-M2 is an excitation control module used in ALSTOM/Converteam C10/120-M2 systems. It performs excitation fault detection and excitation limit monitoring functions within legacy industrial control installations.
This module is commonly maintained as a spare for existing generator, motor drive, and excitation control equipment. Before replacement, verify rack position, connector layout, firmware/configuration requirements, and the installed C10/120-M2 system documentation.

- LC110-M2
5. Installation & Configuration Guide
Stage 1: Pre-Installation Preparation (Approx. 10 minutes)
⚠️ Safety First
- Notify operations about planned shutdown time.
- Place the driven equipment into a safe state.
- Apply lockout/tagout procedures.
- Remove cabinet power.
- Wait at least 5 minutes for stored energy discharge.
- Confirm zero voltage before handling the module.
Tools Required
- ESD wrist strap
- PH1 screwdriver
- Digital multimeter
- Wire labels
- Smartphone for reference photos
Data Backup
- Record the existing LC110-M2 rack position.
- Photograph module orientation and connectors.
- Document:
- Terminal wiring
- Rack address settings
- Adjacent module positions
- Alarm configuration
Stage 2: Removing the Old Module (Approx. 10 minutes)
- Open the control cabinet.
- Identify the installed LC110-M2 module.
- Label all connectors before removal.
- Release rack locking mechanism.
- Pull the module straight out.
⚠️ Note: Keep the removed LC110-M2 available until the replacement passes functional checks.
Inspect:
- Backplane connector pins
- Rack contacts
- Dust contamination
- Heat marks
- Corrosion
Stage 3: Installing the New Module (Approx. 15 minutes)
- Wear ESD protection before touching the PCB.
- Verify the replacement marking: ALSTOM LC110-M2.
- Compare connector positions with the removed unit.
- Insert the module into the correct rack slot.
- Ensure the locking mechanism is fully engaged.
- Reconnect all wiring.
Configuration Clone (Critical)
Copy from the original:
- Module location
- Hardware jumpers (if installed)
- Address settings
- Related excitation parameters
Self-Checklist
[ ] Correct LC110-M2 installed
[ ] Rack position confirmed
[ ] Connectors fully seated
[ ] Wiring verified
Stage 4: Power-On & Testing (Approx. 20 minutes)
Pre-Power Check
- Check supply voltage.
- Verify no wiring shorts.
- Confirm rack connections.
Power-On Steps
- Energize the control rack.
- Check module status indicators.
- Verify no excitation alarms.
- Confirm communication with the main controller.
- Run excitation system diagnostics.
- Perform controlled equipment startup.
⚠️ Troubleshooting Note
- Module not detected: Check rack seating and backplane connection.
- Excitation fault alarm: Verify field wiring and parameter settings.
- Unexpected limits trip: Compare replacement module configuration with the original.
6. Frequently Asked Questions (FAQ)
Q1: Is ALSTOM LC110-M2 still manufactured?
No. The LC110-M2 is a discontinued legacy module. Available units generally come from industrial surplus, unused stock, or refurbishment suppliers.
Q2: What does the LC110-M2 actually do?
The module functions as an excitation fault detector and excitation limits module for C10/120-M2 systems. It monitors excitation-related conditions rather than acting as a general-purpose PLC CPU.
Q3: Can I hot-swap the LC110-M2?
No. Treat it as a powered control rack module unless the original system documentation specifically approves live replacement. Shut down power before removal.
Q4: Will replacing the LC110-M2 erase my control parameters?
Usually, the main control parameters are stored in the system controller rather than only in this module. However, always document the existing configuration before removal.
Q5: Why is the LC110-M2 expensive compared with newer control modules?
Legacy industrial electronics are priced based on availability, testing requirements, and remaining installed base demand. A discontinued module may cost more because replacement supply is limited.
Q6: What should I verify before ordering an LC110-M2?
Confirm:
- Exact part number: LC110-M2
- Existing system: C10/120-M2
- Rack compatibility
- Connector layout
- Module condition
- Test documentation
A matching label is required, but system compatibility should always be verified before installation.



