
 WhatsApp: +86 16626708626
 Email:
  Phone: +86 16626708626
Description
Key Technical Specifications
| Parameter | Value |
|---|---|
| Manufacturer | Applied Materials |
| AMAT Part Number | 1080-01772 |
| Associated Drive Manufacturer | Copley Controls |
| Product Family | Xenus Plus |
| Associated Copley Model | 800-2032 |
| Product Type | Dual-Axis Servo Drive |
| Number of Controlled Axes | 2 |
| Application | Semiconductor equipment motion control |
| Motor Interface | Verify against installed drive |
| Feedback Interface | Verify against installed drive |
| Communication Interface | Configuration-dependent; verify installed assembly |
| Control Interface | Configuration-dependent |
| Input Power | Verify from drive nameplate/documentation |
| Operating Temperature | Verify against applicable Copley 800-2032 documentation |
| Mounting | Equipment cabinet / semiconductor-tool assembly |
| Firmware / Configuration | Must match machine application |
| Replacement Status | Legacy equipment spare; verify current availability |
Available equipment listings specifically cross-reference AMAT 1080-01772 to the Copley Xenus Plus 800-2032 dual-axis drive. However, publicly available sources do not provide enough authoritative information to safely publish the exact input-voltage, current, feedback, connector, and environmental ratings for the AMAT-configured assembly.
Do not order this part solely from the numerical part number if the equipment is production-critical. Match the AMAT label, Copley model, revision, connector layout, motor/feedback wiring, and machine configuration.
Product Introduction
The Applied Materials 1080-01772 is identified in current secondary-market documentation as a semiconductor-equipment servo-drive assembly associated with the Copley Controls Xenus Plus 800-2032 dual-axis drive. Its function is coordinated servo control for equipment motion where two axes are controlled from one drive assembly.
For replacement work, the important issue is configuration compatibility rather than simply finding another dual-axis amplifier. Motor ratings, feedback type, control wiring, communication settings, firmware, and the Applied Materials tool configuration must all match. Visually similar Copley drives are not automatically interchangeable.
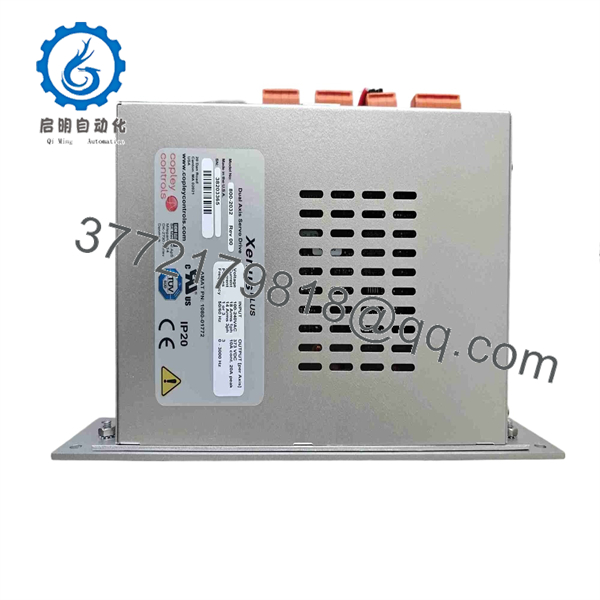
1080-01772
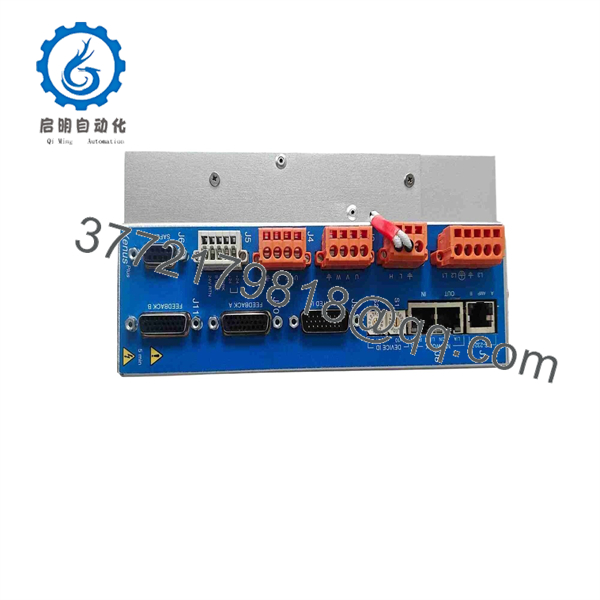
1080-01772
Installation & Configuration Guide
Stage 1: Pre-Installation Preparation — About 10–15 minutes
⚠️ Safety First: Notify operations, place the semiconductor tool in its approved maintenance state, and follow the equipment manufacturer’s LOTO procedure. Do not work on energized servo power circuits unless the OEM procedure explicitly permits it and the required electrical-safety controls are in place.
Tools Required:
- ESD wrist strap
- Insulated screwdriver set
- Digital multimeter
- Torque screwdriver appropriate to the terminal hardware
- Wire labels
- Smartphone/camera for wiring photographs
- OEM machine documentation
Data Backup:
- Record AMAT 1080-01772 exactly as shown on the installed label.
- Record the Copley model and hardware revision.
- Photograph the complete drive before disconnecting anything.
- Photograph motor, feedback, control, and communications connections.
- Record axis assignments.
- Record controller/drive communication parameters.
- Record existing servo faults and diagnostic codes.
- Back up the machine configuration before replacing the drive.
⚠️ Do not rely on memory for motor and encoder wiring. Take photographs and label every connector.
Stage 2: Removing the Old Drive — About 5–10 minutes
- Confirm the tool is in the approved maintenance state.
- Isolate the relevant electrical power according to the OEM procedure.
- Verify absence of hazardous voltage with an appropriately rated meter.
- Allow the DC bus to discharge for the period specified by the equipment manufacturer.
- Apply ESD protection.
- Photograph the complete wiring arrangement.
- Label motor and feedback connections.
- Disconnect control and communication wiring carefully.
- Disconnect motor power wiring without disturbing adjacent axes.
- Remove mounting hardware.
- Remove the drive from the equipment assembly.
⚠️ Do not assume that identical-looking connectors have identical pin assignments. Compare the replacement against the original before reconnecting anything.
Stage 3: Installing the New Drive — About 5–10 minutes
- Verify the replacement is marked 1080-01772.
- Verify the associated Copley model and revision.
- Compare connector locations with the removed drive.
- Inspect connectors for bent pins, contamination, or mechanical damage.
- Install the drive in the original mounting position.
- Secure the mounting hardware.
- Reconnect motor wiring using the documented axis assignments.
- Reconnect feedback wiring.
- Reconnect control and communications cables.
- Tighten terminals to the applicable OEM/Copley torque specification.
Configuration Clone — Critical:
- Copy the original axis assignment.
- Copy communication settings.
- Copy motor/feedback configuration.
- Copy acceleration and velocity limits.
- Copy current/torque limits.
- Copy homing parameters.
- Copy fault-handling parameters.
- Verify any stored drive configuration before enabling motion.
Self-Checklist:
- AMAT part number verified
- Copley model/revision verified
- Motor wiring matched
- Feedback wiring matched
- Control wiring matched
- Communication settings documented
- Mounting hardware secured
- ESD precautions maintained
Stage 4: Power-On & Testing — About 10–20 minutes
- Do not enable servo output immediately after power-up.
- Restore control power according to the equipment procedure.
- Check drive status indicators.
- Confirm the controller recognizes the drive.
- Verify communications.
- Confirm both axes report the expected status.
- Check for active drive faults.
- Verify feedback position with the motor stationary.
- Enable one axis at a time where the machine procedure permits.
- Perform a controlled low-speed jog.
- Verify motor direction.
- Verify encoder/feedback response.
- Execute the machine’s homing procedure.
- Run a controlled production-equivalent motion sequence.
- Monitor current, position error, and fault status.
⚠️ If an axis moves in the wrong direction, stop immediately. Do not attempt to correct the problem by changing parameters at random. Check motor phase wiring, axis assignment, feedback polarity, and the machine’s established configuration.
Technical Pitfall & Survival Guide
❗ 1. AMAT-to-Copley Cross-Reference
The AMAT equipment number is not necessarily the same identifier used by the underlying drive manufacturer. Current listings associate 1080-01772 with Copley 800-2032.
Verify both numbers before purchasing.
❗ 2. Motor and Feedback Mismatch
A dual-axis drive can still be the wrong replacement if its motor-feedback configuration differs from the installed assembly.
I’ve seen replacement drives that looked identical electrically but failed during servo initialization because the feedback configuration was different.
❗ 3. Stored Configuration
Do not assume the replacement drive contains the same application parameters as the failed unit. If the machine depends on drive-resident configuration, obtain the correct backup before removing the original.
❗ 4. Communication Settings
A drive can power up normally while remaining unavailable to the machine controller. Check the physical communication connection, address/settings, controller configuration, and drive configuration before replacing hardware again.
❗ 5. Never Skip the Low-Speed Test
After installation, verify direction and feedback at controlled low speed before returning the axis to normal production velocity. A wiring error discovered during a low-speed jog is much easier to contain than one discovered during a high-speed automated cycle.
Frequently Asked Questions (FAQ)
What is AMAT 1080-01772?
1080-01772 is an Applied Materials equipment part number associated by secondary-market documentation with a Copley Controls Xenus Plus dual-axis servo drive, commonly identified as 800-2032.
Is 1080-01772 a PLC or I/O module?
No. It is identified as a dual-axis servo-drive assembly used for motion control in semiconductor manufacturing equipment. It is not a conventional PLC CPU, DCS I/O card, or standalone power supply.
Is 1080-01772 the same as Copley 800-2032?
Available equipment listings make that cross-reference, but I would not treat the two numbers as interchangeable purchasing identifiers without verification. The Applied Materials assembly may have machine-specific configuration, connectors, firmware, or mechanical provisions. Confirm the physical labels and configuration before substitution.
Can I replace it with another Xenus Plus dual-axis drive?
Not automatically. Verify the motor voltage/current requirements, feedback device, axis configuration, control interface, communication settings, firmware, and Applied Materials machine configuration. A drive with the same number of axes can still be electrically or operationally incompatible.
Does the replacement drive retain my machine configuration?
Do not assume it does. A replacement may arrive with factory/default parameters or a configuration different from the failed unit. Back up the original configuration when possible and document all critical parameters before removal.
Why do some suppliers describe 1080-01772 differently?
This is an important purchasing warning. Online sources currently give conflicting descriptions for 1080-01772, including servo-drive, gas-distribution, and other semiconductor-equipment descriptions.
For that reason, the physical nameplate, revision, photographs, and installed-equipment documentation should take precedence over a generic web listing. If you have the label or a photo of the 1080-01772, it can be used to verify the exact hardware before purchase.
What condition should I request from a supplier?
For a production-critical spare, request New Original / New Surplus only when the seller can document the physical condition. Ask for clear photographs of the label, serial number, revision, connectors, and packaging. For refurbished inventory, request the actual functional-test procedure and warranty terms. A supplier currently lists 1080-01772 as new with a one-year warranty, but that is a supplier-specific claim, not an OEM certification.



