
 WhatsApp: +86 16626708626
 Email:
  Phone: +86 16626708626
Description
Key Technical Specifications
| Parameter | Value |
|---|---|
| Manufacturer | Applied Materials |
| Part Number | 0190-01431 |
| Assembly Description | ASSY TC HTR WXZ 300MM |
| Product Type | TC Heater Assembly |
| Configuration | WXZ |
| Wafer Size | 300 mm |
| Primary Function | Heating / temperature control |
| Application | Semiconductor manufacturing equipment |
| Equipment Interface | Machine-specific heater and temperature-control connections |
| Identification | Applied Materials OEM part number |
| Condition | Supplier-specific; verify before purchase |
| Compatibility | Verify equipment model and serial-number configuration |
Important: Publicly available records provide limited electrical specifications for 0190-01431. I would not invent heater voltage, wattage, resistance, thermocouple type, connector pinout, or temperature range without an OEM service document or a photograph of the actual assembly.
One commercial listing specifically identifies 0190-01431 as “ASSY TC HTR WXZ 300MM” and gives a listed weight of 0.12 kg for its particular inventory item. That weight should not be treated as an OEM engineering specification without confirmation.
Product Introduction
Applied Materials 0190-01431 is identified as a TC Heater Assembly for WXZ 300 mm semiconductor equipment. The assembly is associated with wafer-processing equipment where controlled heating and temperature measurement are required during semiconductor manufacturing.
The 300 mm designation is important when matching this part to equipment. Do not substitute another Applied Materials heater assembly solely because its part number or physical appearance is similar. Heater resistance, thermocouple configuration, mechanical dimensions, and connector pinout must be verified against the installed assembly.
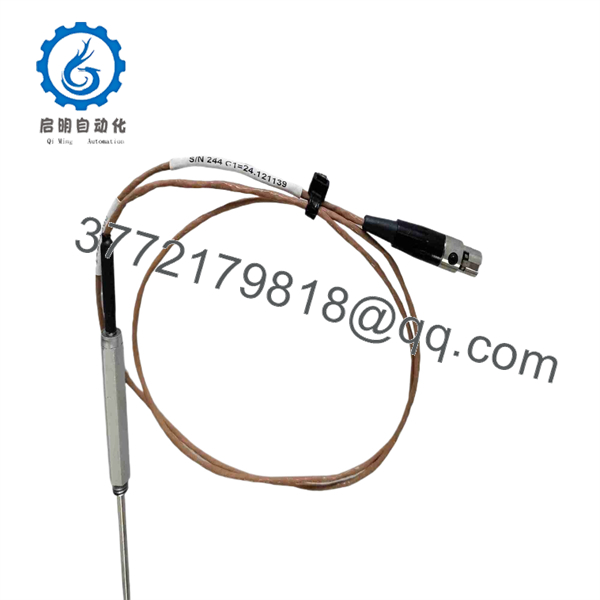
0190-01431
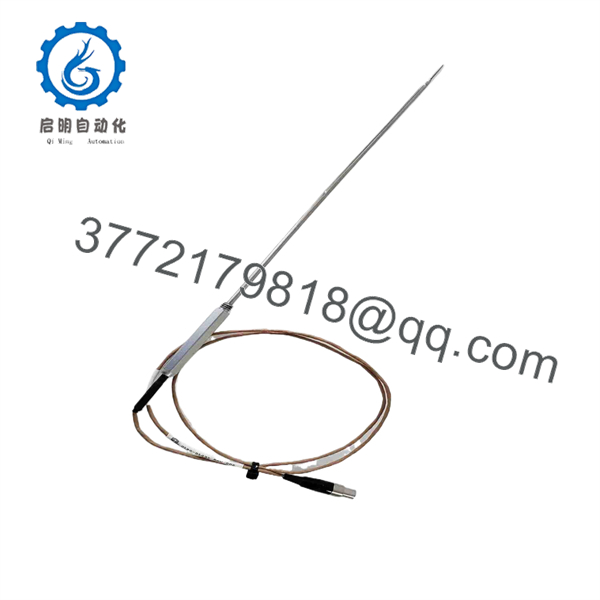
0190-01431
Installation & Configuration Guide
Estimated replacement time: 30–60 minutes for a prepared maintenance team. Actual time can be considerably longer if chamber access, vacuum recovery, or temperature calibration is required.
Stage 1: Pre-Installation Preparation
⚠️ Safety First
- Place the semiconductor processing tool in the approved maintenance state.
- Follow the equipment-specific shutdown procedure.
- Lock out and tag out electrical power before accessing the heater assembly.
- Isolate pneumatic, vacuum, gas, and other energy sources if the equipment procedure requires it.
- Allow heated components to cool to a safe temperature.
- Verify the absence of hazardous electrical energy with an appropriate meter.
Tools Required
- ESD wrist strap
- Digital multimeter
- Insulated screwdrivers
- Appropriate connector tools
- Wire/connector identification labels
- Smartphone or camera
- Equipment-specific service documentation
- Insulation-resistance tester only when explicitly permitted by the OEM procedure
Data Backup
Before removing the existing assembly:
- Photograph the complete installed assembly.
- Photograph every connector and cable routing path.
- Record the existing part number and revision markings.
- Record heater and thermocouple wiring positions.
- Record equipment model and serial number.
- Save applicable temperature-control parameters.
- Record baseline resistance or diagnostic measurements only when the OEM service procedure specifies the correct test method.
❗ Do not guess the heater resistance specification. The correct value depends on the specific equipment design and heater configuration.
Stage 2: Removing the Old Assembly
- Confirm the equipment is electrically isolated.
- Verify that the heater has cooled sufficiently for maintenance.
- Remove the required chamber or equipment covers according to the service manual.
- Photograph connector orientation before disconnecting anything.
- Label each connector if the machine does not provide clear identification.
- Disconnect the heater and temperature-sensor connections without pulling on cable conductors.
- Remove the applicable mounting hardware.
- Carefully remove the assembly without damaging nearby chamber components.
- Inspect the mating surfaces, connectors, cables, and temperature-sensor wiring.
⚠️ Keep the removed 0190-01431 until the replacement has passed commissioning. It provides a valuable reference for connector orientation and physical configuration.
Stage 3: Installing the New Module
- Wear the ESD wrist strap and establish the required ESD controls.
- Verify the replacement label reads Applied Materials 0190-01431.
- Compare the new assembly against the removed unit.
- Verify mechanical dimensions and mounting-hole positions.
- Confirm heater and thermocouple connector locations.
- Install the assembly without forcing it into position.
- Secure the mounting hardware using the torque specified by the equipment service documentation.
- Reconnect all electrical connections.
- Confirm connector locks are fully engaged.
- Route cables exactly as specified by the equipment manufacturer.
- Ensure cables cannot contact heated surfaces or moving mechanisms.
Self-Checklist
- Part number verified
- 300 mm / WXZ configuration verified
- Mechanical fit confirmed
- Heater connections secured
- Temperature-sensor connections secured
- Cable routing verified
- Mounting hardware secured
- ESD controls maintained
Stage 4: Power-On & Testing
- Perform a complete visual inspection.
- Verify that no tools or foreign objects remain inside the equipment.
- Check connectors for incomplete engagement.
- Restore power according to the OEM startup sequence.
- Monitor the heater-control system for diagnostic alarms.
- Verify temperature-sensor feedback.
- Perform the OEM-specified heater resistance or continuity check if applicable.
- Initiate a controlled temperature ramp.
- Compare actual temperature feedback against the equipment control system.
- Check for abnormal temperature rise, unstable feedback, or heater faults.
- Run the applicable chamber qualification or process verification sequence.
⚠️ Do not apply an arbitrary DC voltage to the heater terminals for testing. Heater assemblies can be damaged by incorrect test voltage or polarity, and semiconductor equipment often uses specialized temperature-control circuits.
Frequently Asked Questions (FAQ)
1. What is Applied Materials 0190-01431?
Applied Materials 0190-01431 is identified in available parts records as an “ASSY TC HTR WXZ 300MM”, meaning a TC heater assembly associated with WXZ 300 mm semiconductor manufacturing equipment.
2. Is 0190-01431 a PLC or electronic control module?
No. Available identification points to a heater assembly, not a PLC CPU, I/O module, or general-purpose controller. One unrelated listing incorrectly describes the number as a PLC CPU, so that description should not be relied upon. The more specific parts listing identifies it as the TC HTR WXZ 300MM assembly.
3. What does “300MM” mean?
It identifies the assembly with the 300 mm wafer equipment class. Do not interpret this as the heater’s physical diameter without checking the OEM mechanical drawing.
4. Can I substitute another Applied Materials heater?
I would not do that based on appearance alone. Heater assemblies can differ in resistance, power rating, temperature-sensor arrangement, connector pinout, mechanical dimensions, and control-system compatibility.
Match the complete Applied Materials part number first.
5. Is 0190-01431 new or refurbished?
The part number itself does not establish condition. Current secondary-market listings may contain used, surplus, refurbished, or as-is inventory. For example, one listing currently identifies its 0190-01431 unit as pre-owned and untested.
For procurement, request photographs of the actual label and confirm whether the unit is Factory Sealed, New Original/New Surplus, or Refurbished/Tested.
6. What electrical specifications should I verify before ordering?
At minimum, verify:
- Heater voltage
- Heater resistance
- Heater power
- Thermocouple/sensor type
- Connector configuration
- Cable length and routing
- Mechanical dimensions
- Equipment model and serial number
These values should come from the applicable Applied Materials equipment documentation or the existing assembly. Do not use generic values from another heater model.
7. What information should I provide when ordering 0190-01431?
Provide the Applied Materials part number 0190-01431, equipment model, equipment serial number, existing assembly revision, and clear photographs of the installed unit and its connectors. That information gives a supplier a much better basis for confirming compatibility than the part number alone.



