
 WhatsApp: +86 16626708626
 Email:
  Phone: +86 16626708626
Description
Key Technical Specifications
| Parameter | Value |
|---|---|
| Model | BS207 |
| OEM Part Number | 00009207-00 |
| Manufacturer | Bachmann electronic GmbH |
| System | Bachmann M1 / M200 control platform |
| Product Type | System backplane / base module |
| Module Slots | 7 |
| System Bus | Bachmann M1 internal system bus |
| Primary Function | Module mounting, power distribution, and internal bus connection |
| Nominal System Voltage | 24 V DC |
| Reported Operating Range | 18–36 V DC |
| Operating Temperature | −30 to +60 °C |
| Storage Temperature | −40 to +85 °C |
| Relative Humidity | 5–95%, non-condensing |
| Mounting | System/rack mounting; verify exact mechanical version |
| Certifications / Approvals | CE, UKCA, cULus, ABS, BV, DNV, KR, LR, NK, RINA, RoHS |
| OEM Variant | BS207 |
| Related Variants | BS207 CC, BS207/E, BS207/S |
The OEM Bachmann approval document confirms BS207 as 00009207-00 and also distinguishes the CC, E, and S variants with different part numbers.
A Bachmann BS200/E technical document shows that the variant is a seven-slot backplane, with a width of 55 mm per module slot, 21 mm depth including the connector, and 150 mm height. Do not automatically apply those mechanical dimensions to the standard .
Product Introduction
The BachmannBS207 is a seven-slot system backplane used within Bachmann M1 automation architectures. It provides the physical mounting and electrical interconnection required for CPU, I/O, and communication modules installed in the control system. Bachmann’s documentation identifies the standard as part number 00009207-00.
For replacement work, the variant matters. , CC, /E, and /S are separate order codes, so a seven-slot description alone is not enough to establish interchangeability. Verify the complete part number against the installed hardware.
Installation & Configuration Guide
Stage 1: Pre-Installation Preparation — Approximately 10 Minutes
⚠️ Safety First: Put the M1 control system into its approved maintenance state. Stop the controlled process where required, isolate the relevant 24 V DC supply, and apply site lockout/tagout procedures.
Tools Required
- ESD wrist strap
- Appropriate screwdriver
- Digital multimeter
- Wire labels
- Smartphone or camera
- M1 system documentation
- Replacement
Data Backup
- Record the complete part number from the installed backplane.
- Confirm whether the existing unit is , CC, /E, or /S.
- Photograph the complete rack before removal.
- Record installed CPU, I/O, and communication modules.
- Photograph power connections and terminal positions.
- Save the controller configuration where applicable.
- Record any module addresses or configuration settings associated with the installed rack.
⚠️ Do not order only from the “” description if the installed label contains a suffix. Bachmann documents several variants with different order numbers.
Stage 2: Removing the Old Backplane — Approximately 5–10 Minutes
- Confirm the control system is in the approved maintenance condition.
- Isolate the 24 V DC supply.
- Verify the supply is de-energized with a multimeter.
- Label every power and system connection before disconnecting it.
- Remove installed M1 modules according to the Bachmann module-removal procedure.
- Support the modules to prevent mechanical stress on their connectors.
- Release the mounting hardware.
- Remove the backplane carefully.
- Inspect the mounting area and connectors for contamination, corrosion, or mechanical damage.
⚠️ Keep the original backplane until the replacement system has completed commissioning.
Stage 3: Installing the New Backplane — Approximately 5–10 Minutes
- Put on a grounded ESD wrist strap.
- Confirm the replacement part number.
- Compare the physical connector arrangement with the removed .
- Verify that the number and type of module positions match the existing architecture.
- Mount the securely.
- Reconnect the system power wiring according to the original documentation.
- Check polarity and supply voltage before installing electronic modules.
- Reinstall the CPU, I/O, and communication modules in their documented positions.
- Confirm every module is fully seated.
- Secure the module retaining hardware.
Self-Checklist
- Exact variant verified
- OEM part number checked
- Seven module positions confirmed
- Power polarity checked
- Backplane securely mounted
- Modules correctly positioned
- Connectors fully seated
- No bent or contaminated contacts
Stage 4: Power-On & Testing — Approximately 10–15 Minutes
- Perform a final visual inspection.
- Measure the incoming DC supply before energizing the rack.
- Confirm correct polarity.
- Energize the M1 system.
- Observe CPU and module status LEDs.
- Confirm the CPU recognizes the installed modules.
- Check the controller diagnostic information.
- Verify I/O module communication.
- Check communication modules and connected networks.
- Restore the control application only after the hardware passes its diagnostic checks.
- Perform an I/O dry run.
- Return the process to normal operation after the approved functional test.
⚠️ A backplane replacement should not change application logic by itself, but the controller configuration and installed module positions still need to be verified. A misplaced module can produce configuration or hardware-diagnostic faults even when the backplane itself is correct.
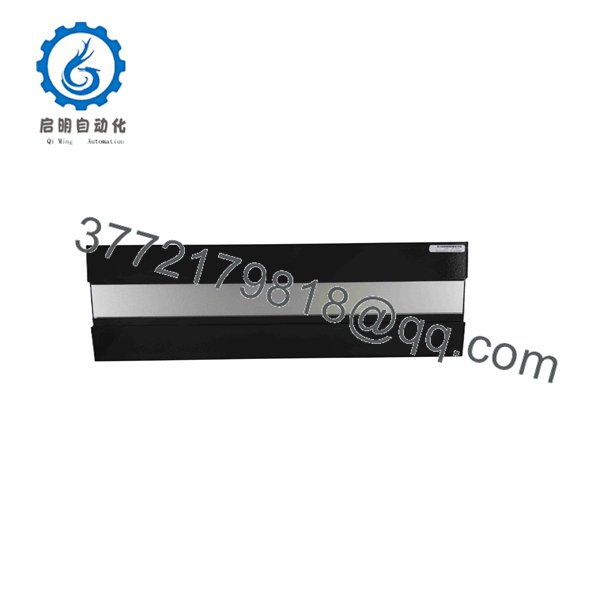
BS207
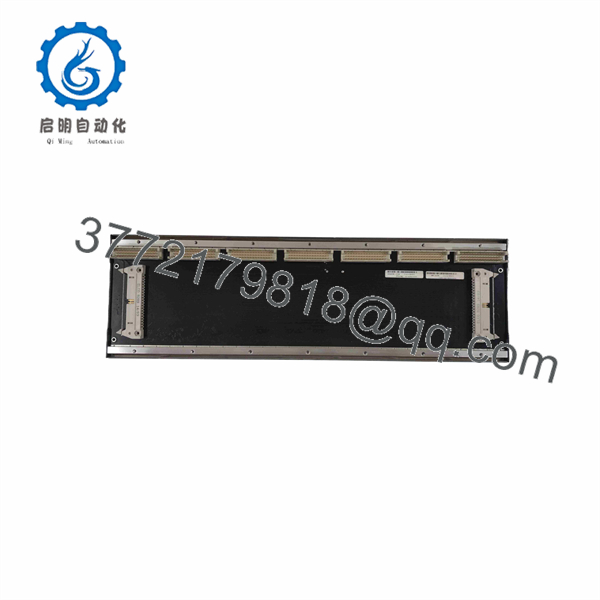
BS207
Frequently Asked Questions (FAQ)
Q1. What is the Bachmann ?
The is a seven-slot Bachmann system backplane/base module for the M1 automation architecture. It provides the physical and electrical infrastructure required to connect system modules through the internal M1 bus. Third-party technical listings also identify it as a seven-slot M1 backplane.
Q2. What is the OEM part number for ?
Bachmann’s current standards and approvals document lists the standard as 00009207-00. It separately lists CC as 00015951-00, /E as 00029662-00, and /S as 00016789-00.
Q3. Is the same as /E?
No. Both are seven-slot backplanes, but they have different OEM order numbers. Bachmann lists = 00009207-00 and /E = 00029662-00. The /E belongs to the BS200/E series and has its own mechanical specification.
Q4. Can I hot-swap the ?
Do not assume that the backplane itself is hot-swappable. The backplane is the structural and electrical foundation for multiple M1 modules, so removing it normally requires de-energizing the associated system and removing the installed modules. Follow the specific Bachmann maintenance procedure for the installed system revision.
Q5. How many modules can accommodate?
The is identified as a 7-slot backplane. The available Bachmann BS200/E documentation likewise identifies /E as having seven module slots.
Q6. Is obsolete?
Bachmann’s current standards/approvals document still lists and its variants, including the OEM part numbers and applicable approvals. That document alone does not establish commercial availability or production status, so procurement should still verify current stock and lifecycle status.
Q7. What should I provide when ordering a replacement?
Provide the complete part number from the installed backplane, preferably including the OEM number 00009207-00 if that is what is installed. Also provide photographs of the nameplate, connectors, and complete rack. If the existing unit is marked CC, E, or S, include that suffix because those are distinct Bachmann order codes.



