
 WhatsApp: +86 16626708626
 Email:
  Phone: +86 16626708626
Description
3. Key Technical Specifications
| Parameter | Value |
|---|---|
| Product Type | Communication Processor |
| Product Family | TDXnet™ / TDISecure™ |
| Typical Models | 2155/00, 2155/40 |
| Primary Function | Machinery data acquisition and communications |
| Dynamic Input Capacity | Up to 24 dynamic channels (model dependent) |
| Process Inputs | Up to 24 analog process inputs (TDISecure models) |
| Communication | Ethernet TCP/IP, Serial (RS-232/422/485), Modbus (model dependent) |
| Compatible Software | Bently Nevada System 1® |
| Compatible Systems | Bently Nevada Machinery Protection Systems |
| Frequency Range | DC to 30 kHz (TDISecure models) |
| Mounting | Rack-mounted |
| Application | Turbines, compressors, generators, pumps |
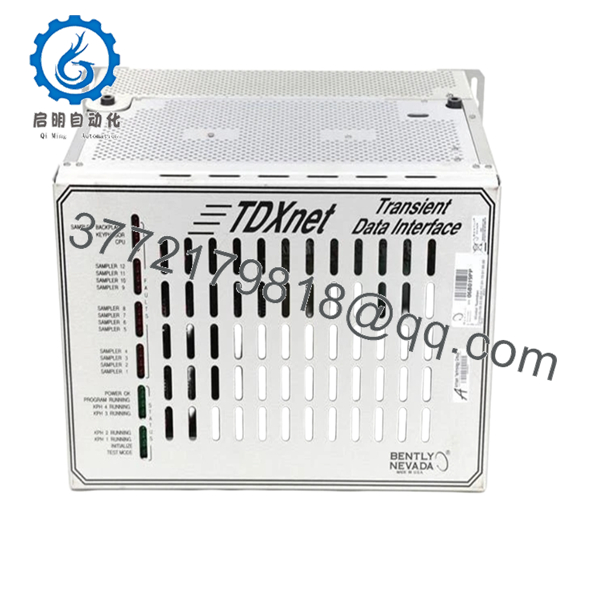
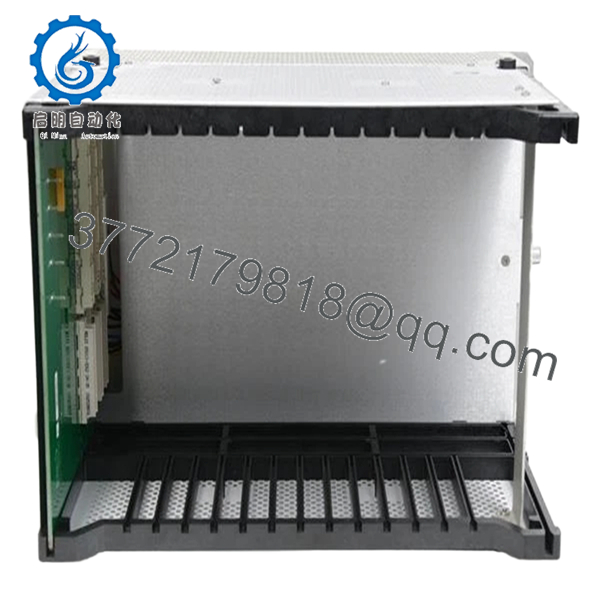
The 2155 family functions as the communication interface between Bently Nevada machinery protection hardware and asset management software. Legacy 2155/00 TDXnet systems collect steady-state and startup/shutdown data, while newer 2155/40 TDISecure processors add improved cybersecurity, Ethernet networking, and higher-capacity data acquisition.
4. Product Introduction
The Bently Nevada 2155 platform provides centralized communication and high-speed data acquisition for rotating machinery monitoring systems. Rather than performing machinery protection directly, it gathers dynamic and process measurements from monitoring hardware and transfers them to System 1 for diagnostics, trending, and long-term asset management.
Many facilities continue operating legacy 2155/00 TDXnet processors because they integrate with existing 3500-based monitoring systems. For modernization projects, the 2155/40 TDISecure processor offers improved cybersecurity, Ethernet connectivity, and support for additional process measurements while maintaining a similar installation footprint.

- 2155
- 2155
5. Installation & Configuration Guide
Stage 1 – Pre-Installation Preparation (10 Minutes)
⚠️ Safety First
- Notify operations of scheduled maintenance.
- Perform Lock-Out/Tag-Out procedures.
- Remove system power.
- Wait at least five minutes before opening the enclosure.
Tools Required
- Grounded ESD wrist strap
- Phillips screwdriver
- Fluke 115 multimeter
- Laptop with System 1 software
- Network cable
- Smartphone for documentation
Data Backup
- Export System 1 configuration.
- Record Ethernet and serial communication settings.
- Document IP addresses.
- Photograph all rear panel connections.
- Record processor firmware revision.
Stage 2 – Removing the Existing Processor
- Label all communication cables.
- Disconnect Ethernet and serial connections.
- Remove field wiring carefully.
- Release mounting hardware.
- Withdraw the processor without stressing backplane connectors.
⚠️ Keep the original processor until the replacement has successfully completed operational testing.
Stage 3 – Installing the Replacement
- Wear a grounded ESD wrist strap.
- Verify the complete model number and option codes.
- Install the processor into the rack.
- Reconnect communication and power cables.
- Restore network configuration.
Self-Checklist
- ☑ Correct model number
- ☑ Network configuration restored
- ☑ Power connections verified
- ☑ Communication cables secured
- ☑ Processor fully seated
Stage 4 – Power-On & Testing
Pre-Power Inspection
- Verify supply voltage.
- Confirm protective grounding.
- Check communication cable integrity.
Power-Up Procedure
- Apply power.
- Observe normal startup indicators.
- Verify Ethernet communication.
- Connect using System 1.
- Confirm all monitored channels are available.
- Verify startup/shutdown data collection.
- Test Modbus or serial communication if configured.
⚠️ Troubleshooting
- A communication timeout is often caused by incorrect IP addressing or firewall settings.
- Missing channels usually indicate configuration mismatches rather than processor failure.
- When replacing a legacy TDXnet processor, confirm that the System 1 version supports the installed hardware revision.
Common Replacement Pitfalls
❗ Firmware Revision
I’ve seen upgrades delayed because only the hardware was replaced. The processor powered up normally, but System 1 rejected communications due to unsupported firmware. Always document firmware before shutdown.
❗ Network Configuration
Record IP addresses, subnet masks, and gateway settings before removing the old processor. Restoring factory defaults can create unnecessary commissioning delays.
❗ Legacy Compatibility
Not every 2155 processor is interchangeable. A 2155/00 TDXnet and a 2155/40 TDISecure serve similar purposes but differ in hardware architecture and supported features.
❗ Cable Identification
Label every Ethernet, serial, and synchronization cable before removal. It saves considerable troubleshooting time during startup.
❗ ESD Protection
Communication processors contain high-density digital electronics. Handle them only while properly grounded.
Keep these checks in mind and you’ll avoid most commissioning delays.
6. Frequently Asked Questions (FAQ)
Q1. What does the Bently Nevada 2155 do?
The 2155 is a communication and data acquisition platform that transfers machinery monitoring data from protection systems to System 1 software for diagnostics, trending, and asset management.
Q2. Is the 2155/00 still available?
The 2155/00 TDXnet is a legacy product and has been discontinued. Most available units today are New Surplus or professionally refurbished inventory.
Q3. Can the 2155/40 replace the 2155/00?
In many modernization projects, 2155/40 TDISecure replaces legacy TDXnet processors, but compatibility depends on the machinery protection system, software version, and site configuration. Verify the migration path before ordering.
Q4. Which software is compatible?
The processor communicates with Bently Nevada System 1® for machinery diagnostics and historical data management.
Q5. Does the processor perform machinery protection?
No. Machinery protection remains the responsibility of dedicated monitoring hardware such as the 3500 system. The 2155 collects and transfers monitoring data for diagnostics and condition monitoring.
Q6. Why is New Surplus inventory less expensive than OEM pricing?
Most New Surplus units come from unused project stock or excess distributor inventory. Although they have never been commissioned, they are no longer current production. Reputable suppliers should provide serial number verification, functional testing, and documented QC reports before shipment.
Q7. What quality inspections should be completed before shipment?
A comprehensive quality process should include:
- OEM serial number verification
- Anti-counterfeit inspection
- Visual inspection for corrosion, scratches, or repair marks
- Power-up testing on a compatible Bently Nevada test system
- Ethernet and serial communication verification
- Firmware documentation
- Continuous operational burn-in testing
- QC sign-off
- ESD-safe packaging
- Heavy-duty export packaging
Test reports, communication screenshots, and power-up videos should be available upon request.



