
 WhatsApp: +86 16626708626
 Email:
  Phone: +86 16626708626
Description
Key Technical Specifications
| Parameter | Value |
|---|---|
| Manufacturer | Bently Nevada (Baker Hughes) |
| Model | 3500/22 |
| Assembly Part Number | 138607-01 |
| Product Type | Transient Data Interface (TDI) Module |
| System Series | Bently Nevada 3500 Machinery Protection System |
| Installation Slot | Slot 1, adjacent to rack power supplies |
| Primary Function | Rack communication and transient data collection |
| Host Software | Bently Nevada System 1 and 3500 Configuration Software |
| Ethernet Interface | 10Base-T / 100Base-TX RJ-45 (standard configuration) |
| USB Port | Front-panel USB for local configuration |
| Power Consumption | Approximately 10.5 W |
| Operating Temperature | -30 °C to +65 °C |
| Storage Temperature | -40 °C to +85 °C |
| Compatible Monitor Modules | 3500/40M, 3500/42M, 3500/45, 3500/50M, 3500/60 and other compatible 3500 M-series modules |
| Data Functions | Continuous static data acquisition and transient waveform capture (with optional Channel Enabling Disk) |
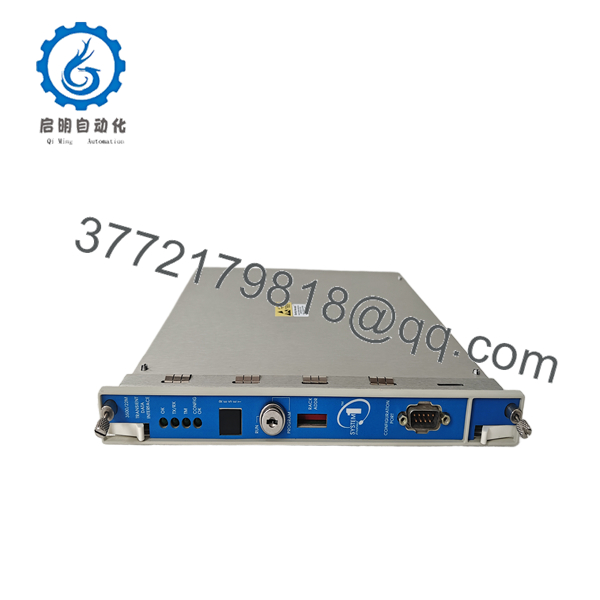
The 3500/22M combines the functionality of the legacy 3500/20 Rack Interface Module (RIM) with a communication processor, serving as the primary interface between the 3500 rack and Bently Nevada System 1 condition monitoring software. It installs in Slot 1 and continuously transfers steady-state and transient machinery data over Ethernet.
Engineering Note
The assembly number 138607-01 identifies the standard TDI module. It is not interchangeable with every Rack Interface Module or TMR configuration. Verify the complete ordering code, firmware compatibility, and I/O module before replacement.
Product Introduction
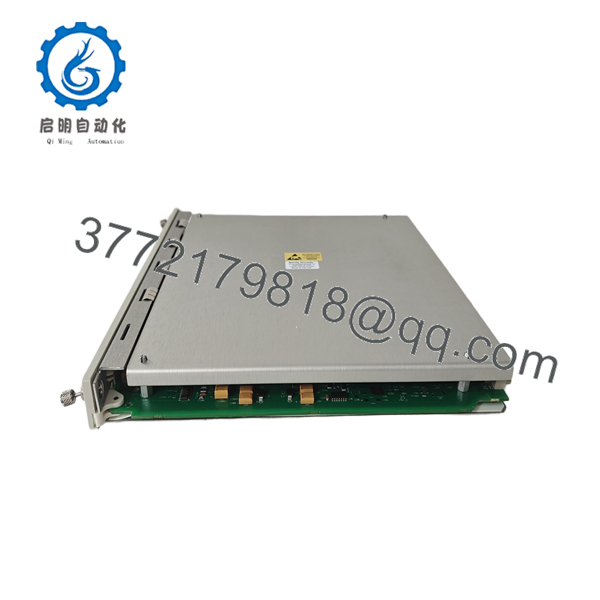
The Bently Nevada 3500/22 (138607-01) is the Transient Data Interface (TDI) module for the 3500 Machinery Protection System. It functions as the rack communication controller, providing configuration access while collecting static and transient machinery data for transmission to System 1 condition monitoring software.
Unlike the older 3500/20 Rack Interface Module, the 3500/22M integrates rack management with transient waveform acquisition. For plants performing machinery diagnostics, startup analysis, or trip-event investigation, the TDI provides centralized communication without affecting the protection functions executed by the monitoring modules.

- 3500/22 138607-01
- 3500/22 138607-01
Installation & Configuration Guide
Stage 1: Pre-Installation Preparation (Estimated Time: 10 Minutes)
⚠️ Safety First
- Notify operations and schedule the rack outage.
- Verify all protected machinery is in a safe operating condition.
- Apply Lockout/Tagout (LOTO).
- Remove power from the 3500 rack.
- Wait at least five minutes before opening the enclosure.
Tools Required
- ESD wrist strap
- PH1 screwdriver
- Fluke 115 (or equivalent) digital multimeter
- Wire labels
- Laptop with 3500 Configuration Software
- Smartphone for documentation
Data Backup
Before removing the existing TDI:
- Export the complete rack configuration.
- Record the existing firmware revision.
- Photograph rear I/O connections.
- Record Ethernet IP settings.
- Save System 1 communication parameters.
⚠️ I’ve seen maintenance teams replace a TDI without exporting the rack configuration. Rebuilding the rack from memory usually takes much longer than the hardware replacement itself.
Stage 2: Removing the Old Module (Estimated Time: 10 Minutes)
- Open the rack enclosure.
- Disconnect Ethernet and USB connections.
- Label every cable.
- Remove retaining screws.
- Pull the module straight forward without twisting.
- Inspect the backplane connector carefully.
Check for:
- Bent connector pins
- Dust accumulation
- Oxidized contacts
- Loose backplane hardware
⚠️ Keep the removed module until the replacement passes all functional tests.
Stage 3: Installing the New Module (Estimated Time: 10 Minutes)
Step 1 – ESD Protection
- Wear a grounded wrist strap.
- Place the module on an ESD-safe surface.
- Handle only the module housing.
Step 2 – Compatibility Verification
Confirm:
- Model: 3500/22M
- Assembly Number: 138607-01
- Correct rear I/O module
- Firmware compatibility
- Rack revision compatibility
Step 3 – Install the Module
- Slide the TDI fully into Slot 1.
- Confirm full connector engagement.
- Tighten retaining screws.
- Reconnect Ethernet.
Self-Checklist
- Correct model verified
- Module fully seated
- Ethernet connected
- Rack configuration backed up
- Rear I/O verified
Stage 4: Power-On & Testing (Estimated Time: 20 Minutes)
Pre-Power Checks
Using a multimeter:
- Verify rack power supply.
- Check grounding continuity.
- Confirm no short circuits.
Power-Up Procedure
- Energize the rack.
- Verify the OK LED.
- Confirm TX/RX activity.
- Connect using 3500 Configuration Software.
- Verify firmware revision.
- Confirm System 1 communication.
- Review monitor status for all installed channels.
⚠️ Troubleshooting
Solid Fault LED
The first item to verify is firmware compatibility. A newer replacement module installed in an older rack may require a firmware update or rack configuration reload.
No Ethernet Communication
Check:
- IP address
- Subnet mask
- Network switch port
- Rear I/O module
- RJ-45 cable
Configuration Error
Reload the saved rack configuration before assuming the hardware is defective.
Frequently Asked Questions (FAQ)
Q1. Can the 3500/22M be hot-swapped?
No. Although the 3500 system supports online diagnostics, the TDI is the primary rack communication interface installed in Slot 1. Replace it only with rack power removed to avoid communication loss or configuration corruption.
Q2. What is the difference between the 3500/20 RIM and the 3500/22M?
The 3500/22M combines the Rack Interface Module function with transient data acquisition. It supports communication with System 1 software and can capture transient waveform data, while the older 3500/20 primarily serves as the rack interface. They are not universally interchangeable.
Q3. Will replacing the TDI erase my rack configuration?
Not if you export the configuration first. The configuration should always be backed up before replacement and restored afterward if required. Experienced engineers never skip this step.
Q4. Does the module support System 1 software?
Yes. The 3500/22 is specifically designed as the communication gateway between the 3500 rack and Bently Nevada System 1 condition monitoring software.
Q5. Is 138607-01 the complete ordering number?
No. 138607-01 is the assembly part number. The complete ordering code includes the 3500/22M configuration, selected I/O module, approvals, and other options. Always verify the full catalog number before ordering.
Q6. Why are new surplus modules often less expensive than OEM list pricing?
Most new surplus inventory comes from canceled projects, strategic spare-part reductions, or plant decommissioning programs. Pricing reflects inventory availability rather than product quality. Always request serial number verification, functional test records, and traceability documentation before purchase.
Q7. What quality inspection should be completed before shipment?
A professional quality process should include:
- OEM label and serial number verification.
- Visual inspection for corrosion, scratches, UV discoloration, and rework marks.
- Power-on testing using a genuine Bently Nevada 3500 rack.
- Ethernet communication verification.
- USB configuration port test.
- Continuous operation under load for at least 24 hours.
- Final QC approval, ESD packaging, and shipment documentation.
Test reports, rack startup photographs, and functional test videos should be available upon request.



