
 WhatsApp: +86 16626708626
 Email:
  Phone: +86 16626708626
Description
Key Technical Specifications
| Parameter | Value |
|---|---|
| Model | DELCOM-3222 |
| Manufacturer | Delta Electronics |
| Product Family | Delta I/O / DV-NET |
| Product Type | Serial communication interface |
| Communication Interfaces | RS-232C / RS-485 |
| RS-232C Interface | Serial interface |
| RS-485 Interface | Differential serial bus |
| Communication Type | Asynchronous serial communication |
| Typical Application | PLC and industrial device communication |
| Mounting / Mechanical Format | Verify against the actual DELCOM-3222 hardware revision |
| Protocol | Application-dependent; verify the host/device protocol |
| Condition | Specify Factory Sealed, New Original/New Surplus, or Refurbished (tested) |
Technical caution: Publicly indexed information on this older model is limited and inconsistent. Some aftermarket listings describe the DELCOM-3222 as an RS-232C-to-RS-485 converter and publish detailed electrical specifications, but those specifications are not sufficiently corroborated by an accessible Delta primary datasheet.
For procurement, I would not assume published values such as 10–30 Vdc input, 120 Ω termination, 1,200 m transmission distance, or 115.2 kbps are applicable to every DELCOM-3222 revision without checking the nameplate and original manual.
Product Introduction
The Delta DELCOM-3222 is an industrial serial communication interface associated with Delta’s I/O/DV-NET product range. Available equipment records identify it specifically as an RS-485/232C communication device used for serial connectivity in industrial control systems.
For replacement work, the important checks are the interface pinout, electrical supply, communication parameters, and host-system compatibility. Do not substitute a generic RS-232/RS-485 converter solely because the connector types appear identical.
Installation & Configuration Guide
Stage 1: Pre-Installation Preparation — 10–15 Minutes
⚠️ Safety First: Stop the affected communication segment before removing the module. If the DELCOM-3222 is installed inside an energized control cabinet, follow the site’s LOTO procedure and verify the supply voltage with a properly rated multimeter.
Tools Required
- ESD wrist strap.
- Appropriate screwdriver.
- Calibrated multimeter.
- Wire labels.
- Smartphone or camera.
- Laptop with the applicable Delta programming/communication software.
Data Backup
- Record the complete model and hardware/revision information.
- Photograph the existing wiring before disconnecting anything.
- Record RS-232 and RS-485 terminal assignments.
- Record baud rate, parity, data bits, and stop bits.
- Document the connected PLC, HMI, drive, or other serial device.
- Photograph any DIP switches or rotary switches.
- Save the host PLC communication configuration.
⚠️ Do not assume the communication converter determines the protocol. RS-232 and RS-485 define electrical interfaces; they do not by themselves define Modbus RTU, proprietary PLC protocols, or the application-layer message format.
Stage 2: Removing the Old Module — 5–10 Minutes
- Power down the affected equipment according to the approved site procedure.
- Verify the supply voltage is absent.
- Photograph all connections.
- Label every conductor before removal.
- Disconnect the RS-232C cable without forcing the connector.
- Disconnect the RS-485 A/B/GND wiring as applicable.
- Disconnect the module’s power wiring if separately supplied.
- Remove the mounting hardware or DIN-rail latch, depending on the actual hardware configuration.
- Inspect the replacement location for loose conductors, corrosion, or damaged terminals.
⚠️ Keep the original module on the workbench. For an older Delta interface, its terminal markings and switch configuration may be more useful than a generic online wiring diagram.
Stage 3: Installing the New Module — 10 Minutes
- Verify the replacement model against the old nameplate.
- Confirm the hardware/revision information where marked.
- Put on the ESD strap.
- Mount the replacement securely.
- Reconnect the power supply with correct polarity if external DC power is required.
- Reconnect RS-232C wiring.
- Reconnect RS-485 wiring.
- Verify RS-485 polarity carefully. A/B naming is not standardized across every manufacturer’s equipment.
- Replicate the original DIP-switch or hardware configuration.
- Secure all terminals.
Self-Checklist
- Exact model verified
- Hardware revision checked
- Supply voltage verified
- RS-232C wiring verified
- RS-485 polarity verified
- DIP switches copied
- Shield/ground arrangement verified
- Host communication settings documented
- Termination configuration verified where applicable
Stage 4: Power-On & Testing — 10–20 Minutes
- Check the supply rail with a multimeter before connecting power.
- Energize the communication equipment.
- Check the module’s power/status indication.
- Confirm the RS-232C connection at the host.
- Confirm the RS-485 connection at the remote device or bus.
- Check baud rate and serial framing.
- Start the host communication software.
- Send a controlled test message or valid application-layer command.
- Verify returned data rather than relying only on TX/RX LEDs.
- Restore the process connection after communications remain stable.
⚠️ If communication fails, troubleshoot in this order:
- Power supply.
- RS-232 TX/RX/GND wiring.
- RS-485 A/B polarity.
- Baud rate.
- Parity and stop bits.
- Device address.
- RS-485 termination and biasing.
- Protocol/application configuration.
- Cable shielding and grounding.
- Host PLC configuration.
A common field mistake is replacing the physical interface and then immediately changing PLC communication parameters. Change one variable at a time. Otherwise, you lose the ability to identify whether the failure is electrical, configuration-related, or protocol-related.
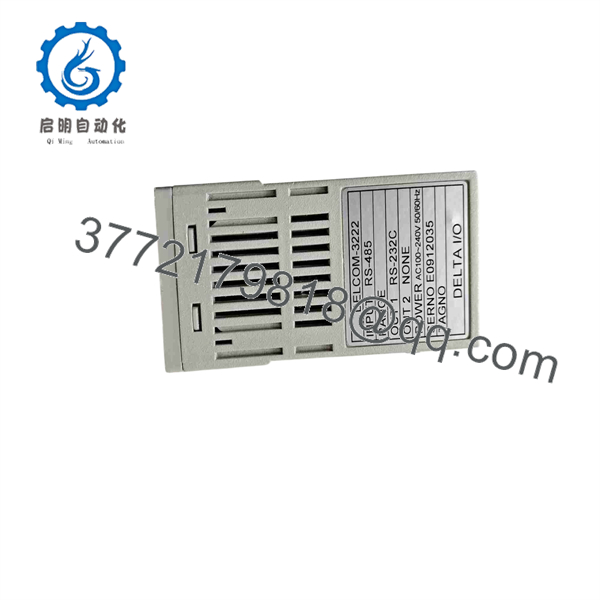
DELCOM-3222 RS-485/232C
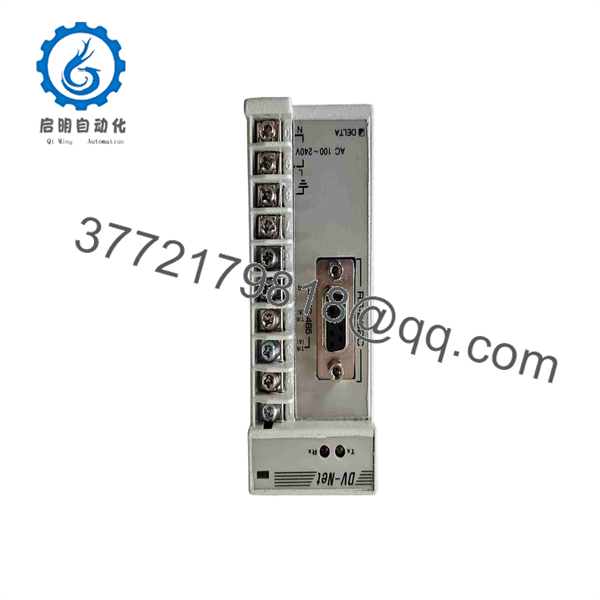
DELCOM-3222 RS-485/232C
Frequently Asked Questions (FAQ)
Q1. What is the used for?
The is identified in available equipment records as a Delta I/O / DV-NET communication device with RS-485/232C connectivity. It is intended for serial communication between compatible industrial control equipment.
Q2. Is simply an RS-232-to-RS-485 converter?
Available aftermarket documentation describes it that way, but I would be careful with that assumption when replacing an installed unit. The appears in Delta DV-NET/I/O equipment inventories, so the actual application protocol and electrical configuration should be verified against the installed system rather than treating it as a generic converter.
Q3. Can I replace it with any RS-232/RS-485 converter?
No—not without checking the application. Two converters can have identical RS-232 and RS-485 labels but differ in isolation, power requirements, termination, flow control, pinout, and serial framing behavior.
For a running PLC system, the safer approach is to match the electrical interface, wiring, communication parameters, and application protocol.
Q4. Does the support Modbus RTU?
Some aftermarket descriptions associate the with Modbus RTU applications, but RS-485 itself does not mean Modbus.
If your existing system uses Modbus RTU, verify the actual master/slave configuration, baud rate, parity, address range, and message format before ordering a substitute.
Q5. What should I check before purchasing a replacement?
At minimum, provide the supplier with:
- Complete model:
- Photograph of the nameplate
- Photograph of both interfaces
- Existing terminal wiring
- Supply-voltage information
- Host PLC or controller model
- Communication protocol
- Baud rate and serial framing
- Hardware/revision information, if marked
This is particularly important because publicly available specifications vary between aftermarket sources. For example, published supply-voltage, isolation, temperature, and mounting specifications are not consistent across the sources reviewed.
Q6. Is the still manufactured?
I found current aftermarket listings and historical equipment inventories for the model, but I did not find a sufficiently authoritative current Delta product page confirming active production. Treat it as a legacy/aftermarket sourcing item unless Delta documentation confirms otherwise.
Q7. What condition should I specify when ordering?
Specify the condition explicitly: Factory Sealed, New Original / New Surplus, or Refurbished (tested).
For a legacy , request photographs of the actual unit and nameplate before shipment. If the supplier claims that the unit has been tested, ask what was tested—at minimum, power-up and both communication interfaces should be verified.



