
 WhatsApp: +86 16626708626
 Email:
  Phone: +86 16626708626
Description
Key Technical Specifications
- Manufacturer: Emerson Process Management / Westinghouse Ovation
- Part Number: 1B30023H01
- Catalog Description: ASSY, I/O BUS TERMINATOR – INTERNAL GUIDES
- System: Emerson Ovation DCS
- Component Type: I/O bus terminator assembly
- Primary Function: Provides termination at the appropriate end of an Ovation I/O bus
- Electrical Interface: Ovation I/O bus
- Reported Supply: 12 V DC at 75 mA
- Reported Operating Temperature: −40 to +70 °C
- Reported Relative Humidity: 5–95%
- Reported Weight: Approximately 0.11 kg
- Alternate Identification: Westinghouse Ovation 1B30023H01
Emerson’s own Ovation spare-parts documentation identifies 1B30023H01 as “ASSY, I/O BUS TERMINATOR – INTERNAL GUIDES.” Independent technical listings also identify it specifically as an Ovation I/O bus terminator.
Compatibility note: Do not substitute a visually similar terminator without checking the installed Ovation I/O architecture, revision, and termination position. The H01 suffix matters.
Product Introduction
The Emerson 1B30023H01 is an I/O bus terminator assembly used in Emerson Process Management / Westinghouse Ovation DCS installations. Emerson’s spare-parts documentation identifies the part as an “ASSY, I/O BUS TERMINATOR – INTERNAL GUIDES,” making it a system-level I/O bus termination component rather than a conventional PLC CPU or I/O channel module.
This part is normally purchased as a maintenance spare when an existing Ovation I/O bus termination component requires replacement. Because legacy Ovation installations can contain revision-specific hardware, verify the exact part number against the site’s hardware records before installation.
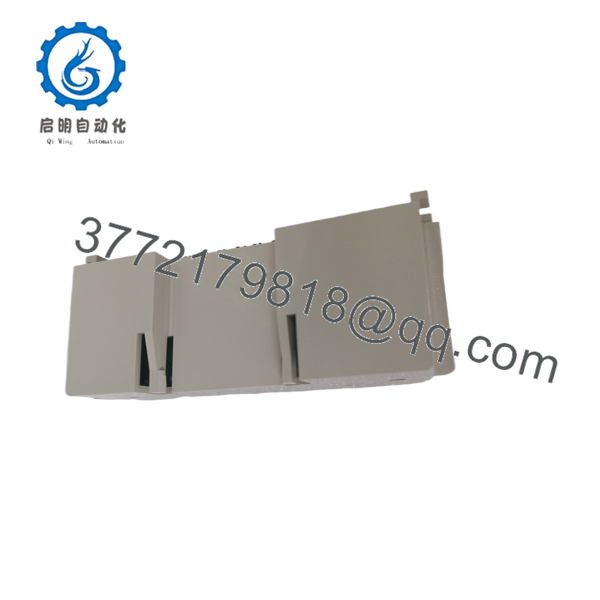
1B30023H01
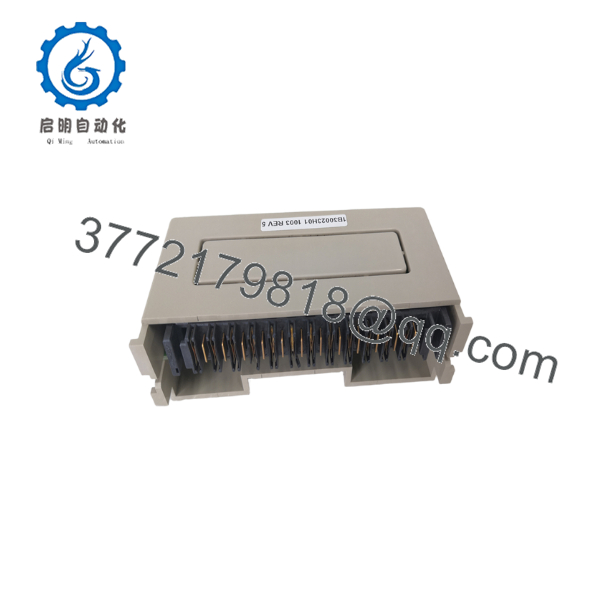
1B30023H01
Installation & Configuration Guide
Stage 1: Pre-Installation Preparation — Approximately 5–10 Minutes
⚠️ Safety First: Notify operations, place the affected control segment in a safe operating state, and follow the site’s approved LOTO procedure. Do not remove an I/O bus component from an energized assembly unless the specific Ovation hardware documentation explicitly permits that maintenance procedure.
Tools Required
- ESD wrist strap and grounded ESD work surface
- PH1 screwdriver, if applicable to the installed hardware
- Digital multimeter
- Wire/terminal labels
- Smartphone or camera for documentation
- Approved Ovation system documentation
Data Backup
- Record the existing 1B30023H01 part number and hardware revision.
- Photograph the installed termination arrangement before removal.
- Record adjacent module positions and cable routing.
- Document relevant Ovation node/I/O-bus configuration.
- If configuration software provides diagnostic information, capture the existing bus status before shutdown.
Stage 2: Removing the Old Assembly — Approximately 5 Minutes
- Place the affected system in its approved maintenance state.
- Remove the applicable front cover, bezel, or retaining hardware.
- Label connected conductors or cables before disconnecting them.
- Do not pull on cable conductors. Release the appropriate connector or retaining mechanism first.
- Release the module/base locking mechanism according to the installed Ovation hardware design.
- Withdraw the assembly straight out without twisting.
- Inspect the mating connector and surrounding backplane/termination hardware for contamination, bent contacts, corrosion, or mechanical damage.
⚠️ Keep the removed 1B30023H01 until commissioning is complete. It provides an important physical and configuration reference if the replacement does not behave as expected.
Stage 3: Installing the New Assembly — Approximately 5–10 Minutes
- Verify the replacement marking is exactly 1B30023H01.
- Compare the new assembly physically with the removed unit.
- Inspect contacts and connectors under adequate lighting.
- Connect your ESD wrist strap before handling exposed electronics.
- Do not assume a similar-looking H02 or other revision is interchangeable.
- Install the assembly in the same physical position as the removed component.
- Seat the assembly completely and engage all retaining hardware.
- Reconnect cables exactly as documented in the photographs.
- Verify that connectors are fully seated and mechanically secured.
Self-Checklist
- Exact part number: 1B30023H01
- Correct physical position
- Connectors fully seated
- Retaining hardware secured
- Cable routing matches original installation
- No bent or contaminated contacts
- ESD precautions maintained
Stage 4: Power-On & Testing — Approximately 10–15 Minutes
- Perform a pre-power inspection. Look for loose conductors, misplaced connectors, and accidental shorts.
- Energize the affected Ovation hardware according to the approved plant procedure.
- Observe available status indicators on the associated I/O hardware.
- Access the Ovation diagnostic environment.
- Confirm that the affected I/O bus returns to the expected operational state.
- Check for bus communication or termination-related diagnostics.
- Verify the connected I/O nodes/modules.
- Perform a controlled I/O verification with operations.
- Monitor the system for abnormal diagnostics after returning the loop to service.
⚠️ Troubleshooting Note: If the I/O bus does not recover, do not immediately assume the replacement terminator is defective. First verify connector seating, bus topology, termination location, adjacent hardware, cable integrity, and the exact H01 part number.
Technical Pitfall & Survival Guide
1. Firmware Revision Mismatch
This component is a bus termination assembly rather than a programmable CPU, so firmware is not normally the first suspect. However, firmware and hardware revisions of the associated Ovation I/O equipment can affect system compatibility.
Check the complete node, I/O controller, and termination architecture—not just the replacement part number.
2. Termination Position
❗ Termination location matters. A terminator installed at the wrong point in a bus architecture can produce communication problems even when the component itself is good.
Photograph the original installation before removal. Replicate the physical arrangement exactly unless the approved engineering drawing specifies otherwise.
3. Wiring / Connector Incompatibility
Do not wire from memory. Confirm the connector orientation and cable routing against the installed Ovation documentation.
A connector that appears mechanically compatible does not automatically establish electrical compatibility.
4. Power and Electrical Loading
Do not assume that a replacement’s reported electrical characteristics apply to the entire I/O assembly. Check the system-level power budget and the associated I/O equipment before energizing a modified node.
5. ESD Damage
❗ Treat the assembly as ESD-sensitive equipment. Wear a grounded wrist strap and avoid touching connector contacts or exposed circuitry.
A termination component can be damaged during handling without leaving visible evidence. If the replacement fails immediately after installation, verify the installation procedure and ESD controls before declaring the part defective.
Frequently Asked Questions (FAQ)
1. What is Emerson 1B30023H01?
The 1B30023H01 is an Emerson Ovation I/O bus terminator assembly. Emerson’s own spare-parts documentation lists its description as “ASSY, I/O BUS TERMINATOR – INTERNAL GUIDES.”
2. Is 1B30023H01 a PLC CPU or I/O module?
No. It is a bus termination assembly, not a programmable CPU and not a multi-channel analog or digital I/O module. Its role is associated with termination of the Ovation I/O bus.
3. Can I hot-swap the 1B30023H01?
Do not assume it is hot-swappable. The safe approach is to follow the maintenance procedure specified for the exact Ovation hardware configuration and place the affected equipment in the approved maintenance state before removal.
4. Is Emerson 1B30023H01 obsolete?
It should be treated as a legacy Ovation spare with limited availability. Current secondary-market listings identify the part as discontinued or as a legacy spare, while other suppliers continue to list stock.
That combination is typical of older DCS hardware: availability varies by supplier and warehouse. Confirm actual physical stock before committing the part to a shutdown schedule.
5. Is 1B30023H01 genuinely new?
Condition depends on the individual unit. New Original / New Surplus means the physical unit should be unused, but surplus inventory is not equivalent to current factory production stock.
If purchasing surplus, request photographs of the actual unit, original labels, date/traceability information where available, and the supplier’s test documentation.
6. Is 1B30023H02 a direct replacement for 1B30023H01?
Do not treat the H02 suffix as an automatic drop-in replacement. Different revisions can reflect mechanical, electrical, or system-compatibility changes. Verify the approved Emerson documentation and the installed Ovation hardware revision before substituting another suffix.
7. What should I provide when requesting a replacement?
Provide 1B30023H01, the complete nameplate information, photographs of the installed assembly, the Ovation system/hardware revision, and the application or node information if available.
For a shutdown-critical purchase, also specify the required condition—Factory Sealed, New Original/New Surplus, or Refurbished (tested)—and request confirmation of physical stock, lead time, warranty terms, and test documentation before placing the order.



