
 WhatsApp: +86 16626708626
 Email:
  Phone: +86 16626708626
Description
Key Technical Specifications
| Parameter | Specification |
|---|---|
| Part Number | 1C31197G01 |
| Manufacturer | Emerson / Westinghouse |
| System | Emerson Ovation DCS |
| Module Type | Valve Positioner Personality Module |
| PMOD Family | 1C31197G01–G04 |
| Compatible Electronics | 1C31194G01 / 1C31194G02 |
| Supported Servo Coil | 82 Ω |
| Drive Resistor | 330 Ω |
| Maximum Current | Up to ±24.9 mA |
| Module Group | Valve Positioner |
| Channel Capacity | 8 |
| Fuse Rating | 1.25 A, 250 V, fast acting |
| Typical Function | Valve positioner coil interface |
| Mounting | Ovation I/O module assembly |
The Ovation I/O Reference Manual identifies 1C31197G01 as a Valve Positioner Personality Module. Unlike some aftermarket descriptions that call it a complete valve-position controller, the Emerson documentation classifies it specifically as a PMOD. The G01 version uses 330 Ω resistors and is intended to drive 82 Ω servo coils, with current capability up to ±24.9 mA.
The same documentation identifies 1C31194G01 and 1C31194G02 as the corresponding Valve Positioner Electronics Module family. The G01 PMOD can be used with either electronics version, subject to the complete Ovation configuration.
Product Introduction
The Emerson Ovation 1C31197G01 is the Personality Module used in an Ovation Valve Positioner assembly. It establishes the electrical interface between the Valve Positioner Electronics Module and the associated servo-coil circuit. The G01 variant is specifically configured for 82 Ω servo coils using a 330 Ω resistor network.
This distinction matters during replacement. The 1C31197G01 is not a standalone electronics controller; it is the PMOD portion of the valve-positioner architecture. Matching the PMOD to the installed 1C31194G01/G02 electronics and actual servo-coil resistance is essential before commissioning.
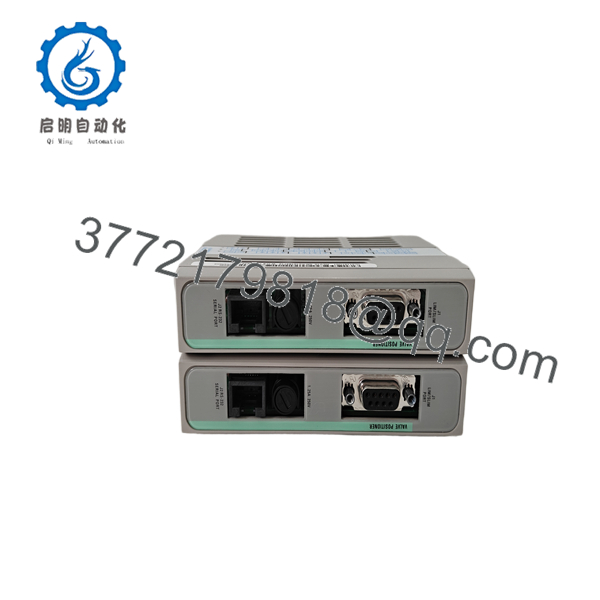
1C31197G01
1C31197G01
Installation & Configuration Guide
Stage 1 — Pre-Installation Preparation — 5–10 min
- Apply LOTO and place the controlled valve in the approved maintenance condition.
- Confirm the replacement nameplate reads 1C31197G01.
- Identify the existing Valve Positioner Electronics Module. Confirm whether it is 1C31194G01 or 1C31194G02.
- Verify the actuator/servo-coil specification. The G01 PMOD is designed around an 82 Ω servo coil.
- Photograph the existing PMOD, terminal connections, module position, and wiring.
- Back up relevant Ovation configuration and valve-positioner parameters.
- Prepare:
- ESD wrist strap
- PH1 screwdriver
- Digital multimeter
- Wire labels
- Smartphone/camera
- Obtain the applicable Ovation I/O documentation and wiring drawings before disconnecting the module.
⚠️ Do not substitute a 1C31197G02, G03, or G04 simply because the module physically fits. These variants use different resistor networks and are intended for different servo-coil loads.
Stage 2 — Removing the Existing Module — ~5 min
- Confirm the valve and actuator are in the approved maintenance state.
- Record the current valve position and any active positioner alarms.
- Label all wiring before removal.
- Disconnect field connections according to the site maintenance procedure.
- Release the module retention mechanism.
- Remove the existing PMOD carefully.
- Inspect the connector, terminal interface, and adjacent electronics module.
- Keep the old PMOD until the replacement has passed functional testing.
⚠️ Do not perform resistance measurements on a powered servo circuit. Isolate the relevant circuit before using an ohmmeter.
Stage 3 — Installing the 1C31197G01 — 5–10 min
- Verify the exact replacement: 1C31197G01.
- Confirm the installed electronics module belongs to the 1C31194G01/G02 family.
- Confirm the valve actuator uses the appropriate 82 Ω servo-coil configuration.
- Inspect the PMOD connector and PCB for physical damage.
- Use ESD protection before handling the board.
- Align the PMOD with its mating interface.
- Seat the module without excessive force.
- Reconnect field wiring according to the original documentation.
- Verify coil polarity and all associated feedback connections.
- Perform a final visual inspection before energizing.
Installation Self-Check
- 1C31197G01 verified
- 1C31194G01/G02 electronics module verified
- 82 Ω servo coil verified
- Wiring documented
- Connector inspected
- PMOD fully seated
- ESD precautions maintained
- Configuration backup completed
Stage 4 — Power-On & Testing — 10–15 min
- Perform a visual inspection before applying power.
- Restore the Ovation I/O supply according to the approved procedure.
- Check module and system status indications.
- Confirm that the Valve Positioner is recognized by the Ovation system.
- Verify valve-position feedback against the physical valve position.
- Apply a controlled position command.
- Check that the actuator responds in the correct direction.
- Verify the positioner reaches representative low, mid, and high command points.
- Monitor for excessive coil current, position oscillation, or position feedback error.
- Do not return the valve to automatic process control until command, feedback, and final-position behavior have been verified.
Supplier Acceptance / QC Checklist
For a shutdown-critical spare, the acceptance record should include:
- Exact 1C31197G01 part-number verification
- PCB and connector visual inspection
- Serial/traceability information where available
- ESD-controlled handling
- Compatibility verification against the 1C31194G01/G02 electronics
- Servo-coil resistance/configuration verification
- Controlled functional testing where a suitable Ovation test assembly is available
- Electrical safety testing appropriate to the test procedure
- Final QC inspection
- ESD-safe packaging
For this PMOD, a power-on test alone is not enough. The important compatibility check is the relationship between the PMOD resistor network and the installed servo-coil load.
Technical Pitfall & Survival Guide
1. The G01/G02/G03/G04 Variants Are Not Interchangeable
The Ovation manual specifies four Valve Positioner PMOD groups:
- 1C31197G01: 330 Ω resistors, 82 Ω servo coils, up to ±24.9 mA
- 1C31197G02: 360 Ω resistors, 250 Ω servo coils, up to 16.8 mA
- 1C31197G03: 240 Ω resistors, 1,000 Ω servo coils, up to 8.3 mA
- 1C31197G04: 160 Ω resistors, 125 Ω servo coils, up to 36 mA; only two coils may be driven
These are electrical variants, not merely revision numbers.
2. Do Not Mistake the PMOD for the Electronics Module
The 1C31197G01 is a Personality Module. The Valve Positioner Electronics Module is in the 1C31194G01/G02 family. Treating the two part numbers as equivalent can result in ordering the wrong component.
3. Verify the Servo-Coil Resistance
Before installing G01, confirm the actual coil specification. An 82 Ω G01 configuration should not be selected merely because the old board has a similar physical appearance.
4. Check the Fuse
The Ovation documentation identifies a 1.25 A, 250 V fast-acting fuse for the 1C31197G01–G04 Valve Positioner PMOD family. Check the protection circuit during maintenance and do not install an arbitrary fuse rating.
5. Be Careful With Aftermarket Specifications
Current supplier pages sometimes describe 1C31197G01 as a complete “Valve Positioner Control Module” and publish generic voltage, temperature, or communication specifications. The Emerson reference manual is more precise: 1C31197G01 is the Valve Positioner Personality Module, with its defining electrical characteristic being the 82 Ω coil interface.
Frequently Asked Questions (FAQ)
1. What is Emerson 1C31197G01?
1C31197G01 is an Emerson Ovation Valve Positioner Personality Module (PMOD). It forms part of the Valve Positioner assembly and is electrically configured for 82 Ω servo coils.
2. Which electronics module is used with 1C31197G01?
The Ovation documentation identifies 1C31194G01 and 1C31194G02 as the Valve Positioner Electronics Modules that can be used with the 1C31197G01–G04 PMOD family.
3. What servo coil does 1C31197G01 support?
The G01 PMOD uses a 330 Ω resistor network for 82 Ω servo coils, providing up to approximately ±24.9 mA according to the Ovation I/O Reference Manual.
4. Can I replace 1C31197G01 with 1C31197G02?
Not as a direct substitution without checking the servo coil. G02 is designed for a different coil resistance and current characteristic. The four PMOD variants have different electrical configurations.
5. Is 1C31197G01 a complete valve positioner?
No. It is the Personality Module portion of the Valve Positioner assembly. The electronics module is separately identified as 1C31194G01 or 1C31194G02.
6. Is 1C31197G01 an obsolete component?
It is a legacy Ovation component and is primarily encountered as a replacement/maintenance spare for existing systems. Current aftermarket listings show availability, but actual condition and stock status vary by supplier.
7. What should I verify before purchasing?
Verify 1C31197G01, the installed 1C31194G01/G02 electronics module, the servo-coil resistance, terminal/base configuration, and actual product condition. For critical valve-control applications, request photographs of the nameplate and a functional-test report rather than relying solely on a catalog description.



