
 WhatsApp: +86 16626708626
 Email:
  Phone: +86 16626708626
Description
3. Key Technical Specifications
| Parameter | Value |
|---|---|
| Model | 08G20G4-24P |
| Product Type | Layer 2 Managed Gigabit PoE+ Switch |
| Ethernet Ports | 24 × 10/100/1000Base-T RJ45 |
| Uplink Ports | 4 × 1 Gb SFP |
| Switching Capacity | 56 Gbps |
| Forwarding Rate | 41.7 Mpps |
| PoE Standard | IEEE 802.3af / IEEE 802.3at |
| Total PoE Budget | 375 W (370 W in some hardware revisions) |
| Maximum PoE Output | Up to 30 W per port |
| MAC Address Table | 16,000 entries |
| VLAN Support | Up to 255 Dynamic VLANs (4,094 VLAN IDs) |
| Packet Buffer | 1.5 MB |
| Jumbo Frame Support | Up to 12 KB |
| Management | CLI, Web GUI, SNMP, RMON |
| Power Input | 100–240 VAC, 50–60 Hz |
| Operating Temperature | 0 °C to 50 °C |
| Optional Redundant Power | Supported |
Verify hardware revision and firmware compatibility before deployment, particularly when integrating with existing Enterasys stacking or management environments.
4. Product Introduction
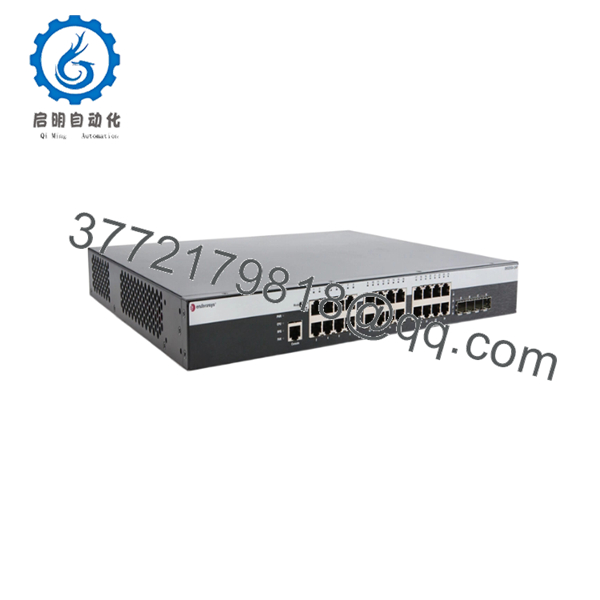
The Enterasys 08G20G4-24P is a managed Layer 2 Gigabit Ethernet switch in the Enterasys 800 Series. It provides twenty-four IEEE 802.3af/802.3at PoE-enabled Gigabit ports together with four dedicated SFP uplink interfaces, making it suitable for enterprise edge networks, IP surveillance, wireless access, and industrial Ethernet deployments.
In field deployments, this switch is commonly selected when maintaining existing Enterasys infrastructures because it combines wire-speed forwarding, a substantial PoE power budget, and mature management features without requiring changes to established network architectures.

- 08G20G4-24P
5. Installation & Configuration Guide
Stage 1 – Pre-Installation Preparation (10 minutes)
⚠️ Safety First
- Notify operations of scheduled network downtime.
- Save the running configuration.
- Lock out and tag out the AC power source.
- Wait at least five minutes before opening the equipment rack.
Tools Required
- ESD wrist strap
- PH1 screwdriver
- Fluke 115 (or equivalent) multimeter
- Cable labels
- Smartphone for documenting connections
Data Backup
- Export startup and running configuration.
- Record management IP address.
- Save VLAN database.
- Photograph all fiber and copper connections.
- Document SFP locations before removal.
Stage 2 – Removing the Existing Switch (10 minutes)
- Label every Ethernet and fiber connection.
- Disconnect all network cables.
- Remove SFP modules carefully.
- Disconnect AC power.
- Remove rack mounting screws.
- Lift the switch evenly from the rack.
⚠️ Keep the original switch available until the replacement has successfully completed operational testing.
Stage 3 – Installing the Replacement (10 minutes)
- Wear a grounded ESD wrist strap.
- Verify the replacement is model 08G20G4-24P.
- Install the switch into the rack.
- Tighten mounting screws evenly.
- Install SFP modules in their original locations.
- Reconnect Ethernet cables.
- Connect the AC power cord.
Self-Checklist
- ☑ Correct model installed
- ☑ Rack secured
- ☑ SFPs installed correctly
- ☑ Cabling restored
- ☑ Ground connection verified
Stage 4 – Power-On & Testing (10–15 minutes)
Pre-Power Check
- Verify AC input voltage.
- Inspect for damaged network cables.
- Confirm no RJ45 connector is damaged.
Startup Procedure
- Apply power.
- Observe LED self-test.
- Verify the Power LED remains steady.
- Log in through CLI or Web management.
- Confirm firmware version.
- Restore saved configuration if required.
- Verify VLANs.
- Test PoE operation.
- Verify SFP uplinks.
⚠️ Troubleshooting Note
- Red fault indicator: Verify firmware compatibility and hardware revision.
- PoE devices fail to power: Check the remaining PoE budget and port priority configuration.
- SFP uplinks remain down: Confirm module compatibility and fiber polarity.
Common Technical Pitfalls
❗ Firmware Revision Mismatch
I’ve seen maintenance teams replace a switch during a short outage only to discover that the older management platform rejected the newer firmware. Record the existing firmware version before replacement and request a compatible revision whenever possible.
❗ Configuration Backup
This is one of the easiest mistakes to avoid. Export the running configuration before disconnecting the original switch. Rebuilding VLANs and ACLs from memory usually takes much longer than expected.
❗ SFP Compatibility
Not every Gigabit SFP is accepted by legacy Enterasys hardware. Verify the optical module type and firmware support before installation.
❗ PoE Power Budget
Although the switch supports up to 375 W of PoE, calculate the connected device load carefully. Twenty-four high-power devices can quickly consume the available budget, particularly with IEEE 802.3at equipment.
❗ Electrostatic Discharge (ESD)
Always handle the switch using an ESD strap and grounded work surface. Static damage frequently produces intermittent faults that are difficult to diagnose after installation.
Keep these checks in mind and you’ll avoid most of the rework encountered during legacy Enterasys switch replacements.
6. Frequently Asked Questions (FAQ)
Q1. Can I replace the 08G20G4-24P without shutting down the network?
No. This is not a hot-swappable switch. Shut down the unit properly before disconnecting power or network connections to avoid service interruption and possible configuration corruption.
Q2. Is the 08G20G4-24P discontinued?
Yes. The model belongs to the legacy Enterasys 800 Series and is no longer in active production. Most available inventory consists of unused surplus or professionally tested refurbished equipment.
Q3. Does it support IEEE 802.3at PoE+?
Yes. The switch supports both IEEE 802.3af and IEEE 802.3at standards with up to 30 W available per port and a total PoE budget of approximately 375 W, depending on hardware revision.
Q4. Will replacing the switch erase my network configuration?
If you replace only the hardware, the configuration is not transferred automatically. Save the running configuration from the original switch and restore it to the replacement during commissioning.
Q5. Why is New Surplus inventory less expensive than OEM pricing?
The hardware is discontinued, so pricing is determined by secondary-market availability rather than the original manufacturer list price. New Surplus equipment is unused legacy inventory, while refurbished units have been previously deployed and fully tested.
Q6. What quality checks are performed before shipment?
Each unit is processed through a documented inspection procedure:
- OEM identification and serial number verification
- Visual inspection for corrosion, damaged connectors, and repair marks
- Power-on verification
- Port and link testing
- PoE output verification
- Management interface validation (CLI/Web/SNMP)
- Firmware version documentation
- Final QC inspection
- ESD-safe packaging with protective cushioning
Test reports, photographs, and power-on videos are available upon request.



