
 WhatsApp: +86 16626708626
 Email:
  Phone: +86 16626708626
Description
3. Key Technical Specifications
| Parameter | Value |
|---|---|
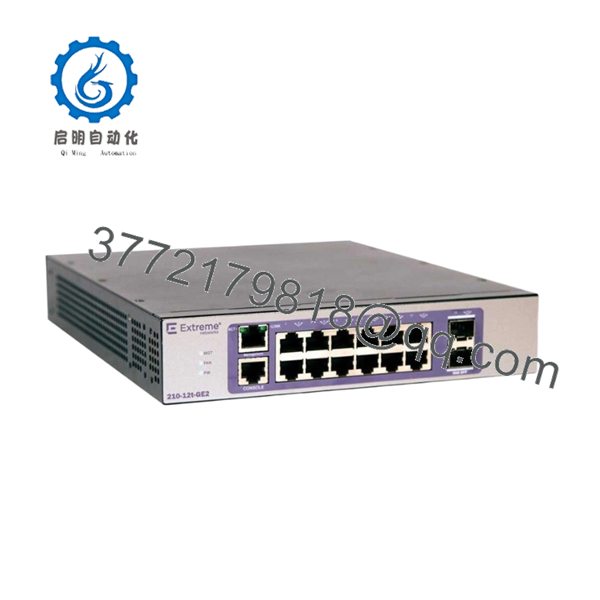
| Product Model | 210-12t-GE2 |
| Manufacturer | Extreme Networks |
| Product Family | ExtremeSwitching 210 Series |
| Product Type | Layer 2 Managed Ethernet Switch |
| Copper Ports | 12 × 10/100/1000BASE-T RJ45 |
| Fiber Uplinks | 2 × 1 GbE SFP (unpopulated) |
| Switching Features | Layer 2 switching with static IPv4 routing |
| Management | Web GUI, CLI, SNMP, SSH |
| Power Input | 100–240 VAC, 50/60 Hz, 0.5 A maximum |
| Maximum Power Consumption | 18 W |
| Cooling | Fanless |
| Operating Temperature | 0 °C to 50 °C (32 °F to 122 °F) |
| Dimensions | 20.9 × 25.5 × 4.3 cm (8.23 × 10.05 × 1.69 in) |
| Weight | Approximately 1.51 kg (3.33 lb) |
| Mounting | Desktop, wall mount, or rack mount with optional kit |
Compatibility Note: The 210 Series is intended for access-layer deployments and provides Layer 2 switching with static routing. It does not support the advanced Layer 3 routing, ExtremeXOS feature set, or hardware stacking available on higher-end ExtremeSwitching platforms. Verify your network requirements before selecting it as a replacement.
4. Product Introduction
The Extreme Networks 210-12t-GE2 is a compact managed Gigabit Ethernet switch designed for branch offices, industrial control panels, laboratories, and small enterprise access networks. It provides twelve Gigabit copper interfaces, two SFP uplink ports, and managed Layer 2 switching with static routing capabilities.
The fanless design makes this model suitable for quiet control rooms and low-noise installations. For facilities that do not require dynamic routing or advanced switching features, it offers straightforward deployment and lower power consumption while maintaining centralized network management.
5. Installation & Configuration Guide
Stage 1 – Pre-Installation Preparation (Estimated Time: 10 Minutes)
⚠️ Safety First
- Notify operations of the planned maintenance.
- Confirm all connected equipment can tolerate a temporary network interruption.
- Apply Lock-Out/Tag-Out procedures where applicable.
- Disconnect AC power.
- Wait at least 5 minutes before handling the switch.
Tools Required
- Grounded ESD wrist strap
- PH1 screwdriver
- Fluke 115 digital multimeter
- Cable labels
- Smartphone for documenting cable locations
Data Backup
- Save the running configuration.
- Record:
- Management IP address
- VLAN configuration
- Static routes
- Port settings
- User accounts
- Photograph all cable connections.
- Record installed SFP module types.
Stage 2 – Removing the Old Switch (Estimated Time: 5 Minutes)
- Disconnect AC power.
- Label every Ethernet cable.
- Remove installed SFP transceivers.
- Disconnect console and management cables.
- Remove mounting hardware.
- Lift the switch straight out.
⚠️ Never remove fiber modules by pulling on the fiber cable. Remove the SFP module correctly before disconnecting the fiber.
Inspect RJ45 ports, SFP cages, and the power connector for physical damage.
Keep the original unit available until the replacement completes operational testing.
Stage 3 – Installing the New Switch (Estimated Time: 10 Minutes)
- Wear a grounded ESD wrist strap.
- Verify the replacement model is 210-12t-GE2.
- Install the switch securely.
- Install compatible SFP modules if required.
- Restore the saved configuration.
- Reconnect network cables according to the photographs.
Self-Checklist
- Model verified
- Configuration restored
- SFP modules installed
- VLAN configuration verified
- Cables labeled correctly
- Ground connection verified
Stage 4 – Power-On & Testing (Estimated Time: 10 Minutes)
Pre-Power Check
- Verify AC input voltage.
- Confirm protective grounding.
- Inspect power cord condition.
Power-On Steps
- Apply AC power.
- Verify Power and System LEDs.
- Access the management interface.
- Confirm:
- Management IP
- Port status
- VLAN database
- Static routes
- Test communication with connected PLCs, HMIs, workstations, and servers.
- Verify uplink operation through the SFP ports if installed.
⚠️ Troubleshooting Note
No network communication
- Verify VLAN assignments.
- Check management IP configuration.
- Confirm SFP module compatibility.
- Verify cable pinout and link status LEDs.

- 210-12t-GE2
Engineering Notes from Field Experience
❗ Configuration Backup
This switch stores its operating configuration locally. I’ve seen technicians replace perfectly good hardware only to discover the saved VLAN configuration was never backed up. The replacement came online, but every connected device lost communication because the switch was running factory defaults. Always export the configuration before maintenance.
❗ SFP Module Compatibility
Not every 1 Gb SFP module works reliably across different switch families. Verify the optical module type before installation. A mismatched transceiver may prevent link establishment even though the switch itself is functioning normally.
❗ Static Routing Limitations
One common mistake is assuming the 210 Series offers the same routing capabilities as an EXOS-based switch. It does not. If your existing network depends on OSPF, BGP, or advanced policy routing, this platform is not a direct functional replacement.
❗ Power and Cooling
The 210-12t-GE2 is fanless, which reduces noise and maintenance. Even so, leave adequate clearance around the ventilation openings. I’ve seen compact control cabinets run 15–20 °F above room temperature simply because airflow was blocked by bundled cables.
❗ Electrostatic Discharge (ESD)
A fanless switch is still vulnerable to ESD damage. I once watched a technician install one without grounding himself after unpacking it from the shipping carton. The switch booted, but one copper port intermittently dropped packets under load. Use an ESD wrist strap every time.
Keep these checks in mind and you’ll avoid most of the troubleshooting that extends scheduled maintenance windows.
6. Frequently Asked Questions (FAQ)
Q1. Can I hot-swap the 210-12t-GE2?
No. This model is not designed for hot replacement. Disconnect power before removing or installing the switch to prevent hardware damage and network instability.
Q2. Does the 210-12t-GE2 support Layer 3 routing?
Only basic static IPv4 routing. It does not provide advanced Layer 3 protocols such as OSPF or BGP. If your application requires dynamic routing, consider a higher-tier ExtremeSwitching platform.
Q3. Is this switch fanless?
Yes. The 210-12t-GE2 uses a fanless cooling design and supports operation from 0 °C to 50 °C, making it suitable for quiet office and control room environments.
Q4. Will replacing the switch erase my configuration?
Yes. The configuration is not transferred automatically to replacement hardware. Export the startup configuration before maintenance and restore it after installation.
Q5. Why is New Surplus equipment less expensive than OEM pricing?
New Surplus inventory typically comes from canceled projects, distributor overstock, or unused maintenance stock. The equipment has not been placed into production service but may have been stored for an extended period. Verify serial numbers, inspection records, and functional test documentation before deployment.
Q6. What quality inspections should be completed before shipment?
A documented inspection process should include:
- OEM serial number verification and traceability.
- Anti-counterfeit inspection.
- Visual inspection for corrosion, scratches, discoloration, or repair marks.
- Power-on self-test.
- Management interface verification.
- Copper and SFP port communication testing.
- Continuous operation under load for more than 24 hours.
- Insulation resistance testing (500 V Megger, where applicable).
- Firmware documentation and configuration backup.
- Final QC approval, ESD packaging, protective cushioning, and heavy-duty export carton.
Test reports, startup photographs, and operational videos should be available upon request before shipment.



