
 WhatsApp: +86 16626708626
 Email:
  Phone: +86 16626708626
Description
Key Technical Specifications
| Parameter | Value |
|---|---|
| Manufacturer | Fuji Electric |
| Model | FRN5 |
| Product Type | AC Drive / Variable Frequency Drive |
| Product Family | FRENIC |
| Primary Function | AC motor speed and torque control |
| Input Voltage | Variant-dependent; verify complete nameplate |
| Output Voltage | Dependent on input class and drive configuration |
| Motor Capacity | Variant-dependent |
| Frequency Range | Model/configuration dependent |
| Control Method | Configuration dependent |
| Communication | Optional/interface-dependent on specific FRENIC variant |
| Installation | Industrial panel or enclosure installation, depending on model |
| Application | Pumps, fans, conveyors, machinery, and general motor control |
| Lifecycle | Exact status depends on the complete FRN5 designation |
Important identification note: FRN5 appears to be an incomplete Fuji Electric drive designation. Fuji Electric FRENIC drives normally use longer catalog numbers containing additional characters that identify voltage class, capacity, enclosure/configuration, and other options. Do not select a replacement, parameter set, or motor application based on FRN5 alone. The complete nameplate model number is required.
Product Introduction
The Fuji Electric FRN5 designation refers to equipment associated with Fuji Electric’s FRENIC AC drive platform, used for variable-frequency control of industrial motors. FRENIC drives are applied across machinery, conveyors, pumps, fans, and other motor-driven equipment where controlled speed and acceleration are required.
For maintenance procurement, the critical issue is identifying the complete FRN5 nameplate designation before replacement. Voltage class, motor capacity, control configuration, and available functions can vary between FRENIC models. Match the full catalog number rather than ordering from the shortened reference.
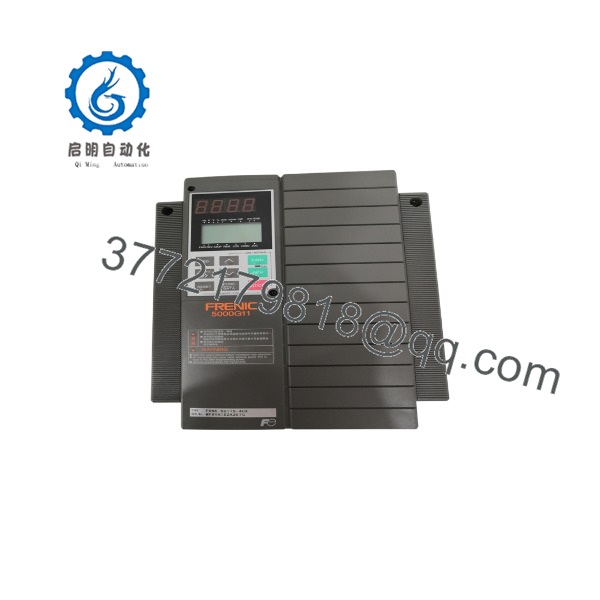
FRN5
Installation & Configuration Guide
Stage 1: Pre-Installation Preparation — Approximately 10 Minutes
⚠️ Safety First
- Notify operations and confirm the motor/process can be stopped safely.
- Stop the motor using the approved operating procedure.
- Apply lockout/tagout (LOTO) to the drive input power.
- Wait the period specified by the Fuji Electric manual for DC-bus discharge.
- Verify the DC bus voltage with a properly rated multimeter before touching terminals.
- Never rely solely on the keypad display or a status LED to prove the drive is de-energized.
Tools Required
- ESD wrist strap
- Insulated, appropriately rated screwdriver
- Digital multimeter
- Wire labels
- Smartphone/camera
- Torque screwdriver where specified by the installation documentation
Data Backup
Before disconnecting the existing drive:
- Photograph the complete nameplate.
- Record the full Fuji Electric catalog/model number.
- Photograph all power and control terminals.
- Record motor nameplate data.
- Save drive parameters using the applicable Fuji Electric keypad/software method.
- Record acceleration/deceleration times, frequency limits, motor protection settings, and control source.
- Photograph any option cards or communication interfaces.
⚠️ The full model number is the first thing to verify. by itself is not enough.
Stage 2: Removing the Old Drive — Approximately 5–10 Minutes
- Confirm LOTO is active.
- Verify the DC bus has discharged to a safe voltage.
- Remove the drive cover/access panel as specified by the model.
- Photograph terminal wiring before removal.
- Label incoming power, motor output, control, and communication wiring.
- Disconnect wiring without pulling on conductors.
- Remove the drive’s mounting hardware.
- Lift or slide the drive out while supporting its weight.
- Inspect the enclosure, wiring, terminals, and cooling path.
Keep the original drive available until commissioning is complete.
Stage 3: Installing the Replacement — Approximately 10 Minutes
- Verify the complete replacement model number against the original nameplate.
- Confirm input voltage and motor capacity are appropriate.
- Check the enclosure and mounting dimensions.
- Install the drive using the manufacturer’s specified mounting arrangement.
- Reconnect input power and motor conductors according to the applicable wiring diagram.
- Reconnect control terminals using the photographs and approved drawings.
- Confirm grounding connections.
- Verify communication wiring and shield termination where applicable.
- Tighten terminals to the manufacturer’s specified torque.
Self-Checklist
- Complete model number verified
- Voltage class verified
- Motor capacity verified
- Input wiring correct
- Motor output wiring correct
- Ground connection secured
- Control wiring checked
- Communication wiring checked
- Mounting hardware secured
Stage 4: Power-On & Testing — Approximately 10–20 Minutes
- Perform a final wiring inspection.
- Confirm no exposed conductors can contact adjacent terminals.
- Restore power according to the site’s startup procedure.
- Check the drive display for alarms or fault codes.
- Verify programmed motor parameters against the motor nameplate.
- Confirm the commanded frequency source.
- Confirm the run command source.
- Start the motor at low speed under controlled conditions.
- Verify rotation direction.
- Check motor current against expected operating conditions.
- Test acceleration and deceleration.
- Verify the external PLC/DCS command and feedback signals.
⚠️ If the motor rotates in the wrong direction, stop immediately and correct the approved motor-output wiring procedure. Do not simply increase the speed reference to test the problem.
Technical Pitfall & Survival Guide
❗ 1. Incomplete Model Number
The biggest issue with is identification. Fuji Electric uses extended FRENIC catalog numbers.
Avoidance: Photograph the complete nameplate before ordering. One missing suffix can represent a different voltage class or capacity.
❗ 2. Parameter Loss
Replacing an AC drive does not automatically transfer the old parameter set.
Avoidance: Back up the existing parameters before removal. Pay particular attention to motor data, command sources, frequency limits, acceleration/deceleration, electronic thermal protection, and communication settings.
I’ve seen replacement drives powered up correctly but refuse to run because the original drive received its run command from a PLC while the replacement was still configured for keypad control.
❗ 3. Motor Data Mismatch
Do not assume that a replacement drive can use generic motor settings.
Verify:
- Rated voltage
- Rated current
- Rated frequency
- Rated speed
- Motor capacity
- Motor control mode
Incorrect motor data can produce poor acceleration, excessive current, nuisance trips, or unstable operation.
❗ 4. Control Terminal Wiring
Control-terminal functions must be checked against the exact FRENIC model manual.
A terminal that looks familiar is not automatically equivalent between drive families or revisions.
Take photographs before removal. Then verify every connection against the applicable manual.
❗ 5. DC-Bus Voltage
This is the safety issue that gets underestimated.
An AC drive contains energy storage on its DC bus after incoming power has been removed. Do not open the drive and start handling terminals immediately after shutdown.
Follow the manufacturer’s discharge procedure and verify voltage with a properly rated meter.
Frequently Asked Questions (FAQ)
Can the Fuji Electric be hot-swapped?
No, do not treat it as a hot-swappable component. An AC drive contains hazardous voltage and stored DC-bus energy. Isolate the supply, follow LOTO, wait for the manufacturer’s specified discharge period, and verify the DC bus before working on the drive.
Is a complete Fuji Electric model number?
Usually, no. is insufficient to determine the exact voltage, capacity, and configuration. Fuji Electric FRENIC drives use longer catalog designations. For procurement, provide a photograph of the complete nameplate or the entire model string.
Will I lose the motor-drive parameters when replacing the drive?
The old drive’s parameters do not automatically transfer to the replacement. Back up the parameter set before removal whenever the existing drive is still operational. If communication software or a keypad is used for configuration, preserve that data as part of the maintenance record.
Can I use any FRENIC drive as a replacement for ?
No. Match the complete model number, input voltage class, motor capacity, control requirements, enclosure requirements, and installed options. A drive with the same general FRENIC family designation can still be electrically unsuitable for the application.
What should I verify before purchasing a Fuji Electric ?
At minimum, provide the supplier with:
- Complete model/catalog number
- Nameplate photograph
- Input voltage
- Motor rated power
- Motor rated current
- Application
- Required control interface
- Communication option, if installed
- Existing drive condition
- Required delivery date
This avoids the common problem of receiving a physically similar drive that cannot be configured as a direct replacement.
Is a New Surplus the same as a factory-new current-production drive?
Not necessarily. “New Surplus” generally means unused inventory that may have been stored outside the OEM’s current production channel. Ask for photographs of the actual unit, nameplate, serial number, packaging condition, and a test report. Do not confuse New Surplus with Factory Sealed Current Production.
What is the direct replacement if is obsolete?
There is no responsible way to specify a direct replacement from alone. The complete Fuji Electric model number is required first. Once the full catalog number is known, the replacement can be checked against Fuji Electric’s current FRENIC product documentation, including voltage class, capacity, control method, and option compatibility.



