
 WhatsApp: +86 16626708626
 Email:
  Phone: +86 16626708626
Description
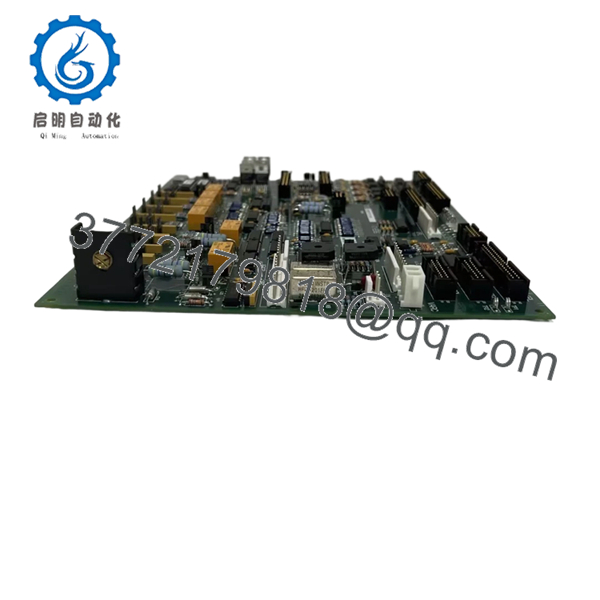
3. Key Technical Specifications
| Parameter | Value |
| Manufacturer | GE Energy / General Electric |
| Board Function | Signal Conditioning and I/O Distribution |
| Input Signals | Contact Inputs (Dry/Wet) |
| Output Signals | Relay Driver Outputs |
| Interface Connectors | 1PL, 2PL, and 3PL Ribbon Headers |
| Logic Voltage | 5 VDC (Onboard Logic) / 24 VDC (External I/O) |
| Revision | G1A (Group 1, Revision A) |
| Mounting | Plastic Standoff or Metal Chassis Plate |
4. Product Introduction & Supply Chain Strategy
The GE DS200TCQCG1A serves as the primary expansion interface for the Mark V control system, facilitating high-density digital and analog signal routing. It acts as a bridge between the central processor boards and the field terminal blocks, ensuring that logic signals are properly conditioned and isolated. This board is essential for systems requiring extensive monitoring of auxiliary turbine hardware.
From a strategic procurement perspective, the TCQC board is a “high-impact” spare. Because it handles various field inputs, it is frequently exposed to external electrical transients. Choosing a “New Surplus” unit over a refurbished one is a calculated move to ensure total reliability. Refurbished TCQC boards often hide micro-fractures in the traces or degraded opto-isolators that can lead to intermittent signal “flicker,” causing nuisance alarms that are notoriously difficult to troubleshoot.
5. Installation & Configuration Guide
Stage 1: Pre-Installation (Prep & Safety)
Ensure the Mark V core is powered down and tagged out. Wear a grounded ESD wrist strap before handling the DS200TCQCG1A. Before removing the existing unit, use a marker to label all ribbon cables (1PL, 2PL, etc.) to ensure they are returned to the correct headers.
Stage 2: Removal
Carefully squeeze the locking tabs on the ribbon cable connectors to release them—never pull on the cables themselves. Unscrew the mounting hardware from the cabinet wall or rack. Slide the board out, ensuring you do not snag any adjacent wiring.
Stage 3: Installation (Clone & Seat)
Verify that the jumper settings on the new DS200TCQCG1A match your original board. These jumpers often define the “Wet” vs. “Dry” contact logic levels. Seat the board onto its standoffs and secure the mounting screws. Firmly press the ribbon cables into their respective headers until the locking tabs click.
Stage 4: Power-On & Testing
Apply control power and monitor the HMI for any I/O communication errors. Use the “Signal Forced” function in the control software to verify that the digital inputs and outputs on the TCQC board are responding correctly to field devices.

- DS200TCQCG1A
6. Firmware/Software Versions & Upgrade Notes
The DS200TCQCG1A G1A revision is the baseline architecture for the TCQC series. While later revisions exist, the G1A is the most widely compatible across various Mark V software kernels. Warning: If your system configuration (IO.ASG) expects a specific hardware revision, replacing it with a different Group (e.g., G2) may cause a “Board Mismatch” fault. Always verify the Group (G1) matches your original hardware to maintain plug-and-play compatibility.
7. Frequently Asked Questions (FAQ)
What is the difference between “New Surplus” and “Refurbished” for this board?
New Surplus means the board has zero run-time hours and has been kept in protected storage. Refurbished boards are used parts that have been cleaned and tested; they carry the “thermal history” of their previous environment, making them more prone to failure.
Can this board handle 125 VDC field signals?
Depending on the jumper configuration and the specific input circuit, the TCQC can interface with various voltage levels. Always check your site-specific wiring diagram before applying 125 VDC to any input pins.
Does the TCQC board require any software programming?
No, the board itself is hardware-driven. However, your Mark V control logic must be configured to recognize the I/O points associated with the board’s slot location.
Why does my system show an I/O fault after I swapped the board?
The most common cause is a ribbon cable that is not fully seated or a jumper that was not moved from the old board to the new one. Double-check all physical connections and jumper positions.
Is this board compatible with both , , and cores?
Yes, the TCQC can be used across various cores in the Mark V system, provided the configuration logic and hardware addressing are set correctly.


