
 WhatsApp: +86 16626708626
 Email:
  Phone: +86 16626708626
Description
3. Key Technical Specifications
| Parameter | Value |
|---|---|
| Manufacturer | GE Panametrics |
| Model | MOISTURE.IQ-1-6-1-1-1-0-0 |
| Product Type | Multi-Channel Trace Moisture Analyzer |
| Measurement Principle | Aluminum Oxide Moisture Sensor (M Series / MIS Series compatible) |
| Measurement Channels | 1 to 6 configurable channels |
| Display | 800 × 480 WVGA color touch screen |
| Supported Measurements | Dew Point, Frost Point, PPMv, PPBv, Relative Humidity, Moisture by Weight |
| Probe Compatibility | M Series, Moisture Image Series (MIS), MISP2 |
| Communications | RS-232, RS-485, USB, Ethernet, Modbus |
| Analog Outputs | Two outputs per installed channel |
| Alarm Relays | Two measurement relays per channel plus one common fault relay |
| Data Logging | Micro SD storage, multiple simultaneous logs |
| Operating Temperature | -20 °C to +60 °C |
| Storage Temperature | -40 °C to +70 °C |
| Operating Pressure | Vacuum to 5,000 psig (probe dependent) |
| Warm-Up Time | Approximately 5 minutes |
| Enclosure | Weatherproof or explosion-proof configurations available |
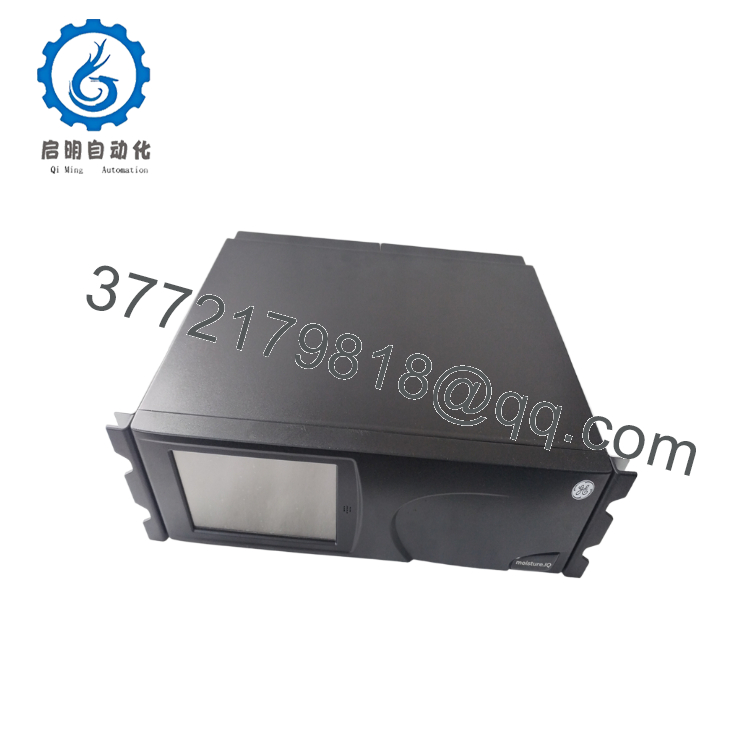
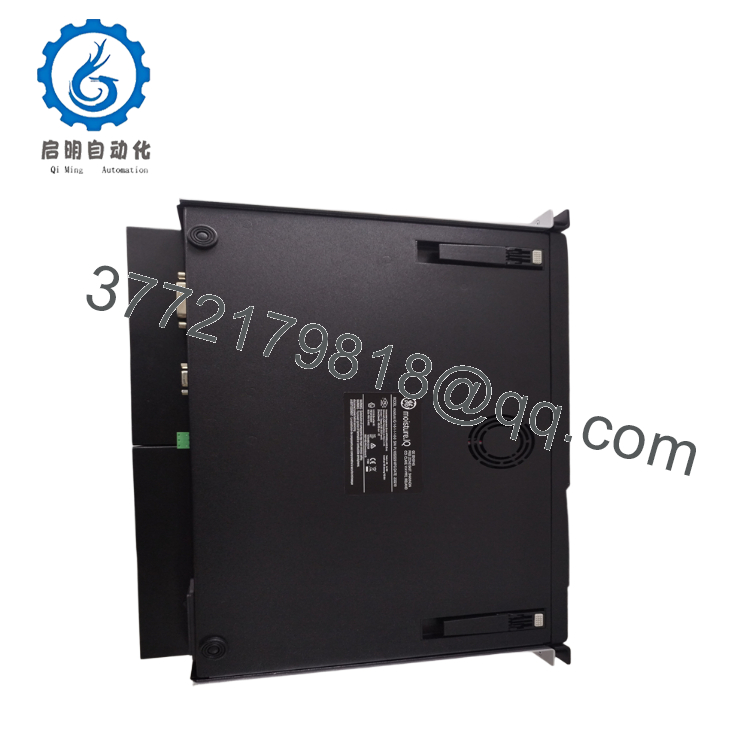
The GE Panametrics moisture.IQ is a modular, microprocessor-based moisture analyzer designed for continuous measurement of trace moisture in industrial gases. Depending on the installed modules, it can monitor moisture, temperature, pressure, oxygen, and auxiliary process signals from one to six independent channels.
4. Product Introduction
The GE MOISTURE.IQ-1-6-1-1-1-0-0 is a configurable industrial moisture analyzer used for continuous monitoring of trace moisture in natural gas, compressed air, petrochemical processes, semiconductor manufacturing, and power generation. It works with GE Panametrics M Series and Moisture Image Series probes to provide accurate dew point and moisture measurements.
Its modular architecture allows engineers to expand the system with additional measurement channels, analog outputs, alarm relays, and communication interfaces without replacing the complete analyzer. Verify the complete option code before ordering because hardware modules are configuration-dependent.
5. Installation & Configuration Guide
Stage 1 – Pre-Installation Preparation (20 Minutes)
⚠️ Safety First
- Notify operations before removing the analyzer.
- Isolate the analyzer from the process sample.
- Apply Lockout/Tagout procedures.
- Disconnect AC power.
- Allow the analyzer to complete shutdown before servicing.
Tools Required
- ESD wrist strap
- PH1 screwdriver
- Fluke 115 digital multimeter
- Laptop with Panametrics software
- Ethernet cable
- Smartphone for documenting wiring
Data Backup
Before replacement:
- Export analyzer configuration.
- Record IP address and communication settings.
- Save alarm limits.
- Record firmware revision.
- Photograph all terminal wiring.
- Record installed option modules.
Stage 2 – Removing the Existing Analyzer (15 Minutes)
- Disconnect sample lines if applicable.
- Label all field wiring.
- Disconnect communication cables.
- Remove power wiring.
- Remove mounting hardware.
- Carefully remove the analyzer.
Inspect:
- Terminal blocks
- Communication connectors
- Moisture probe cables
- Enclosure gasket
- Sample fittings
⚠️ Keep the existing analyzer until the replacement completes commissioning.
Stage 3 – Installing the New Analyzer (25 Minutes)
- Wear an ESD wrist strap.
- Verify the complete ordering code:
MOISTURE.IQ-1-6-1-1-1-0-0
- Install the analyzer securely.
- Reconnect probe cables.
- Connect communication wiring.
- Restore power wiring.
- Configure network parameters.
- Restore saved configuration if required.
Installation Checklist
- Model verified
- Option code verified
- Probe wiring complete
- Network configured
- Ground connection confirmed
- Sample connections leak tested

- MOISTURE.IQ-1-6-1-1-1-0-0
- MOISTURE.IQ-1-6-1-1-1-0-0
Stage 4 – Power-On & Testing (30 Minutes)
Pre-Power Inspection
- Verify supply voltage.
- Confirm proper grounding.
- Inspect moisture probe connections.
- Verify communication wiring.
Startup Procedure
- Energize the analyzer.
- Allow approximately 5 minutes for stabilization.
- Confirm touch-screen operation.
- Verify probe recognition.
- Check communication with the DCS or SCADA.
- Verify analog outputs.
- Confirm alarm operation.
- Compare readings against reference measurements if available.
⚠️ Troubleshooting Note
If moisture readings remain unstable:
- Inspect the sample system for leaks.
- Verify the probe has reached equilibrium.
- Confirm the correct probe type is configured.
- Check communication settings before replacing the analyzer.
SOP Quality Verification
1. Inbound Inspection & Traceability
Each analyzer should undergo:
- OEM label verification
- Serial number recording
- Anti-counterfeit inspection
- Module verification
- Enclosure inspection
- Connector inspection
Confirm:
- No corrosion
- No display damage
- No connector deformation
- No signs of previous repair
2. Live Functional Testing
Testing should be performed using a Panametrics moisture.IQ test bench with compatible moisture probes.
Testing includes:
- Power-on self-test
- Display verification
- Probe communication
- Ethernet and Modbus communication
- Analog output simulation
- Alarm relay testing
- Continuous operation exceeding 24 hours
- Functional verification with calibrated moisture sources
A formal Test Report should be generated.
Test photographs and videos should be available upon request.
3. Electrical Parameter Testing
Perform:
- 500 V insulation resistance test (>10 MΩ where applicable)
- Ground continuity verification
- Power supply verification
- Communication interface testing
4. Firmware & Configuration Verification
Record:
- Firmware revision
- Installed option modules
- Communication parameters
- Alarm configuration
- Calibration records
Maintain photographs of installed modules before shipment.
5. Final QC & Packaging
Final preparation includes:
- QC inspector approval
- Anti-static packaging
- Protective foam inserts
- Heavy-duty corrugated carton
- QC Passed label with inspection date
Technical Pitfalls & Survival Guide
❗ Configuration Code Mismatch
The ordering code determines the installed hardware modules.
I’ve seen engineers install a physically identical moisture.IQ only to discover it lacked the required communication or I/O module. Always compare the complete option code—not just the base model.
❗ Probe Compatibility
The analyzer supports M Series, Moisture Image Series, and MISP2 probes.
Verify the connected probe matches the analyzer configuration before commissioning. An incorrect probe definition can produce inaccurate moisture values.
❗ Sample System Leaks
Small leaks upstream of the probe can introduce atmospheric moisture and distort measurements.
Pressure-test the sample tubing after installation and use clean stainless-steel fittings where possible.
❗ Communication Configuration
Record IP addresses, Modbus settings, and serial parameters before replacing the analyzer.
A hardware replacement is straightforward, but restoring network communication often takes longer if configuration records are missing.
❗ Electrostatic Discharge (ESD)
The measurement electronics are sensitive to static discharge.
Always:
- Wear a grounded wrist strap.
- Handle option modules by their edges.
- Install the analyzer on an ESD-safe work surface.
Keep these checks in mind and you’ll avoid the majority of commissioning problems encountered during moisture analyzer replacement.
6. Frequently Asked Questions (FAQ)
Q1. What is the MOISTURE.IQ-1-6-1-1-1-0-0 used for?
It provides continuous trace moisture monitoring in industrial gas systems, including natural gas, compressed air, petrochemical processing, and power generation. It measures dew point and other moisture-related parameters using compatible Panametrics probes.
Q2. How many measurement channels does this analyzer support?
The moisture.IQ platform supports one to six configurable measurement channels, depending on the installed hardware modules.
Q3. Which moisture probes are compatible?
The analyzer supports GE Panametrics M Series, Moisture Image Series (MIS), and MISP2 moisture probes. Verify compatibility before installation.
Q4. Can I replace the analyzer without recalibrating the probes?
Usually yes, provided the existing calibrated probes are reused and the configuration is restored correctly. However, verify calibration status and compare readings against a reference after commissioning.
Q5. Why is the complete option code important?
The option code defines the installed measurement modules, communications, analog outputs, and relay configuration. Two analyzers with the same base model may have different hardware capabilities.
Q6. Why is surplus inventory often less expensive than factory pricing?
Many units originate from unused project inventory, spare-part stock, or plant modernization programs. Before purchasing, request serial number verification, functional test reports, firmware information, and warranty details.
Q7. What documentation should I request before shipment?
For critical process applications, request:
- Complete option-code verification
- Firmware revision record
- Functional test report
- Communication verification report
- 24-hour burn-in record
- Calibration documentation
- QC inspection report
- ESD packaging confirmation



