
 WhatsApp: +86 16626708626
 Email:
  Phone: +86 16626708626
Description
Key Technical Specifications
- Parameter: Model — CC-PCF901
- Parameter: Part Number — 51405047-175
- Parameter: Manufacturer — Honeywell
- Parameter: System — Honeywell Experion PKS
- Parameter: Hardware Family — Series C / CF9
- Parameter: Module Type — Control Firewall Module
- Parameter: Network Technology — Fault Tolerant Ethernet (FTE)
- Parameter: FTE Downlink Ports — 8
- Parameter: Supervisory Uplink Ports — 1
- Parameter: Total FTE Ports — 9
- Parameter: Mounting Interface — CF9 IOTA
- Parameter: Module Power Distribution — 24 VDC through the IOTA
- Parameter: Typical Companion IOTA — CC-TCF901 for Series C; DC-TCF901 for Series C Mark II
- Parameter: Application — FTE distribution between in-cabinet controllers/Series C modules and the supervisory FTE network
- Parameter: Firmware Consideration — Hardware and firmware revision must be checked against the installed Experion PKS release
Honeywell’s planning documentation describes the CF9 as providing FTE distribution to cabinet network nodes, while the CF9 IOTA provides the physical connections for eight in-cabinet FTE cables and a ninth supervisory-network uplink.
A Honeywell system notice also specifically identifies CC-PCF901 as the CF9 Control Firewall and documents firmware revisions applicable to hardware revision D and later.
Product Introduction
The Honeywell CC-PCF901 is a CF9 Control Firewall Module for Experion PKS Series C control systems. It provides nine FTE connections: eight for in-cabinet network nodes and one uplink toward the supervisory FTE network. The module mounts on the appropriate CF9 IOTA rather than operating as a standalone Ethernet switch.
For replacement work, the important checks are the exact CC-PCF901 part number, cabinet/IOTA version, hardware revision, and installed Experion release. Do not substitute a generic Ethernet switch simply because the port count appears similar; the CF9 is part of the engineered Experion control-network architecture.
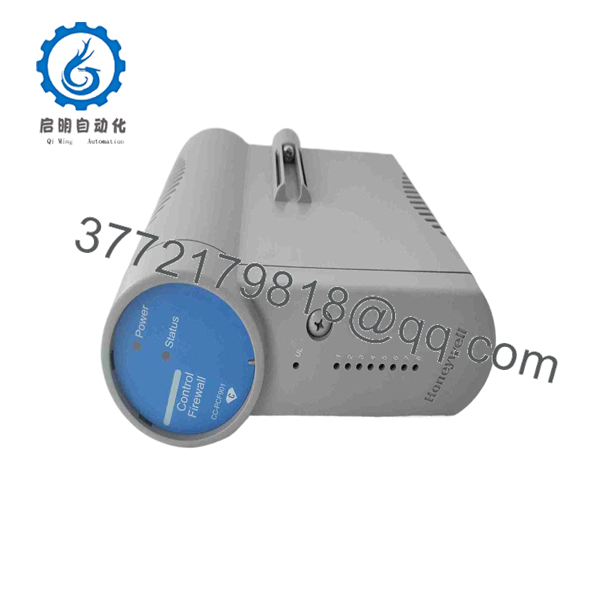
CC-PCF901
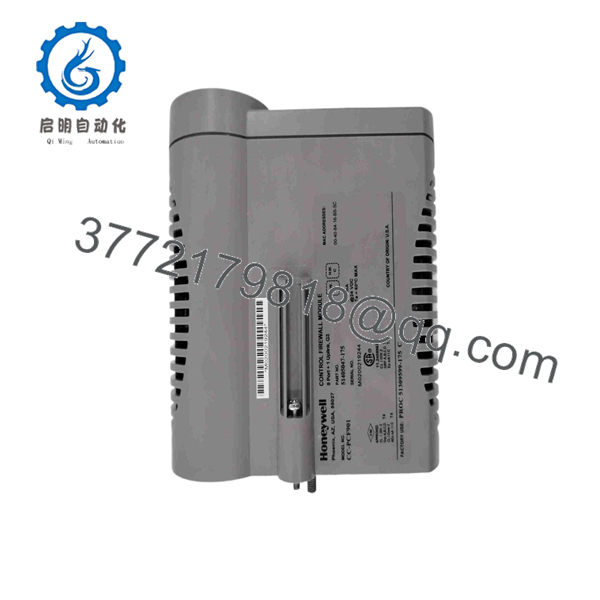
CC-PCF901
Installation & Configuration Guide
Stage 1: Pre-Installation Preparation — About 5–10 Minutes
⚠️ Safety First: Notify operations, place the affected control area in a verified safe state, and follow the site’s approved LOTO procedure before removing the module. Do not assume the module is safe to remove merely because its network links appear inactive.
Tools Required:
- ESD wrist strap and grounded ESD work surface
- PH1 screwdriver where applicable
- Calibrated digital multimeter
- Wire/cable identification labels
- Smartphone or camera for documentation
- Approved Honeywell documentation for the installed Experion release
Data Backup:
- Record the existing CC-PCF901 part number and hardware revision.
- Photograph the module, IOTA, FTE cable arrangement, and LED condition.
- Label each FTE cable before removal.
- Record which cable connects to the supervisory uplink.
- Record the cabinet and IOTA model number.
- Capture the existing Experion configuration and network documentation.
- Verify the installed Experion release and applicable Honeywell firmware documentation.
⚠️ Do not rely on cable position from memory. The ninth port has a different network role from the eight in-cabinet connections. Honeywell documentation identifies it as the supervisory-network uplink.
Stage 2: Removing the Old Module — About 5 Minutes
- Confirm the cabinet is in the approved maintenance state.
- Remove the applicable module cover or retaining hardware.
- Photograph the complete installation before disconnecting anything.
- Label each FTE cable with its original port position.
- Disconnect the cables without pulling on the cable itself.
- Release the module’s mechanical retention mechanism.
- Pull the CC-PCF901 straight from the IOTA.
- Inspect the IOTA connector and surrounding area for contamination, bent contacts, or mechanical damage.
⚠️ Keep the old CC- on site until the replacement has completed functional testing. It provides the reference for cable routing, labeling, hardware revision, and physical installation.
Stage 3: Installing the New Module — About 5 Minutes
- Verify that the replacement is exactly CC-.
- Compare the replacement’s part number and hardware revision with the removed unit.
- Confirm that the installed IOTA is the correct CF9 IOTA for the cabinet generation.
- Attach the ESD strap before handling the module.
- Inspect the module connector for bent or contaminated contacts.
- Align the CC- with the IOTA.
- Seat the module evenly without forcing the connector.
- Secure the module using the manufacturer’s specified retention method.
- Reconnect each FTE cable to its photographed port.
- Confirm the supervisory uplink is connected to the correct port.
Self-Checklist:
- Exact CC- model verified
- Part number verified
- Hardware revision documented
- Correct CF9 IOTA confirmed
- Eight in-cabinet FTE connections restored
- Supervisory FTE uplink restored
- Connectors fully seated
- Module mechanically secured
Stage 4: Power-On & Testing — About 10 Minutes
- Perform a visual inspection before energizing the cabinet.
- Verify there are no loose conductive objects around the IOTA.
- Confirm all FTE cables are correctly identified and seated.
- Restore power according to the site’s approved procedure.
- Observe the module’s startup/status indications.
- Verify that the Experion system recognizes the expected CF9/FTE network path.
- Check the communication status of connected C300 controllers and Series C network nodes.
- Verify the supervisory FTE connection.
- Confirm that network alarms clear as expected.
- Record the final module status and test results.
⚠️ Troubleshooting Note: If the module does not establish the expected FTE communication, do not immediately replace it again. First check the IOTA type, cable port assignment, hardware revision, firmware compatibility, and cabinet network configuration. Honeywell has documented CF9-specific firmware revisions and hardware-revision dependencies, so firmware should be treated as a compatibility item rather than an afterthought.
Technical Pitfalls Worth Checking
1. ⚠️ Firmware or Hardware Revision Mismatch
A replacement that physically fits may still require compatibility verification against the installed Experion release and CF9 hardware revision. Honeywell has published CF9-specific firmware information, including revisions applicable to hardware revision D and later.
2. ⚠️ Wrong IOTA
The CC- is an IOTA-mounted module. Series C and Series C Mark II installations use different IOTA arrangements. For example, Honeywell documentation identifies CC-TCF901 for the Series C configuration and DC-TCF901 for Series C Mark II.
3. ⚠️ Port Misidentification
The CF9 has eight in-cabinet FTE connections plus one supervisory uplink. Moving one cable to the wrong port can create a network problem that looks like a failed module.
4. ⚠️ Treating It Like a Generic Ethernet Switch
Don’t. The CC- is documented as a Control Firewall Module within the Experion architecture. Its installation includes a dedicated CF9 IOTA and defined FTE network roles.
5. ⚠️ ESD Damage
Use a grounded wrist strap and an ESD-safe work area. The module contains electronic circuitry directly exposed during replacement. Handle it by the designated mechanical surfaces rather than touching the PCB or connector contacts.
Frequently Asked Questions (FAQ)
Can the Honeywell CC- be hot-swapped?
Do not assume hot-swap capability. The safe replacement procedure depends on the specific Experion PKS cabinet architecture and approved site maintenance procedure. If the project documentation does not explicitly authorize energized removal, take the affected equipment through the site’s controlled shutdown/LOTO procedure.
Is CC- the same as a normal Ethernet switch?
No. Honeywell identifies CC- as a CF9 Control Firewall Module, not a generic Ethernet switch. It forms part of the Experion FTE control-network architecture and mounts on a CF9 IOTA.
How many Ethernet connections does CC- provide?
The documented configuration has nine FTE ports: eight connections for in-cabinet controllers or Series C modules and one supervisory-network uplink.
What IOTA does CC- use?
The exact IOTA depends on the cabinet generation. Honeywell documentation lists CC-TCF901 for the Series C arrangement and DC-TCF901 for Series C Mark II. The IOTA provides the physical FTE connections and 24 VDC power distribution to the CF9 module.
Is CC- obsolete?
CC- is associated with established Honeywell Experion Series C/CF9 architectures, and replacement stock may depend on the installed system and supplier inventory. Do not treat a supplier’s “in stock” label as proof of current OEM production status. Verify the exact hardware revision and OEM compatibility before purchasing.
Does replacing CC- erase the controller’s programming?
The CC- is a network/control-firewall module, not the C300 control processor itself. Its replacement should therefore not be treated like replacing the controller’s application memory. However, the network configuration and system-level engineering still need to be checked after replacement. Honeywell documentation separately identifies the C300 controller and CF9 as distinct system components.
What condition should I specify when purchasing a replacement?
Specify the required condition explicitly: Factory Sealed/New Original, New Surplus, or Refurbished/Tested. For a surplus CC-, request photographs of the actual module label, part number, hardware revision, and packaging. For refurbished stock, request the functional test procedure and test report rather than relying only on a visual inspection.
For QC-controlled surplus or refurbished stock, a practical inspection sequence is: serial/label verification → visual inspection → connector inspection → powered functional test on an appropriate Honeywell test environment → FTE communication verification → firmware/hardware revision recording → final ESD packaging. Test photographs and reports should be retained with the shipment record.



