
 WhatsApp: +86 16626708626
 Email:
  Phone: +86 16626708626
Description
Key Technical Specifications
| Parameter | Value |
|---|---|
| Model | CC-PDIL01 |
| Manufacturer | Honeywell |
| System Family | Experion PKS Series C I/O |
| Module Type | 24 VDC Digital Input |
| Input Channels | 32 |
| DI Power Voltage Range | 18–30 VDC |
| ON-State Detection | 13 VDC minimum or 3 mA minimum |
| OFF-State Detection | 5 VDC maximum or 1.2 mA maximum |
| Input Impedance | 4.2 kΩ |
| Input Filter / Isolation Delay | 5 ms ±20% |
| Guaranteed ON Field Resistance | 300 Ω maximum at 15 VDC |
| Guaranteed OFF Field Resistance | 30 kΩ minimum at 30 VDC |
| Isolation | 1,500 VAC RMS or ±1,500 VDC |
| Isolation Method | Optical isolation in IOM |
| Non-Redundant IOTA | CC-TDIL01 |
| Redundant IOTA | CC-TDIL11 |
| Open-Wire Detection | Supported |
| Field Power Selection | Internal or external |
| Redundancy | Optional |
The electrical values above come from Honeywell’s Series-C I/O specification.
Part-number caution: public supplier listings associate CC-PDIL01 with different ordering numbers, including 51405040-175, 51405040-176, and 51308388-175. Do not purchase from the short model number alone when the existing installation requires an exact revision or ordering configuration.
Product Introduction
The Honeywell CC-PDIL01 is a 32-channel, 24 VDC digital input module for Honeywell Experion PKS Series C I/O. It receives discrete field signals from switches, contacts, and other 24 VDC devices and passes their status into the control system. Honeywell specifies optical isolation, open-wire diagnostics, internal or external field power selection, and optional redundancy.
The important replacement issue is not simply matching “24 VDC DI.” The IOTA, redundancy arrangement, field-power configuration, exact ordering number, and system configuration must also match. Honeywell lists CC-TDIL01 for non-redundant service and CC-TDIL11 for redundant service.
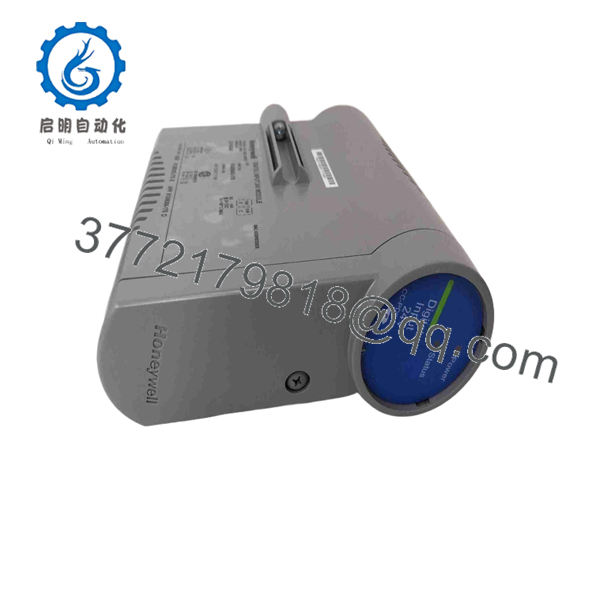
CC-PDIL01
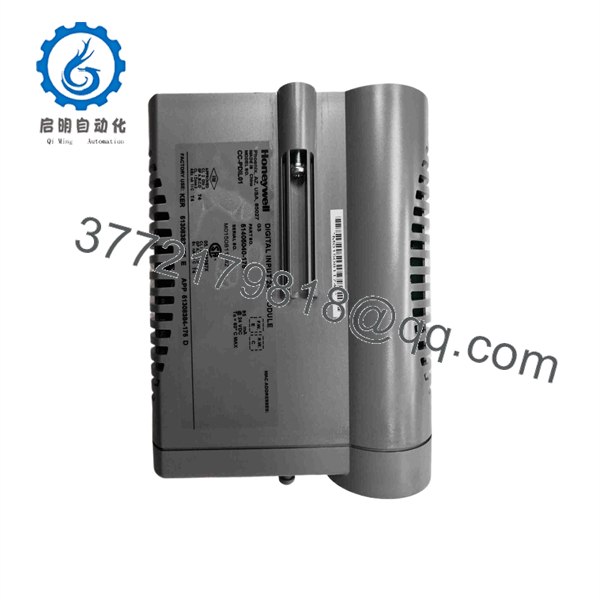
CC-PDIL01
Installation & Configuration Guide
Stage 1: Pre-Installation Preparation — About 5–10 Minutes
⚠️ Safety First: Notify operations, place the affected process in the approved safe state, and follow the site’s LOTO procedure. Do not remove the CC-PDIL01 from an energized installation unless the specific Honeywell architecture and site procedure explicitly permit it.
Tools Required:
- ESD wrist strap
- PH1 screwdriver where applicable
- Calibrated digital multimeter
- Wire labels
- Smartphone/camera for installation photos
- Approved Honeywell Experion documentation
Data Backup:
- Record the complete module label and ordering number.
- Record the existing hardware/revision information.
- Photograph the CC-PDIL01 and IOTA before removal.
- Photograph every field-wire terminal position.
- Record whether the installation uses CC-TDIL01 or CC-TDIL11.
- Record field-power selection and redundancy configuration.
- Save the relevant Experion configuration before disturbing the I/O.
⚠️ Do not assume that every CC-PDIL01 listing represents the same ordering configuration. Public listings show multiple part-number associations for this model. Verify the actual installed label before ordering.
Stage 2: Removing the Old Module — About 5 Minutes
- Confirm the process is in the approved maintenance state.
- Remove the applicable front cover or retaining hardware.
- Photograph the module and IOTA one more time.
- Label every field conductor before disconnecting it.
- Disconnect wiring without pulling on the conductors.
- Release the module’s mechanical retention.
- Pull the CC- straight out from the IOTA.
- Inspect the IOTA connector for bent contacts, contamination, or mechanical damage.
⚠️ Keep the old module until commissioning is complete. It provides a direct reference for the terminal arrangement and ordering configuration.
Stage 3: Installing the New Module — About 5 Minutes
- Verify the replacement model and complete ordering number.
- Confirm the replacement uses the same IOTA arrangement.
- Confirm whether the application is redundant or non-redundant.
- Put on the grounded ESD wrist strap.
- Inspect the replacement connector before installation.
- Align the module with the IOTA.
- Seat the module without forcing the connector.
- Secure the module according to the Series C hardware procedure.
- Reconnect field wiring according to the photographs and wiring documentation.
- Check each terminal individually before energizing.
Self-Checklist:
- CC- model verified
- Complete ordering number verified
- CC-TDIL01 / CC-TDIL11 verified
- Redundancy arrangement verified
- Field-power configuration verified
- All 32 channel assignments documented
- Wiring secured
- IOTA connector fully seated
- Module mechanically secured
Stage 4: Power-On & Testing — About 10–15 Minutes
- Check the installation visually before applying power.
- Verify that no field conductors are shorted or misplaced.
- Restore power using the approved cabinet procedure.
- Observe module status indications.
- Connect to the applicable Experion engineering environment.
- Confirm that the expected I/O module is recognized.
- Verify the configured channel assignments.
- Apply known 24 VDC input states to selected channels.
- Confirm the corresponding digital values at the controller/operator level.
- Test representative ON/OFF transitions across the installed field circuits.
- Check diagnostics for open-wire or invalid-PV indications.
- Return the process to normal service only after the I/O checks pass.
Honeywell specifically documents open-wire detection for CC-; a channel diagnosed with an open field wire can be reported as invalid rather than treated as a valid process value.
Technical Pitfalls Worth Checking
1. ⚠️ Wrong Ordering Number
CC- is the model identifier, but public listings show more than one associated ordering number. Do not use the short model number as the sole purchasing criterion. Match the complete label and revision against the installed system.
2. ⚠️ Wrong IOTA
This is one of the first things I would check on a replacement job. Honeywell specifies CC-TDIL01 for non-redundant installation and CC-TDIL11 for redundant installation.
3. ⚠️ Field Voltage Outside the Specified Range
The documented DI power range is 18–30 VDC. Check the voltage at the actual field terminal rather than assuming the nominal cabinet supply reaches the device unchanged.
4. ⚠️ Misreading Open-Wire Diagnostics
An open-wire diagnostic should not automatically be interpreted as a failed IOM. Check the field conductor, terminal, device contact, and circuit resistance first. Honeywell specifically provides open-wire detection on this I/O function.
5. ⚠️ Treating CC- as an SOE Input
CC- is the standard 24 VDC digital input module. If the application requires sequence-of-events timestamping, verify the required I/O type rather than substituting a standard DI module.
Frequently Asked Questions (FAQ)
Can the Honeywell CC- be hot-swapped?
Do not assume it can. The replacement procedure depends on the installed Series C architecture, IOTA arrangement, redundancy design, and site-approved maintenance procedure. If the documentation does not explicitly authorize energized removal, use the controlled shutdown and LOTO procedure.
How many inputs does CC- have?
Honeywell’s Series-C specification identifies 32 digital input channels for CC-. It is designed for 24 VDC discrete field signals.
What voltage does CC- accept?
The specified DI power range is 18–30 VDC. The documented ON threshold is at least 13 VDC or 3 mA, while the OFF threshold is 5 VDC maximum or 1.2 mA maximum.
Which IOTA is required for CC-?
Honeywell specifies CC-TDIL01 for non-redundant applications and CC-TDIL11 for redundant applications. Verify the existing IOTA before ordering the replacement module.
Is CC- obsolete?
Honeywell’s current 2026 System HINTS material identifies CC- as the recommended replacement for the phase-out CC-PDIL51/CC-TDIL51/CC-TDIL61 combination for greenfield and brownfield expansion, which is different from saying that every existing CC- configuration has unlimited OEM availability.
Will replacing CC- erase my control logic?
CC- is an I/O module rather than the primary C300 controller that stores the control application. Replacing the I/O module does not normally mean downloading the controller application again. However, verify the I/O configuration, channel assignments, redundancy status, and diagnostics after replacement.
What condition should I specify when purchasing CC-?
Specify the condition explicitly: Factory Sealed/New Original, New Surplus, or Refurbished/Tested. More importantly, provide the complete part number from your existing module. Public listings currently show different ordering numbers associated with CC-, so the short model number alone is not sufficient for an exact-match purchase.



