
 WhatsApp: +86 16626708626
 Email:
  Phone: +86 16626708626
Description
Key Technical Specifications
| Parameter | Value |
|---|---|
| Manufacturer | Honeywell |
| Model | CC-TUIO31 |
| Product Type | UIO-2 IOTA |
| I/O Architecture | Universal Input/Output Phase 2 |
| System | Honeywell Experion PKS Series C |
| Associated I/O Module | CC-PUIO31 |
| Configuration | Non-redundant |
| I/O Capacity | 32 points |
| IOTA Size | 9 in (229 mm) |
| Redundant IOTA | CC-TUIO41 |
| I/O Functions via CC-PUIO31 | Analog Input, Analog Output, Digital Input, Digital Output, Pulse Input |
| HART | HART 7 support through the CC-PUIO31 UIO module |
| Module Ambient Temperature | −40 to +70 °C |
| IOTA Role | Field termination and interface for the UIO-2 module |
Honeywell specifies CC-TUIO31 as the non-redundant 9-in IOTA, while CC-TUIO41 is the 12-in redundant IOTA. The associated CC-PUIO31 provides 32 universal I/O points and supports analog, digital, and pulse functions, with HART 7 capability.
Part-number caution: Some aftermarket listings associate CC-TUIO31 with additional hardware numbers such as 51306875-176. Do not assume every CC-TUIO31 listing has the same suffix or revision. Match the label on the installed assembly against the purchasing specification before ordering.
Product Introduction
Honeywell CC-TUIO31 is a Series C UIO-2 non-redundant IOTA used with the CC-PUIO31 Universal I/O module in Experion PKS installations. It provides the physical field termination and interface for one 32-point UIO-2 module. Honeywell specifies a 9-in (229 mm) IOTA footprint.
The key replacement issue is identification: CC-TUIO31 is the IOTA, not the CC-PUIO31 I/O electronics module. For redundant UIO-2 installations, Honeywell specifies CC-TUIO41 instead. Verify the installed cabinet arrangement before ordering either part.
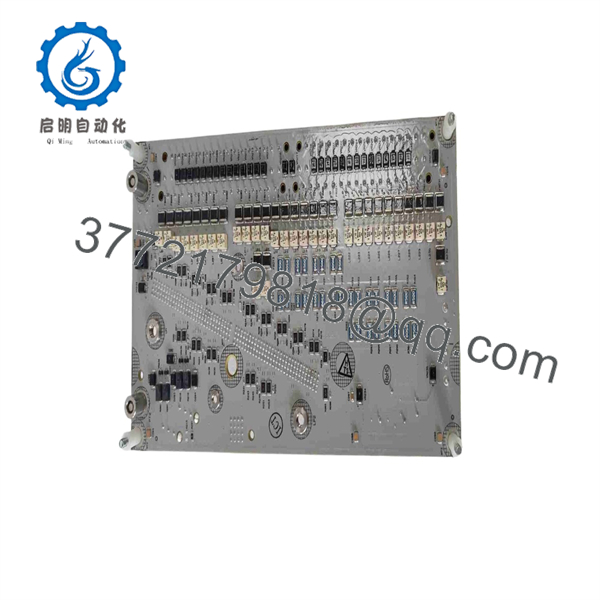
CC-TUIO31
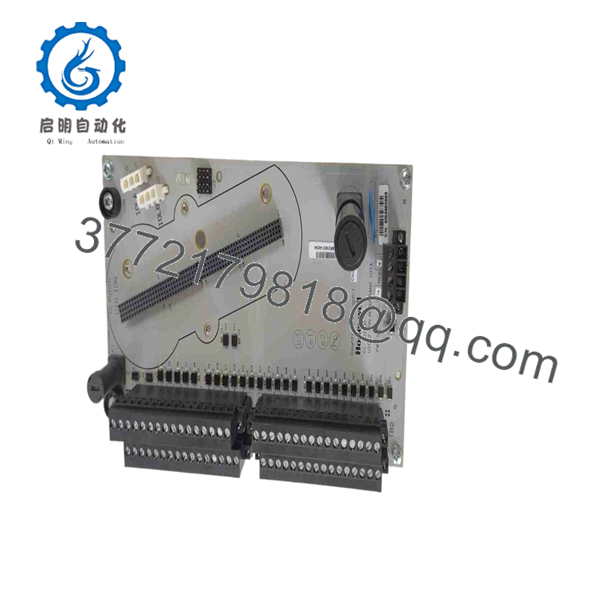
CC-TUIO31
Installation & Configuration Guide
Stage 1: Pre-Installation Preparation — Approximately 5–10 Minutes
⚠️ Safety First: Notify operations, place the affected process in the approved safe state, and follow the site’s lockout/tagout procedure. Do not remove the IOTA from an energized installation unless the applicable Honeywell documentation and site procedure explicitly permit it.
Tools Required:
- ESD wrist strap
- Appropriate Phillips screwdriver
- Digital multimeter
- Wire labels
- Smartphone or camera
- Current Experion PKS cabinet/I/O drawings
Data Backup and Identification
- Confirm the exact model: CC-.
- Confirm that the cabinet uses the non-redundant UIO-2 arrangement.
- Verify that the associated I/O module is .
- Photograph the complete installed assembly.
- Photograph TB1, TB2, TB3, connectors, and field wiring.
- Record the existing module and IOTA labels, including suffixes and date codes.
- Record the channel assignments in the Experion engineering database.
- Keep the old hardware available until commissioning is complete.
Honeywell documentation states that the non-redundant IOTA accommodates one module; the redundant configuration uses two modules on the larger CC-TUIO41 IOTA.
Stage 2: Removing the Old IOTA — Approximately 5 Minutes
- Place the affected process in the approved maintenance state.
- Isolate power according to the site procedure.
- Remove the cabinet cover or access hardware as required.
- Label every field conductor before disconnecting it.
- Photograph each terminal group and connector.
- Disconnect the field wiring without pulling on the conductors.
- Release the applicable mounting hardware.
- Remove the CC- carefully without forcing the mating connectors.
- Inspect the mating interface for bent contacts, contamination, or physical damage.
- Inspect the surrounding wiring and terminal blocks.
⚠️ Keep the old IOTA until the replacement has passed functional checks. It provides a direct physical reference if a wiring question appears during commissioning.
Stage 3: Installing the New CC- — Approximately 5–10 Minutes
- Verify that the replacement label reads CC-.
- Confirm the physical assembly is the 9-in non-redundant configuration.
- Verify compatibility with the installed module.
- Attach an ESD wrist strap before handling the associated electronic hardware.
- Position the IOTA according to the cabinet drawing.
- Seat the assembly without forcing connectors or mounting hardware.
- Secure the IOTA using the specified cabinet hardware.
- Reconnect TB1/TB2/TB3 and other applicable wiring according to the original documentation.
- Check every conductor against the photographs and engineering drawings.
- Verify that no wire is loose, pinched, or incorrectly landed.
Self-Checklist:
- CC- model confirmed
- Non-redundant configuration confirmed
- CC- compatibility confirmed
- Terminal wiring verified
- Connectors fully seated
- Mounting hardware secured
- No damaged contacts
- ESD precautions followed
Stage 4: Power-On & Testing — Approximately 10–15 Minutes
- Perform a complete wiring inspection before energizing the system.
- Verify the applicable cabinet supply conditions against the engineering documentation.
- Energize the affected hardware using the approved startup procedure.
- Check the associated module status indicators.
- Connect to the Experion engineering environment.
- Verify that the expected hardware is detected.
- Confirm the configured channel assignments.
- Test representative analog and digital points.
- Verify signal scaling, status, alarms, and output behavior.
- Return the process to normal control only after the I/O checks pass.
⚠️ If the assembly is not recognized, do not immediately condemn the IOTA. Check the CC-/IOTA pairing, connector seating, cabinet position, wiring, and Experion configuration first.
Honeywell’s technical documentation shows CC- paired with either CC- or CC-TUIO41 and documents the relevant field-wiring arrangements.
Frequently Asked Questions (FAQ)
Q1. Is Honeywell CC- the same thing as CC-?
No. This is an important purchasing distinction.
CC- is the non-redundant IOTA. CC- is the Universal I/O module that mounts to the IOTA. Honeywell lists them as separate components in the UPC architecture.
Q2. How many I/O points does the CC- support?
The CC- arrangement is specified for 32 UIO points when used with the CC- Universal I/O module. The module can configure channels for analog input, analog output, digital input, digital output, and pulse input functions.
Q3. What is the difference between CC- and CC-TUIO41?
CC- is the 9-in non-redundant IOTA. CC- is the 12-in redundant IOTA. Honeywell’s documentation describes the redundant arrangement as mounting two modules on one redundant IOTA.
Q4. Can CC- be used as a direct replacement for an older Honeywell IOTA?
Compatibility depends on the installed Series C architecture and Experion release. Honeywell’s 2026 System Hints documentation identifies CC- / CC- / CC- as the recommended replacement family for the earlier CC-PUIO01 / CC-TUIO01 / CC-TUIO11 family when using Experion R432 and above. Verify the actual Experion release and cabinet configuration before making a migration decision.
Q5. Is CC- redundant?
No. CC- is specifically the non-redundant IOTA. If the application requires redundant hardware, Honeywell identifies CC- as the corresponding redundant IOTA.
Q6. Can I hot-swap CC-?
Do not assume that it is hot-swappable. CC- is part of the cabinet-level UIO termination architecture, and the permitted replacement procedure depends on the specific Experion/UPC installation. Unless the applicable Honeywell documentation explicitly permits energized replacement for your configuration, isolate the equipment before removal.
Q7. What condition should I specify when buying a replacement?
Specify the required condition explicitly: New Original, New Surplus, or Refurbished and Tested. Also request photographs of the actual label, including the full part number, revision/date code, and condition. Some aftermarket listings identify different secondary part numbers against CC-, so relying on the base model alone can create an avoidable identification error.



