
 WhatsApp: +86 16626708626
 Email:
  Phone: +86 16626708626
Description
Key Technical Specifications
| Parameter | Value |
|---|---|
| Model | HC-6002-2 |
| Manufacturer | HUMO Laboratory |
| Product Family | HC 6000 Series |
| Product Type | VME-standard circuit board |
| Bus Architecture | VME |
| Application | Industrial control / electronic measurement equipment |
| Board Generation | Legacy HC 6000 family |
| Physical Format | VME board format |
| Typical Installation | VME chassis / backplane |
| Status | Legacy / obsolete-generation hardware |
| Replacement Verification | Required before substitution |
| Documentation Availability | Limited; verify against equipment-specific documentation |
HUMO Laboratory’s own corporate history confirms that the company developed VME-standard HC 6000 series boards in 1985, followed later by additional VME products including the HC 6003 CPU board.
Important specification note: Publicly available sources identify HC-6002-2 as a HUMO Laboratory module, but I could not verify a manufacturer datasheet that establishes detailed electrical specifications such as supply voltage, I/O channel count, connector pinout, or operating temperature. One secondary listing describes a VME-format HC-6002-2 with specific analog and mechanical specifications, but those details are not corroborated by HUMO’s official documentation, so they should not be treated as confirmed OEM specifications.
Product Introduction
The HUMO Laboratory HC-6002-2 is a legacy board from HUMO’s HC 6000 VME hardware family. HUMO’s company history confirms that the HC 6000 series was developed as VME-standard hardware for industrial and electronic equipment.
This type of board is primarily relevant when maintaining older HUMO equipment or another system built around the original VME architecture. Because public technical documentation for the exact HC-6002-2 is limited, verify the board revision, connector arrangement, chassis slot, and system-level function against the existing equipment before ordering.
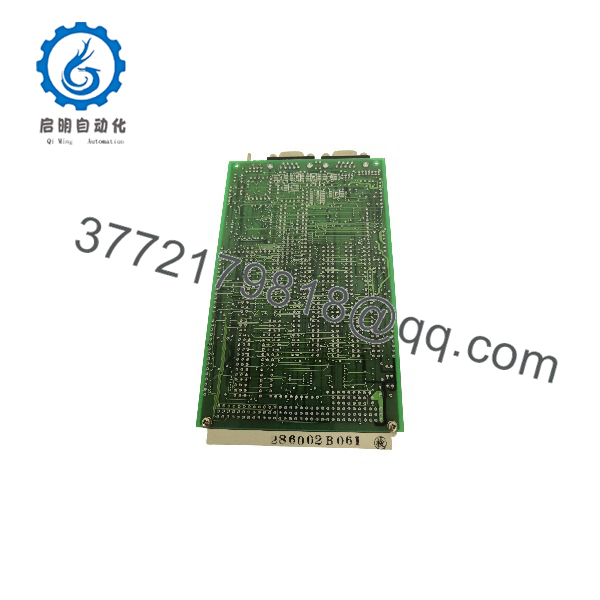
HC-6002-2
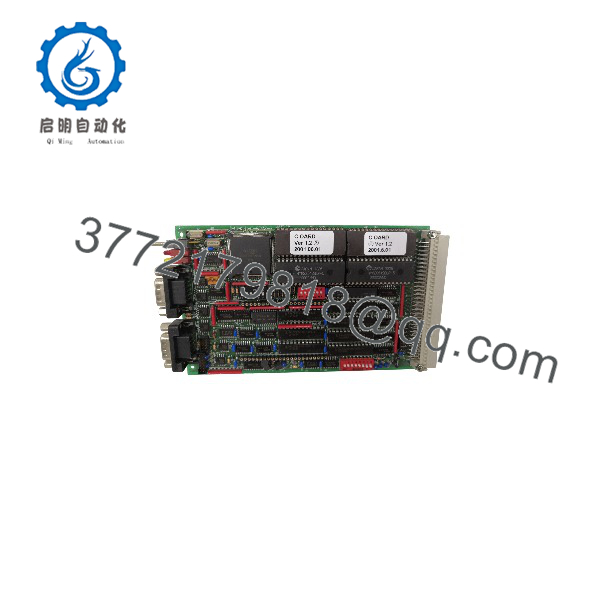
HC-6002-2
Installation & Configuration Guide
Stage 1: Pre-Installation Preparation — 10 minutes
⚠️ Safety First: Shut down the host equipment and isolate the VME chassis power before removing the board. Do not assume the board is hot-swappable.
Tools Required:
- ESD wrist strap
- Phillips screwdriver
- Multimeter
- Wire/connector labels
- Smartphone or camera
- Existing system documentation
Data Backup:
- Record the exact board marking: HC-6002-2.
- Photograph both sides of the board if accessible.
- Photograph the front-panel connectors and cable positions.
- Record the VME chassis slot number.
- Photograph jumper, switch, or configuration settings.
- Record the revision number and serial number.
- Keep the original board until the replacement has passed functional testing.
Stage 2: Removing the Old Module — 5–10 minutes
- Power down and isolate the VME chassis.
- Verify that the chassis is electrically de-energized.
- Remove any front-panel retaining screws.
- Label connected cables before removal.
- Disconnect connectors without pulling on the cable.
- Release the board ejector mechanism.
- Pull the board straight along the card guides.
- Inspect the backplane connector for contamination, bent contacts, or mechanical damage.
⚠️ Do not force the board out at an angle. VME backplane connectors can be damaged by uneven extraction.
Stage 3: Installing the Replacement — 5–10 minutes
- Verify that the replacement marking is HUMO HC-6002-2.
- Compare the connector layout with the original board.
- Check PCB condition for corrosion, cracked components, or damaged edge connectors.
- Confirm that any jumpers or switches match the original configuration.
- Slide the board into the correct VME slot.
- Engage the ejector levers evenly.
- Confirm that the rear connector is fully seated.
- Tighten the front-panel retaining screws.
- Reconnect external cables according to the photographs and wiring documentation.
Self-Checklist:
- Exact model verified
- PCB revision recorded
- Correct VME slot confirmed
- Jumpers/switches checked
- Backplane connector inspected
- Board fully seated
- Front-panel screws secured
- Cables correctly reconnected
Stage 4: Power-On & Testing — 10–20 minutes
- Recheck all connectors before applying power.
- Verify the VME chassis power supply.
- Power up the chassis without enabling the machine process.
- Observe board LEDs, if fitted.
- Check the host controller for VME bus or board-detection errors.
- Verify communication between the replacement board and the host system.
- Run the equipment’s built-in diagnostic sequence if available.
- Perform a controlled functional test.
- Monitor the board for abnormal heating or intermittent communication.
- Return the equipment to normal operation only after the replacement passes the system-level test.
⚠️ Do not apply a guessed supply voltage or jumper configuration. The publicly available information does not provide sufficiently reliable OEM electrical data for HC-6002-2. Confirm the actual chassis documentation before energizing an unidentified board.
Frequently Asked Questions (FAQ)
What is the HUMO HC-6002-2?
The HC-6002-2 is identified in available parts listings as a HUMO Laboratory HC 6000-series module. HUMO’s official history confirms that the HC 6000 family was developed as VME-standard board hardware.
Is HC-6002-2 a VME board?
The available technical listing identifies HC-6002-2 as a VME-format industrial control board, while HUMO’s own history confirms the HC 6000 series was developed for the VME standard. The exact HC-6002-2 electrical implementation should still be confirmed from the original equipment documentation.
Is HUMO HC-6002-2 obsolete?
It is a legacy-generation product. HUMO developed the HC 6000 VME series in the mid-1980s, and later moved into newer VME CPU hardware such as the HC 6003.
Can I replace HC-6002-2 with another VME board?
Not automatically. VME compatibility only establishes the bus architecture. The replacement must also match the original board’s electrical function, connector assignment, address configuration, software interface, and system-specific requirements.
What condition should I request when buying HC-6002-2?
For a critical production system, ask the supplier to state the exact condition in writing: New Original, New Surplus, Used Tested, or Refurbished. For used equipment, request photographs of the actual board, including its identification label and PCB revision.
Is the published ±10 V / 16-bit specification confirmed for HC-6002-2?
No. A secondary listing publishes those specifications, but I could not corroborate them against HUMO’s official HC-6002-2 documentation. Therefore, those values should be treated as unverified secondary information, not as definitive OEM specifications.
What should I provide when requesting a replacement?
Provide the complete HC-6002-2 model number, PCB revision, serial number, photographs of the board, the host equipment model, VME chassis model, installed slot position, and the function performed by the original board. That information is much more useful for compatibility verification than the model number alone.



