
 WhatsApp: +86 16626708626
 Email:
  Phone: +86 16626708626
Description
Key Technical Specifications
| Parameter | Value |
|---|---|
| Model | D201832L |
| Alternate Part Number | DDC8330-D201832L |
| Manufacturer | Metso Automation / Valmet |
| Module Type | IPSP / DC Power Converter |
| Input Voltage | 21–32 VDC |
| Output Voltage | 5.3 VDC and 24 VDC |
| Output Current | 8 A |
| Controller Association | Metso ACN MR controller assemblies |
| Associated Controller | D202275 |
| Associated Base | D202214 |
| Mounting | Controller/base assembly |
| Lifecycle | Discontinued by manufacturer |
| Typical Application | Industrial process-control systems |
Radwell’s listing for DDC8330-D201832L gives the 21–32 VDC input, 8 A output, and 5.3 VDC/24 VDC output specifications and marks the part discontinued by the manufacturer.
A separate Metso automation reseller listing identifies D201832L as an IPSP module and shows it installed with an ACN MR D202275 controller and D202214 base.
Revision caution: Public listings contain conflicting descriptions of D201832L’s electrical configuration. Some listings describe an AC-input variant, while the DDC8330-D201832L listing specifies 21–32 VDC input. Verify the complete nameplate and hardware revision on the unit before applying power.
Product Introduction
Metso Automation D201832L is an IPSP module associated with Metso controller hardware. Public part records also identify DDC8330- as a DC power converter, with 21–32 VDC input and 5.3 VDC/24 VDC outputs at up to 8 A. It is used within legacy Metso automation controller assemblies.
For replacement work, the critical point is matching the complete /DDC8330- identification and hardware revision. Do not assume that a listing describing a different input-voltage version applies to your installed unit.
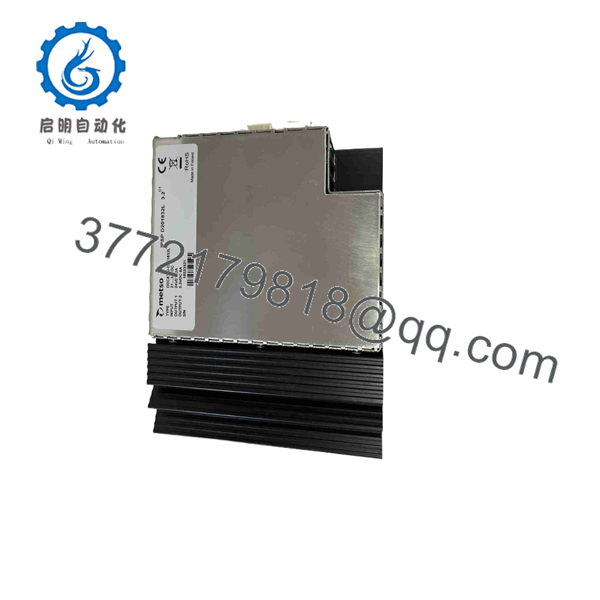
D201832L
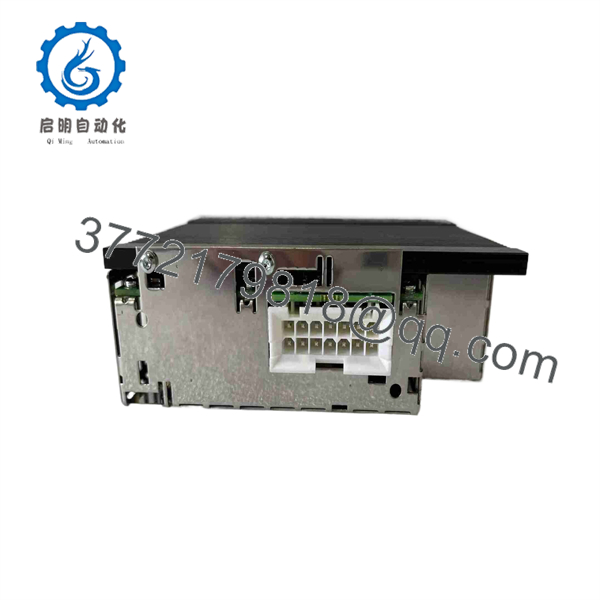
D201832L
Installation & Configuration Guide
Stage 1: Pre-Installation Preparation
Estimated time: 5–10 minutes
⚠️ Safety First: Place the controlled process in a safe operating state. Follow the site’s lockout/tagout procedure and isolate the applicable power source before removing .
Tools Required:
- ESD wrist strap
- Digital multimeter
- Appropriate screwdriver
- Wire labels
- Camera or smartphone
- OEM system documentation
Data Backup:
- Record the complete module identification from the nameplate.
- Photograph the installed and surrounding controller assembly.
- Record all connector positions.
- Photograph hardware revision and configuration markings.
- Record the controller/base assembly part numbers.
- Confirm the incoming power voltage before ordering the replacement.
⚠️ Pay particular attention to input voltage. Public records for DDC8330- specify 21–32 VDC, while some other supplier pages describe differently. The physical nameplate and system documentation should take precedence over a generic web listing.
Stage 2: Removing the Old Module
Estimated time: 5–10 minutes
- Verify that the controller rack is de-energized.
- Confirm the absence of hazardous voltage with an appropriately rated multimeter.
- Identify the position.
- Label every connector before removal.
- Disconnect the connectors without pulling on the cable.
- Release the module’s mechanical retaining hardware.
- Remove the module straight from its mounting position.
- Inspect the mating connectors and backplane for contamination or damaged contacts.
⚠️ Keep the original module until the replacement has completed commissioning. The old unit provides the most reliable reference for connector position, revision, and physical configuration.
Stage 3: Installing the New Module
Estimated time: 5–10 minutes
- Verify the complete part num.
- Compare the hardware revision against the removed module.
- Confirm that the replacement’s input-voltage specification matches the installed power architecture.
- Put on the ESD wrist strap.
- Inspect the backplane connector before insertion.
- Install the module without forcing the connector.
- Secure the module mechanically.
- Reconnect each connector according to the photographs and system drawings.
- Verify that no connector is partially seated.
Self-Checklist:
- Exact identification confirmed
- Hardware revision checked
- Input voltage verified
- Output configuration verified
- Connectors correctly positioned
- Module fully seated
- ESD precautions followed
Stage 4: Power-On & Testing
Estimated time: 10–15 minutes
- Before energizing, verify the incoming supply voltage.
- Check for an obvious short circuit between the relevant power rails and ground.
- Energize the controller assembly according to the plant commissioning procedure.
- Check the status and controller diagnostics.
- Verify that the expected internal power rails are present.
- Confirm the associated controller starts correctly.
- Check controller communication with the host system.
- Verify connected I/O modules.
- Monitor the rack for abnormal power or diagnostic alarms.
- Allow the system to operate under normal load before returning the process to automatic operation.
The doc electrical specification calls for 21–32 VDC input and 5.3 VDC/24 VDC outputs, with an 8 A output rating.
⚠️ Do not energize a replacement based solely on a supplier description. Confirm the actual nameplate and installed system voltage first.
Frequently Asked Questions (FAQ)
What is Metso ?
is identified by industrial automation suppliers as an IPSP (Integrated Power Supply & Processor) module used in Metso automation controller assemblies. The closely ide is documented as a DC power converter.
What are the electrical specifications of ?
For , Radwell lists a 21–32 VDC input, 5.3 VDC and 24 VDC outputs, and 8 A output current.
Is the ?
Multiple industrial-part listings associate the two designations. However, because supplier records can combine model numbers and revisions, verify the complete part number and hardware revision on the actual module before treating them as direct replacements.
Is obsolete?
The listing at Radwell is explicitly marked discontinued by manufacturer. That makes lifecycle status an important consideration when sourcing this part. Availability on the surplus and repair market does not mean the OEM is still manufacturing it.
Can be replaced without checking the controller?
No. The module is part of a larger controller/power architecture. Supplier documentation shows used with an ACN MR D202275 controller and D202214 base. Verify the complete assembly configuration before replacement.
What should I verify before purchasing ?
Verify these items against the installed unit:
- Hardware revision
- Input voltage
- Output voltage rails
- Output-current requirement
- Controller/base part numbers
- Connector arrangement
- Physical mounting configuration
This is particularly important because publicly available supplier pages do not agree on every electrical detail for the broader designation. The 21–32 VDC / 5.3 VDC + 24 VDC / 8 A specification is specifically documen.
Is a standalone CPU?
Not based on the available documentation. Supplier records describe it as an IPSP/power-converter module, while the associated Metso assembly listing identifies D202275 as the controller used with . Treat as part of the controller power architecture rather than assuming it contains the complete process-control application.



