
 WhatsApp: +86 16626708626
 Email:
  Phone: +86 16626708626
Description
Key Technical Specifications
- Model: FX3G-40MT-ESS
- Manufacturer: Mitsubishi Electric
- Series: MELSEC FX3G
- PLC Type: Compact Programmable Logic Controller
- Power Supply Voltage: 24 V DC
- Total I/O Points: 40 points
- Input Type: DC input (24 V DC)
- Output Type: Transistor output (sink type)
- Output Points: 24 transistor outputs
- Program Memory: Built-in EEPROM memory
- Programming Software: GX Works2 / GX Developer
- Communication Options: RS-232C, RS-422, Ethernet and network adapters via expansion modules
- Installation Method: DIN rail or panel mounting
- Operating Temperature: 0 to 55 °C
- Storage Temperature: −25 to +75 °C
- Compliance: IEC 61131-2 compatible PLC programming environment
Product Introduction
The Mitsubishi FX3G-40MT-ESS is a compact MELSEC FX3G Series PLC main unit designed for machine automation, sequence control, and small-scale industrial equipment. It provides 40 built-in I/O points with 24 V DC power input and transistor outputs for high-speed switching applications.
This PLC is commonly used in packaging machines, conveyors, assembly equipment, and OEM control panels where reliable discrete control and expansion capability are required. The FX3G platform supports Mitsubishi programming tools and multiple communication expansion options for system integration.
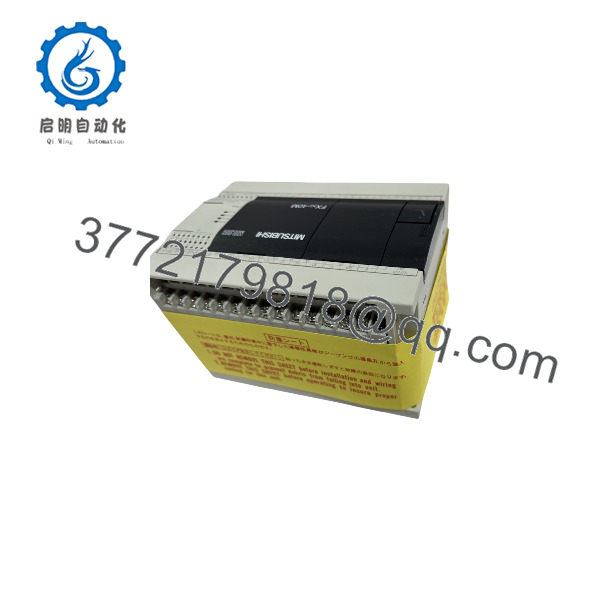
FX3G-40MT-ESS
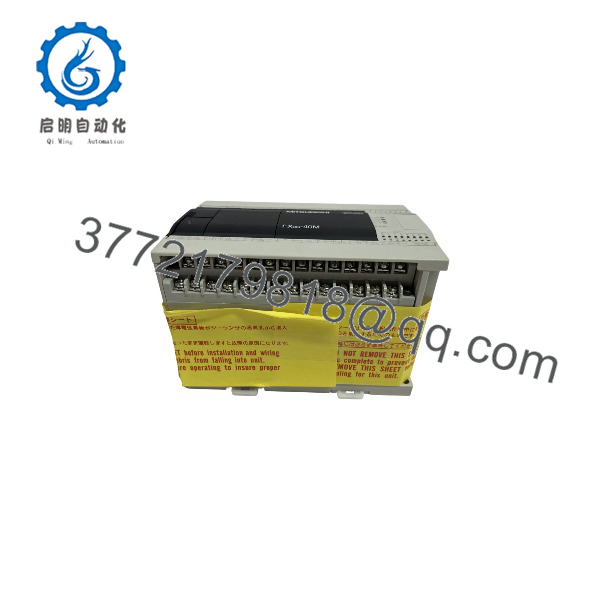
FX3G-40MT-ESS
Installation & Configuration Guide
Stage 1: Pre-Installation Preparation (Approx. 10 minutes)
⚠️ Safety First:
Notify production personnel before replacement. Place the machine in a safe state, perform lockout/tagout procedures, disconnect the 24 V DC supply, and wait for stored electrical energy to discharge.
Tools Required:
- ESD wrist strap
- PH1 screwdriver
- Digital multimeter
- Wire labels
- Smartphone/camera for documentation
Data Backup:
- Export the PLC program using GX Works2 or GX Developer.
- Record PLC communication settings.
- Photograph terminal wiring before removal.
- Document expansion modules and special function units.
- Record the existing PLC model and firmware information if available.
Stage 2: Removing the Old Module (Approx. 10 minutes)
Steps:
- Turn off the PLC power supply and verify zero voltage with a multimeter.
- Remove the terminal cover.
- Label every field wire before disconnecting terminals.
- Disconnect input/output wiring carefully without pulling the terminal block.
- Release the DIN rail locking mechanism or mounting screws.
- Remove the PLC straight outward to avoid damaging connectors.
⚠️ Note:
Keep the original FX3G unit until the replacement PLC has passed communication and I/O testing.
Stage 3: Installing the New Module (Approx. 15 minutes)
Steps:
- Wear an ESD strap before handling the PLC.
- Confirm the replacement model matches Mitsubishi FX3G-40MT-ESS.
- Mount the PLC on the DIN rail or panel bracket.
- Reconnect all wiring according to the original terminal layout.
- Verify 24 V DC power polarity before energizing.
Configuration Clone (Critical):
- Restore the original PLC program.
- Verify input/output addressing.
- Confirm communication parameters.
- Check expansion module settings.
- Confirm transistor output wiring matches the original application.
Self-Checklist:
- Model number verified
- Power polarity checked
- Terminal wiring secured
- Program restored
- Communication settings confirmed
Stage 4: Power-On & Testing (Approx. 15 minutes)
Pre-Power Check:
- Measure the 24 V DC supply voltage.
- Check for short circuits on power terminals.
- Verify grounding connections.
Power-On Steps:
- Power the PLC only.
- Check RUN, POWER, and ERROR LED status.
- Connect GX Works2/GX Developer.
- Confirm PLC communication.
- Monitor input status.
- Test output operation with field devices isolated.
- Perform a complete machine sequence test.
⚠️ Troubleshooting Note:
- If the PLC shows an error LED, check program compatibility and parameter settings.
- If communication fails, verify cable type, communication adapter settings, and baud rate.
- If outputs do not activate, confirm transistor output wiring and load voltage requirements.
Frequently Asked Questions (FAQ)
Q1: Can the Mitsubishi -40MT-ESS be hot-swapped while powered?
No. The -40MT-ESS is not designed for live replacement. Remove power before disconnecting terminals or removing the PLC. Pulling the unit under power can damage the CPU, I/O circuits, or connected field devices.
Q2: Is the Mitsubishi -40MT-ESS obsolete?
The series has been replaced by newer Mitsubishi PLC families, but many units remain installed in industrial machines. Availability depends on remaining inventory. For existing equipment, matching the exact model is often preferred because it avoids control program migration work.
Q3: Is this PLC supplied as new original or refurbished?
The condition should be confirmed before purchase. New Original / New Surplus units are unused inventory items stored outside normal production channels. Refurbished units should include functional testing records and inspection details.
Q4: What is the direct repment for ?
A direct replacement depends on the machine program, expansion modules, communication requirements, and output type. Mitsubishi FX5U models may provide a migration path, but the PLC program and hardware compatibility must be reviewed before replacement.
Q5: Will I lose the PLC program when rcing the ?
Yes, unless the program is backed up and downloaded into the replacement PLC. Always upload the existing PLC project before removing the original controller. Also save communication parameters and special module settings.
Q6: Why is this model available below the original Mitsubishi list price?
Industrial automation spare parts are often sourced from surplus inventory, discontinued stock, or equipment replacement projects. Pricing depends on condition, availability, packaging status, and testing history.
Q7: What should I verify beforeering an ?
Verify:
- Exact model suffix
- Input voltage requirements
- Transistor output type
- Required I/O count
- Existing expansion modules
- PLC program compatibility
- Communication interfaces used in the machine
For critical production equipment, compare the replacement unit against the original Mitsubishi documentation before installation.



