
 WhatsApp: +86 16626708626
 Email:
  Phone: +86 16626708626
Description
3. Key Technical Specifications
| Parameter | Value |
|---|---|
| Module Type | PROFIBUS DP Scanner (Master/Slave) |
| Chassis Compatibility | 1756 ControlLogix (any slot); Honeywell PlantScape |
| Slot Width | Single slot |
| PROFIBUS Connector | 9-pin D-Sub female |
| Baud Rates Supported | 9.6 kbps to 12 Mbps (all standard rates including 45.45 kbps) |
| Maximum DP Slaves | 125 |
| Data per Slave | Up to 122 words input / 122 words output |
| Total I/O Capacity | Up to ~1984 bytes input / 1968 bytes output |
| Backplane Current | Approx. 850 mA @ 5 VDC; 1.75 mA @ 24 VDC |
| Configuration | RSLogix 5000 / Studio 5000 Add-On Profile (AOP); SST Console software |
| Operating Temperature | 0 to 60 °C |
| Features | DP-V0 Master/Slave, DP-V1 Master, Sync/Freeze, listen-only connections |
| Maximum Modules per Chassis | Up to 8 |
4. Product Introduction
The SST-PB3-CLX-RLL is a single-slot PROFIBUS DP scanner module designed for the Allen-Bradley ControlLogix (1756) chassis. Manufactured by Molex/Woodhead as part of the BradCommunications SST family, it acts as a PROFIBUS DP Master and/or Slave, enabling ControlLogix processors to communicate with up to 125 remote PROFIBUS DP devices.
The module supports all standard PROFIBUS baud rates up to 12 Mbps, handles up to 122 words of input and output data per slave, and includes support for DP-V1 services. Configuration is performed through the RSLogix 5000 / Studio 5000 Add-On Profile or the SST configuration software. It is backward-compatible with earlier SST-PFB-CLX modules and can operate without ladder logic for basic scanning. This module is discontinued.
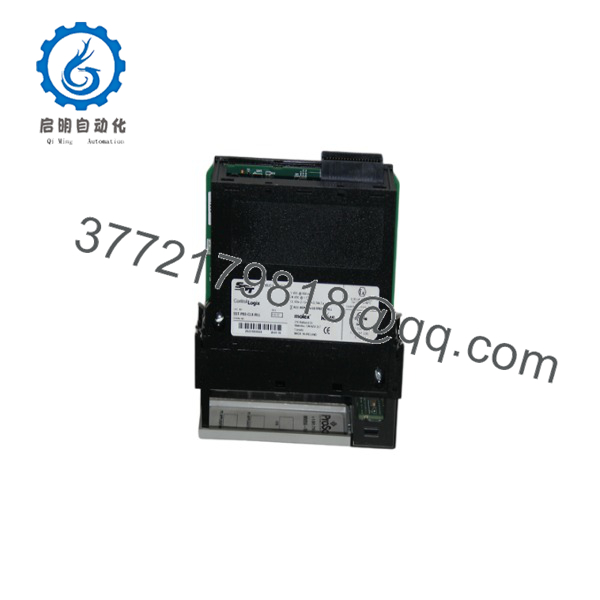
SST-PB3-CLX-RLL
5. Installation & Configuration Guide
Stage 1: Pre-Installation Preparation (10–15 min) ⚠️ Safety First: Remove power from the ControlLogix chassis. Verify the chassis is powered down and locked out. Wear an ESD wrist strap. Tools Required: ESD strap, screwdriver, PROFIBUS cable with 9-pin D-Sub connectors, RSLinx/Studio 5000. Data Backup: Export the existing RSLogix/Studio 5000 project. Record the current module configuration, node addresses, and I/O mapping if replacing an existing scanner.
Stage 2: Removing the Old Module (5–10 min)
- Confirm chassis power is off.
- Disconnect the PROFIBUS cable from the 9-pin D-Sub connector.
- Release the module locking tab and slide the module out of the chassis slot. ⚠️ Keep the old module until the new one is fully commissioned and the network is verified.
Stage 3: Installing the New Module (10–15 min)
- Verify the unit is marked SST-PB3-CLX-RLL (or 1120160018).
- Insert the module into any available ControlLogix slot until the locking tab engages.
- Connect the PROFIBUS network cable to the 9-pin D-Sub connector. Ensure proper termination and shielding.
- Apply chassis power. Self-Checklist: [ ] Module fully seated [ ] PROFIBUS cable and terminators correct [ ] Chassis power restored.
Stage 4: Power-On & Testing (20–40 min)
- Open Studio 5000 / RSLogix 5000 and add or verify the SST-PB3-CLX-RLL via the Add-On Profile.
- Configure the PROFIBUS network (baud rate, slave addresses, I/O mapping) using the AOP or SST Console software.
- Download the configuration to the module.
- Place the controller in Run mode and verify communication status, slave health, and I/O data.
- Monitor diagnostic counters and correct any network or configuration issues. ⚠️ Troubleshooting Note: Common problems include missing terminators, incorrect baud rate, duplicate node addresses, or failure to install the correct Add-On Profile. A module fault often clears after a power cycle and re-download of the configuration.
6. Frequently Asked Questions (FAQ)
Q: Can the SST-PB3-CLX-RLL be hot-swapped? No. Always remove power from the ControlLogix chassis before inserting or removing the module.
Q: Is the SST-PB3-CLX-RLL still in production? No. The module is discontinued. Remaining units are new surplus or refurbished. For new designs, consider current Rockwell or third-party PROFIBUS solutions for ControlLogix or migrate to EtherNet/IP where possible.
Q: How many PROFIBUS slaves can it support? Up to 125 DP slaves. Practical limits depend on total I/O data size and scan time requirements.
Q: Does it require ladder logic to operate? Basic scanning can run without ladder code. Advanced features and diagnostics are typically handled through the Add-On Profile and controller tags.
Q: Why is the price lower than historical OEM list price? These are genuine surplus units from excess inventory. They are original Molex/Woodhead modules that have never been installed in a running system, but they are no longer available through standard channels. Functional testing and warranty are provided.
Q: Is an Add-On Profile available? Yes. Rockwell provides an official Add-On Profile (AOP) for use with RSLogix 5000 / Studio 5000. Install the matching AOP version for reliable configuration.
Q: Can multiple modules be used in one chassis? Yes. Up to eight SST-PB3-CLX-RLL modules can be installed in a single ControlLogix chassis, subject to power supply and backplane capacity.



