
 WhatsApp: +86 16626708626
 Email:
  Phone: +86 16626708626
Description
3. Key Technical Specifications
| Parameter | Value |
|---|---|
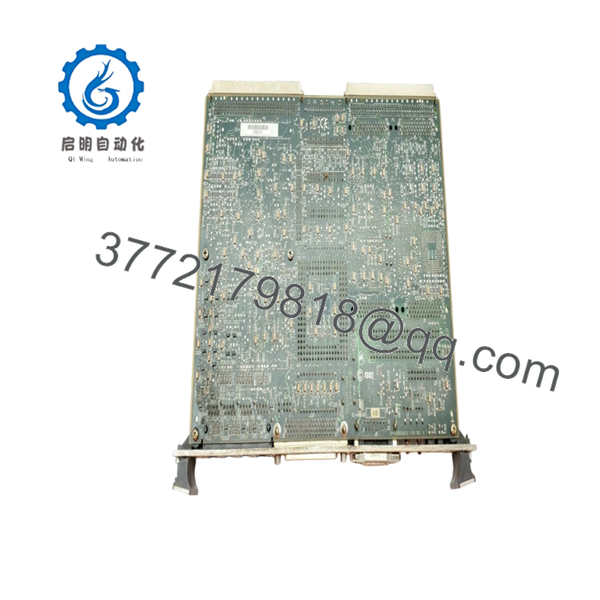
| Manufacturer | Motorola Computer Group |
| Model Number | 84-W8866B01E |
| Associated Platform | MVME162 Series |
| Product Type | VMEbus CPU Board |
| Architecture | Motorola 68040 Embedded Computing Platform |
| Bus Standard | ANSI/VITA VMEbus |
| Form Factor | 6U VME Module |
| Processor Family | Motorola MC68040 Series |
| Memory Support | DRAM and Flash Memory (configuration dependent) |
| Network Interface | Integrated Ethernet Support |
| Serial Interfaces | Multiple Asynchronous Serial Ports |
| Industrial Application | Semiconductor Equipment, Process Control, Test Systems |
| Status | Legacy / Obsolete Product |
Several industry listings identify 84-W8866B01E as a Motorola MVME162-series CPU board, including MVME162-210 and MVME162-220 configurations. The exact processor speed and memory configuration should be verified from the board label because multiple hardware variants were produced under the MVME162 family.
4. Product Introduction
The Motorola 84-W8866B01E is a VMEbus CPU board from the MVME162 embedded controller family. It was widely deployed in semiconductor manufacturing equipment, industrial automation systems, test platforms, and OEM machine controllers that relied on Motorola 68040 processor technology.
In long-life industrial installations, the MVME162 platform remains in service because replacement of the complete control architecture often costs substantially more than maintaining spare processor inventory. Engineers typically select this board when preserving software compatibility and minimizing plant downtime are higher priorities than platform modernization.

- 84-W8866B01E
5. Installation & Configuration Guide
Stage 1: Pre-Installation Preparation (10 Minutes)
⚠️ Safety First
- Notify production personnel of planned downtime.
- Place all controlled equipment into a safe state.
- Apply lockout/tagout procedures.
- Remove system power.
- Wait at least 5 minutes for capacitor discharge.
Tools Required
- ESD wrist strap
- PH1 screwdriver
- Fluke 115 multimeter
- Cable markers
- Smartphone for documentation
- Flashlight
Data Backup
- Back up controller software and boot images.
- Document network settings.
- Photograph DIP switches and jumper locations.
- Record NVRAM configuration values.
- Capture startup diagnostics if available.
Stage 2: Removing the Old Module (5 Minutes)
- Open rack access panels.
- Label all connected cables.
- Disconnect front-panel connections.
- Loosen extraction hardware.
- Use ejector handles evenly.
⚠️ Never pull one side first. Uneven force can damage VME connectors.
- Remove the board in a straight motion.
- Inspect the backplane for:
- Bent pins
- Dust accumulation
- Corrosion
- Connector damage
⚠️ Keep the original board available until the replacement completes functional testing.
Stage 3: Installing the New Module (10 Minutes)
- Connect ESD protection.
- Verify part number and hardware revision.
Configuration Clone (Critical)
- Match every jumper and switch position.
- Verify boot source selection.
- Verify Ethernet and serial configuration settings.
- Verify memory configuration jumpers if present.
❗ This is the most common rookie mistake, but it happens constantly. Take a photo before you pull it. I can’t stress this enough.
- Insert the board squarely into the VME slot.
- Engage ejector handles completely.
- Tighten retaining screws.
- Reconnect all cables.
Self-Checklist
- Model matches
- Jumpers match
- Connectors seated
- Retention screws tightened
- ESD precautions followed
Stage 4: Power-On & Testing (15 Minutes)
Pre-Power Check
- Verify no short circuits exist on power rails.
- Confirm proper board seating.
Power-On Procedure
- Energize the VME chassis only.
- Observe LED startup sequence.
- Verify processor boot activity.
- Connect via console port.
- Confirm Ethernet communication.
- Verify application startup.
- Perform dry-run I/O testing.
Troubleshooting Note
⚠️ Solid fault LEDs often indicate firmware or boot configuration issues.
⚠️ If the board boots but communications fail, check MAC address settings, network parameters, and transition module compatibility.
Common Replacement Risks from the Field
❗ Firmware Revision Mismatch
I’ve seen maintenance teams replace a CPU board and spend two days troubleshooting “communication timeout” alarms. The hardware was good. The replacement board carried a different firmware revision.
Avoidance: Document the existing firmware before removal and request matching firmware whenever possible.
❗ DIP Switch and Jumper Errors
This remains the most common cause of startup failures.
Avoidance: Photograph every switch bank before removal. Match every setting exactly.
❗ Transition Module Compatibility
Many MVME162 installations use dedicated rear transition modules.
Avoidance: Verify compatibility between the CPU board and rear I/O transition hardware.
Warning: Never assume connector compatibility based solely on physical fit.
❗ Power Supply Capacity
Legacy VME racks often operate close to power supply limits.
Avoidance: Calculate total rack load and maintain at least a 20% power margin.
❗ Electrostatic Discharge (ESD)
I once watched a technician remove a VME board during winter without a wrist strap. The replacement failed immediately during commissioning.
Avoidance: Always use a grounded wrist strap and ESD-safe work surface.
Keep these checks in mind and you’ll save yourself 90% of typical rework time.
6. Frequently Asked Questions (FAQ)
Q1. Can I hot-swap the Motorola 84-W8866B01E?
No.
Most MVME162 systems were not designed for hot-swapping. Removing a processor board under power can corrupt memory, interrupt the VME bus, and damage connected hardware. Shut down the chassis first.
Q2. Is this model obsolete?
Yes.
The MVME162 family is a legacy platform. Motorola discontinued production years ago. Current market availability generally comes from surplus inventory, refurbished units, or equipment recovered from decommissioned systems.
Q3. Is the 84-W8866B01E the same as an MVME162 CPU board?
Available industry references consistently associate 84-W8866B01E with MVME162-series CPU boards, including MVME162-210 and MVME162-220 variants. Always verify the exact assembly label because multiple revisions exist.
Q4. Will I lose my application software when replacing the board?
Not necessarily.
Many systems store application software in onboard flash or external storage. Before replacement, create a full backup of firmware, operating system files, and configuration data.
Q5. What is the direct replacement if this board is unavailable?
That depends on the installed software and operating system.
Some applications can migrate to later MVME16x or MVME17x platforms, while others require exact hardware matching. Verify software compatibility before purchasing alternatives.
Q6. Why is surplus inventory often cheaper than OEM pricing?
Because production ended years ago.
Most available inventory originates from excess stock, machine upgrades, or plant closures. The hardware may remain fully functional even though factory production has ceased.


