WhatsApp: +86 16626708626
 Email:
 Phone: +86 16626708626
Description
Key Technical Specifications
| Parameter | Value |
|---|---|
| Processor | Freescale MPC7455 (MPC7450 family) PowerPC at 1 GHz; later builds use MPC7457 |
| On-Chip Cache | 256 KB L2; 2 MB L3 backside cache |
| Coprocessor | AltiVec vector unit for computational workloads |
| DRAM | 512 MB onboard ECC SDRAM; expandable to 1 GB with RAM5500-007 mezzanine card |
| Flash Memory | 40 MB total (32 MB soldered + 8 MB socketed, two banks) |
| NVRAM | Battery-backed RTC/NVRAM; cell capacity life 5 years at 100 % duty, 25 °C |
| VMEbus Interface | Universe II VME64x PCI-to-VME bridge ASIC on dedicated 33 MHz PCI segment; master/slave, A32/D64 |
| PCI Buses | Dual independent 64-bit, 33/66 MHz PCI buses; both PMC sites support 66 MHz operation |
| PMC Expansion | Two PMC sites + PMCspan connector (64-bit PCI expansion) allowing up to four additional PMCs |
| Ethernet | One Gigabit Ethernet (10/100/1000Base-TX) + one 10/100BaseTX port |
| Serial Ports | Two serial ports |
| Real-Time Timers | Eight 32-bit programmable timers/counters |
| Handles | IEEE handles (the -0163 configuration; -0161 uses Scanbe handles) |
| I/O Compatibility | I/O compatible with MVME51xx family transition modules (MVME712M, MVME761 rear I/O via P2) |
| Form Factor | Single VME slot (6U VME64x, double-height), even fully configured with two PMCs |
| Operating Systems | VxWorks, Linux, QNX; Motorola PPCBug/PPCBug firmware and diagnostics |
| Operating Temperature | 0 to +55 °C with forced-air cooling |
| Power | ‘+5 V from VME backplane (board design typical draw, verify against datasheet MVME5500-D8) |
⚠️ Compatibility note: The “-0161” and “-0163” suffixes differ only in front panel handle style (Scanbe vs IEEE). Later Emerson production carries the “6E” designator (MVME55006E-0163). Verify your chassis handle retention and the installed option stickers against the OEM datasheet (document MVME5500-D8, 02/06) before ordering.
Product Introduction
The Motorola MVME5500-0163 is a single-slot VME64x single-board computer built on the MPC7455 PowerPC processor at 1 GHz, with 256 KB L2 cache, 2 MB L3 backside cache, an AltiVec vector unit, and 512 MB ECC SDRAM expandable to 1 GB. It targets data-intensive embedded applications: industrial automation, defense and aerospace systems, transportation, and high-speed data acquisition.
What sets this board apart from the MVME2700/MVME5100 generation is balanced subsystem design: dual independent 64-bit PCI buses running up to 66 MHz, with the Universe II VME interface isolated on its own 33 MHz PCI segment so VMEbus traffic never drags down the PMC sites. It maintains I/O compatibility with the MVME51xx family, which lets plants upgrade processor performance without re-engineering existing VME chassis and transition module wiring — a key reason the MVME5500 became the workhorse of the VME refresh cycle.
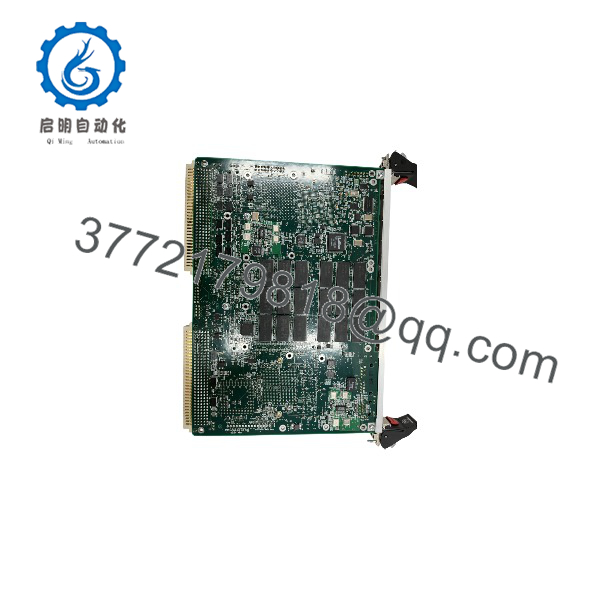
MVME5500-0163
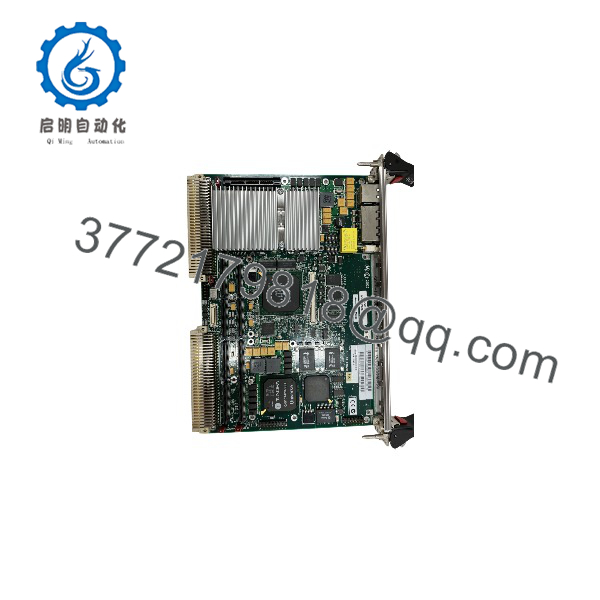
MVME5500-0163
Installation & Configuration Guide
Realistic time budget: 45–60 minutes for a like-for-like swap, plus application reload and soak testing. This board has more configurable variables than a plain I/O module — don’t rush it.
Stage 1: Pre-Installation Preparation (10–15 min)
- ⚠️ Safety First: Notify operations of the downtime window. Put the process in a safe state. Lock out/tag out the chassis power. Wait 5 minutes for backplane capacitor discharge.
- Tools Required: Grounded ESD wrist strap, ESD mat, flat-blade screwdriver for injector/ejector screws, Fluke 115-class multimeter, cable labels, smartphone for photos.
- Data Backup — before you touch hardware:
- Photograph the front panel, all cable connections, PMC site occupants, and any configuration stickers.
- Record the PPCBug firmware version and dump the environment variables (ENV/CNFG) from the serial debug console while the old board still boots.
- Back up the Flash image (application plus any OS loader) and note whether you boot from Flash, network, or disk.
- ❗ Battery warning: The RTC/NVRAM lithium cell has a 5-year design life at full duty. On a 15-year-old board it is a time bomb for your environment settings. Copy down every configuration parameter before removing power. If you’re keeping this chassis alive long-term, replace the battery on the replacement board proactively.
Stage 2: Removing the Old Module (10 min)
- Full chassis power down. Kill the breaker — no soft-off.
- Label and disconnect front panel Ethernet and serial cables. Disconnect P2 cabling if a transition module is used.
- If PMC modules are installed, remove them after photographing their seating and any jumper settings. Set them on the ESD mat in labeled positions.
- Loosen both injector/ejector screws alternately and pull the board straight out. Never cock the board in the slot — P1/P2 pins on a VME64x backplane bend easily and a bent pin can mean a backplane replacement.
- Inspect the slot: dust, bent pins, discoloration from heat. Clean with dry air if needed.
- ⚠️ Keep the old board on the bench until the replacement passes full functional test. Its firmware, jumpers, and PMC configuration are your rollback reference.
Stage 3: Installing the New Module (10–15 min)
- ESD strap on, board on the mat. Confirm the part number matches your order — check for MPC7455 vs MPC7457 CPU, memory size, and handle style (IEEE for -0163).
- Configuration clone: Restore NVRAM environment settings from your documented baseline. Verify system controller designation (only one board should be system controller, usually slot 1). Confirm Flash contents match your backup image.
- Reinstall PMC modules per your photos, matching sites exactly — a PMC in the wrong site changes PCI bus loading and can break timing on a 66 MHz bus.
- Seat the board and tighten the two injector/ejector screws evenly, top and bottom, until P1/P2 connectors seat fully.
- Reattach all cabling per your labels.
Self-checklist: [ ] Part number/CPU variant verified [ ] NVRAM settings restored [ ] System controller setting correct [ ] PMCs in original sites [ ] Cables per photos [ ] Ejector screws tight
Stage 4: Power-On & Testing (15–20 min)
- Meter the +5 V rail at the backplane for shorts to ground before power-up.
- Power the chassis. Watch the debug serial port (9,600 baud) for the PPCBug banner and memory sizing (should report 512 MB ECC).
- Verify the firmware version against your baseline. A PPCBug revision difference means changed default environment variables — enter your documented settings, don’t accept defaults.
- Reload your application image to Flash or confirm the network/disk boot path.
- Dry-run test: Gigabit and 10/100 Ethernet links, both serial ports, a VMEbus window access to a known slave board, and each PMC module.
- ⚠️ Troubleshooting note: A board that boots but fails VMEbus access usually has a Universe II address window mismatch in NVRAM, not bad hardware. Random hangs under compute load point to cooling — the MPC7455 at 1 GHz dissipates serious heat and requires the chassis forced-air spec, not just convection. If the machine crashes in the first 10 minutes of load, check airflow before blaming the board.
Frequently Asked Questions (FAQ)
Q1: Can I hot-swap the MVME5500-0163 under power?
No. It’s a standard VME64x board, not a live-insertion design. Pulling it hot risks bent P1 pins and damaged backplane drivers, and can crash every board on the bus. Power the chassis down first. Yes, that means downtime — plan the window.
Q2: Is this model obsolete, and is it genuinely new?
Yes, it’s discontinued. Motorola left the embedded board business, the line went to Emerson (later branded Penguin Edge), and new production ended. Factory-new doesn’t exist anymore. Our stock is New Original / New Surplus: OEM-packaged boards with traceable packing lists and customs documentation, serial-verified against counterfeits. Be aware that market stock of this board is mixed — refurbs get sold as new regularly. Ask any seller for the test report and packaging photos. We provide both on request.
Q3: What’s the difference between the MVME5500-0161, -0163, and the “6E” versions?
The -0161 and -0163 differ only in front panel handle style: Scanbe handles on the -0161, IEEE handles on the -0163. Functionally identical boards. Later Emerson production adds a “6E” designator (MVME55006E-0163) and some late builds use the MPC7457 instead of the MPC7455 — same core at 1 GHz, minor silicon revisions. All work as direct replacements in the same slot. Match the handle style to your chassis retention hardware if you have a tight fit.
Q4: Will I lose my program when I pull the old CPU?
Your application lives in Flash, in NVRAM settings, or boots from network/disk. If you’ve imaged the Flash and dumped the environment variables, you lose nothing but uptime. The real risk on a board this age is the NVRAM battery: it has a 5-year design life, and when it dies, environment settings vanish on power cycle. I’ve seen sites lose VMEbus address maps because nobody wrote down the ENV settings. Image your Flash and document NVRAM while the system is healthy — not after it faults.
Q5: What’s the upgrade path if the MVME5500 is out of stock?
The MVME6100 is the designated successor — faster processor, similar I/O concept — but it is not a drop-in: it requires firmware rebuilds, OS port, and requalification. There is no painless form-fit-function substitute. For keeping a chassis running, a tested MVME5500 of the right configuration is the only low-risk option. If we don’t have your exact suffix in new surplus, we’ll say so and tell you what we do have — including known-good refurbished units clearly labeled as such.
Q6: What condition are your boards in, and how are they tested?
Incoming inspection covers source traceability (OEM packing lists, customs declarations), serial number and anti-counterfeit verification, and visual inspection for corrosion, rework marks, or component tampering. Every board gets a live functional test on a genuine VME64x test chassis: power-on self-test and PPCBug banner verification on the debug port, ECC memory test, Flash bank verification, both Ethernet ports, serial port loopback, a VMEbus master/slave access test through the Universe II, and a minimum 24-hour powered soak with thermal monitoring. Electrical checks include a 500 V Megger insulation test (>10 MΩ) and rail voltage measurement with a Fluke multimeter. Firmware version and handle configuration are documented and photographed. Boards ship in ESD bagging with a dated QC Passed label and a full test report. Test photos and videos available on request.
Q7: Why is your price lower than the original OEM list price?
Because the OEM no longer makes or supports this board — list price is a historical number. New Surplus stock came through authorized distribution closures and OEM excess inventory, so we price against real market availability, not 2006-era list. We state condition plainly on every listing: New Surplus, tested, 1-Year Warranty. If a unit is Refurbished (tested) rather than new surplus, the listing says so. No ambiguous grades.