WhatsApp: +86 16626708626
 Email:
 Phone: +86 16626708626
Description
Key Technical Specifications
| Parameter | Value |
|---|---|
| Camera Interface | Camera Link, Base configuration |
| Supported Cameras | Any base-configuration Camera Link camera (serial control via NI-IMAQ) |
| Pixel Clock | Up to 80 MHz (Camera Link spec minimum 20 MHz camera transmit) |
| Data Path | Direct DMA transfer to system memory — no onboard image memory |
| Onboard Processing | Programmable region of interest (ROI), image binarization |
| Digital I/O | Isolated digital I/O lines |
| Serial Port | Camera serial communication; baud rates 300 to 115,200 (300, 600, 1200, 1800, 2000, 2400, 3600, 4800, 7200, …) |
| Bus Interface | PCI Express x1 (works in any x1 or wider slot) |
| Synchronization | RTSI bus — routes triggers to/from up to 4 NI Vision, DAQ, or Motion devices |
| Driver Software | NI-IMAQ and NI-IMAQ I/O, part of NI Vision Acquisition Software (VAS) |
| Camera Files | NI-validated camera files pre-installed in the <NI-IMAQ>\Data directory |
| Software Support | LabVIEW, LabWindows/CVI, Vision Builder AI; no register-level programming required |
| Cabling | Standard Camera Link MDR-26 cable (camera-dependent length) |
| Environment | Indoor use only |
| Dimensions | Standard low-profile-capable PCIe card (verify bracket for your chassis) |
Verify the exact assembly revision on the board label before ordering, and confirm your camera has a matching NI-IMAQ camera file — acquisition will not start without it.
Product Introduction
The NI PCIe-1427 is a Base-configuration Camera Link frame grabber on a PCIe x1 card. It captures digital images from any base-config Camera Link camera and streams them directly into host memory via DMA — there’s no onboard image buffer to manage. Typical deployments: machine vision inspection stations, scientific imaging rigs, and industrial automation lines needing high-resolution capture with simple cabling.
The 1427 earns its slot through the NI software ecosystem rather than raw hardware specs. NI-IMAQ driver software, validated camera files, and Vision Acquisition Software mean you configure the camera by picking it from a menu — no register-level programming. Onboard ROI and image binarization cut host CPU load before data hits RAM. RTSI lets you lock capture to DAQ and motion boards for synchronized trigger timing. The honest limit: it’s Base configuration only. Medium- and full-configuration Camera Link cameras need a 1430-class or higher grabber.
Installation & Configuration Guide
Stage 1: Pre-Installation Preparation (Est. 15 minutes)
⚠️ Safety First: Notify operations of downtime — this station may be gating a production line. Power off and unplug the computer. Camera Link hot-plugging the camera side is not supported: after unplugging a cable or powering off a camera, you must restart the acquisition. De-energize everything before touching hardware.
- Tools Required: ESD wrist strap, PH2 screwdriver, multimeter, cable labels, smartphone for photos.
- Software First: ⚠️ Install the NI Vision Acquisition Software before installing the board. The driver must be present when Windows first sees the hardware, or you’ll fight device-detection errors.
- Data Backup: Document your NI-IMAQ camera file and any custom camera attributes (.icd files in
<NI-IMAQ>\Data). Photograph the Camera Link cable routing and trigger wiring. Export your acquisition application config. - Camera File Check: Confirm the camera file for your specific camera model exists and matches its firmware. A mismatched camera file is the #1 cause of garbled or failed captures.
Stage 2: Removing the Old Card (Est. 5 minutes)
- Unscrew the PCIe bracket retention screw.
- Disconnect the Camera Link cable from the bracket’s MDR-26 connector — release the captive screws fully before pulling. Never force a partially locked MDR connector.
- Pull the card straight up from the slot. Don’t pry against neighbors.
- Inspect the slot and the MDR connector pins for dust or damage.
⚠️ Keep the old card until the replacement passes a full capture test.
Stage 3: Installing the New Card (Est. 5 minutes)
- Ground yourself — touch a metal part of the computer chassis, or better, wear the ESD strap before the board leaves its anti-static bag.
- Verify the part number (779706-01 or 192823x-01) and assembly revision on the label match your order.
- Seat the card in a x1 PCIe slot (it also fits wider slots). Press evenly until the card clicks into the latch. Secure the bracket screw.
- Reconnect the Camera Link cable per your photos, hand-tightening the MDR captive screws evenly.
Self-Checklist: [ ] Driver installed first, [ ] Part number matches, [ ] Card seated and latched, [ ] MDR screws tightened evenly.
Stage 4: Power-On & Testing (Est. 10 minutes)
- Power on the PC, then power the camera. Windows detects the board and NI-IMAQ binds it.
- Open NI MAX — expand the PCIe-1427 branch, right-click Channel 0, and select Camera. Your camera should appear in the menu; if not, verify the camera file is installed in
<NI-IMAQ>\Data. - Run a test acquisition — grab a single frame and check it for correct geometry, no torn frames, and correct exposure. Torn or skewed images mean a camera file mismatch, not a bad board.
- Verify trigger lines and isolated DIO if your station uses hardware triggering.
- Restart the acquisition once after the full cable/camera power cycle — the board requires an acquisition restart after camera power events.
⚠️ Troubleshooting Note: If the device isn’t detected at all, you likely need a firmware/driver version update — NI-IMAQ from a matching VAS release. If frames come in but look corrupted, fix the camera file before replacing hardware. If capture stalls intermittently, check the Camera Link cable length and quality; at 80 MHz pixel clocks, marginal cables cause exactly this failure.
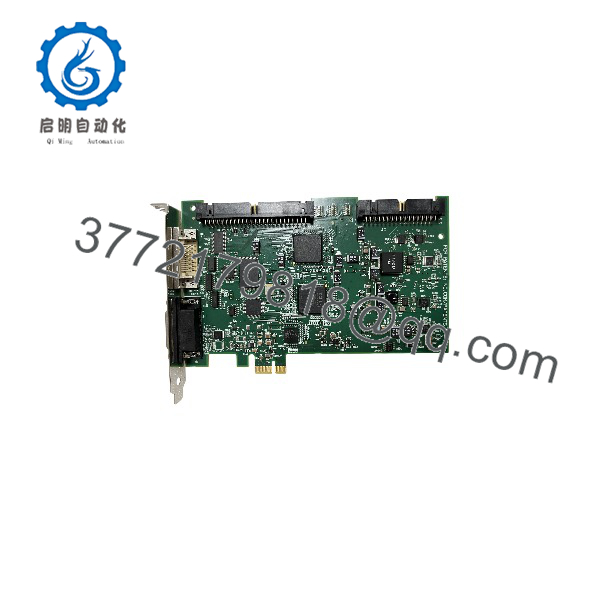
PCIe-1427
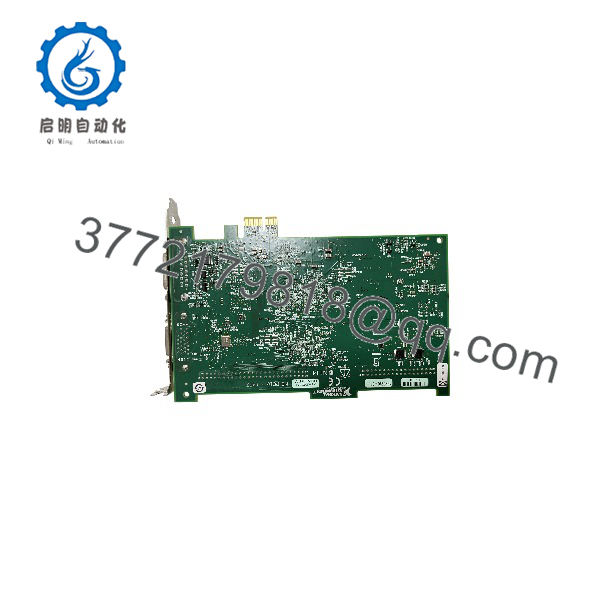
PCIe-1427
Frequently Asked Questions (FAQ)
Q1: Can I hot-swap the card or the camera under power?
No to both. PCIe cards must go in with the PC powered off. And the camera side: if you unplug the Camera Link cable or power-cycle the camera, you must restart the acquisition — the 1427 won’t recover capture automatically. I’ve lost an afternoon to a “faulty frame grabber” that was actually a tech reseating the camera cable mid-shift. Power down, swap, restart the acquisition. Every time.
Q2: Is the PCIe-1427 obsolete, and is your stock genuinely new?
Yes, discontinued — NI’s Camera Link grabbers have been superseded by USB3 Vision and GigE ecosystem products, and NI has moved on from this generation. Our stock is New Original / New Surplus: factory-sealed or uninstalled units with traceable sourcing, functionally tested before shipping. Factory-sealed units still surface periodically on this model. Test reports and photos of your exact unit are available on request. New Surplus and Refurbished (tested) are separate, clearly labeled grades.
Q3: What’s the direct replacement if this is out of stock?
Within NI’s line, the PCIe-1430 steps up to Base/Medium/Full Camera Link configurations, and the PCIe-1437 adds PoCL (Power over Camera Link) and higher bandwidth — both are PCIe x1 like the 1427. But if your camera is base-config and your code uses NI-IMAQ, the PCIe-1427 is the exact functional match with zero re-verification. If you’re rebuilding the station anyway, consider migrating to a USB3 Vision or GigE Vision camera — Camera Link hardware is a shrinking market, and camera availability will drive your decision more than the grabber will. Verify against NI’s current documentation before committing.
Q4: Will I lose my camera configuration when I pull the old card?
Camera files and attributes live on the PC hard drive — back up your <NI-IMAQ>\Data directory and your application config, and you’re safe. The board stores no user data. One caveat: camera files are camera-firmware-sensitive. If you swap both the board and the camera (or a camera was re-flashed), a previously working camera file can produce corrupted images. Re-validate with a test capture before returning the station to production.
Q5: Why is your price lower than the original OEM list price?
The card is discontinued, so surplus inventory trades below original list. We buy excess stock from OEM-authorized channels and test in-house rather than moving new production. You get a verified board at a surplus price. Straight talk on this model: most available stock is new-surplus or refurbished — genuinely factory-sealed units are the minority. The listing states the condition of the exact unit you’ll receive.
Q6: Will this work with my Medium or Full Camera Link camera?
No. The PCIe-1427 handles Base configuration only — roughly 28 bits of image data, one camera per channel. Medium and Full cameras use additional data paths this board simply doesn’t wire up. Attempting it produces nothing or garbage. If your camera datasheet says “Base configuration,” you’re fine; if it says Medium or Full, you need a PCIe-1430 or 1437-class grabber. Check the camera spec, not the connector — every Camera Link camera uses the same MDR-26 plug.
Q7: Do I need onboard image memory on the frame grabber?
Usually not, and the 1427 deliberately omits it — images stream straight into host RAM over PCIe DMA, which is faster and cheaper than buffering on the card. The exception: if your application demands deterministic capture rates independent of host OS jitter (hard real-time inspection on a loaded Windows box), a grabber with onboard memory like the 1430 series gives you a buffer against host stalls. For standard machine vision on a dedicated industrial PC, direct DMA is the right architecture.