
 WhatsApp: +86 16626708626
 Email:
  Phone: +86 16626708626
Description
Key Technical Specifications
| Parameter | Value |
|---|---|
| Manufacturer | Pro-face |
| Model | GP450-EG12 |
| HMI Series | GP70/50/30/10 Series |
| GP Type | GP-450E |
| Display Size | 10 inches |
| Display Technology | EL display |
| Display Mode | Monochrome |
| Resolution | 640 × 400 dots |
| Panel Cutout | 259 × 201 mm |
| Standard Features | Printer port / AUX port |
| Screen Creation Software | GP-PROII V3.20 or later |
| Product Status | Discontinued |
| End of Sales | July 31, 2000 |
| End of Repair | December 28, 2005 |
Pro-face’s technical FAQ identifies GP450-EG12 as the standard GP-450E model with an EL display, 640 × 400-dot resolution, and a 259 × 201 mm panel cutout. It also states that GP-PROII V3.20 or later is compatible with the GP-450E.
Replacement Options
Pro-face currently lists the following replacement paths:
- PFXGP4501TAA — GP4000 Series; same panel cutout; TFT color LCD; monochrome display mode available.
- PFXGP4501TMA — GP4000 Series; same panel cutout; TFT color LCD; monochrome mode available; supports 2-point touch.
- PFXGP4501TADW — GP4000 Series; different panel cutout; TFT color LCD; requires DC power; does not support 2-point touch.
These are replacement options, not necessarily electrical or software drop-in equivalents. Pro-face explicitly distinguishes the panel-cutout and power-supply differences.
Product Introduction
The Pro-face GP450-EG12 is a legacy 10-inch programmable HMI from the GP70/50/30/10 Series. The GP450-EG12 uses an EL display with 640 × 400-dot resolution and was designed for industrial operator-interface applications. Its GP-450E platform includes a printer port and AUX port.
This is an obsolete HMI, not a current-production unit. Pro-face records its end of sales as July 31, 2000 and end of repair as December 28, 2005. For an existing machine, retaining a tested original spare can avoid an immediate panel redesign, but replacement planning should consider the GP4000 options published by Pro-face.
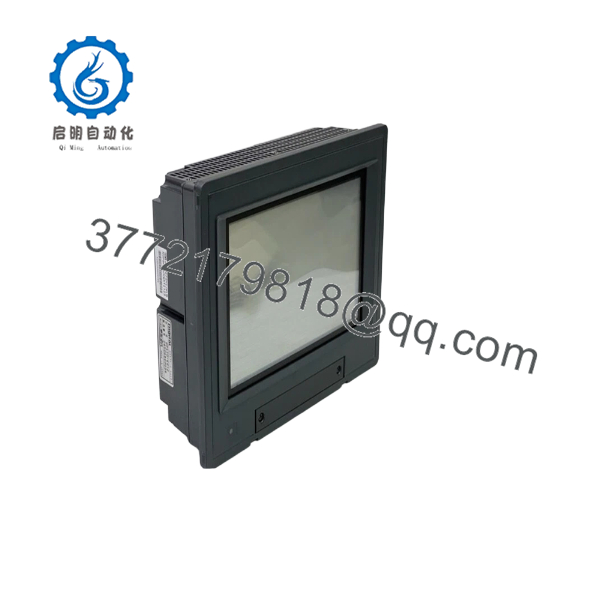
GP450-EG12
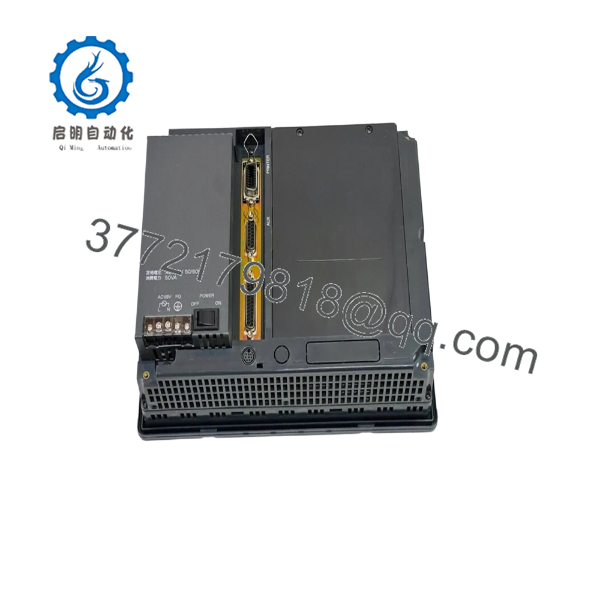
GP450-EG12
Installation & Configuration Guide
Stage 1: Pre-Installation Preparation — 5–10 Minutes
⚠️ Safety First: Place the machine in a safe state and disconnect the HMI from its power source before removing the unit or its wiring.
Tools Required
- ESD wrist strap
- Phillips screwdriver
- Multimeter
- Cable labels
- Smartphone or camera
- Appropriate panel tools
Before Removal
- Notify operations about the maintenance window.
- Place the machine in a safe operating state.
- Isolate power to the HMI.
- Verify the absence of hazardous voltage.
- Photograph the existing GP450-EG12 from the front and rear.
- Record the model and hardware markings.
- Photograph the communication and AUX/printer connections.
- Back up the existing HMI project if the original engineering environment is available.
⚠️ Do not rely on a modern HMI project file being directly compatible with the GP450-EG12. The official documentation identifies GP-PROII V3.20 or later as the compatible screen-creation software for the GP-450E.
Stage 2: Removing the Old — Approximately 10 Minutes
- Remove the rear access hardware as required.
- Label every cable before disconnecting it.
- Disconnect the PLC communication cable.
- Disconnect the printer/AUX connections where fitted.
- Release the panel mounting hardware.
- Support the HMI while removing the final fasteners.
- Pull the unit straight out of the panel.
- Inspect the panel cutout and mounting surface.
The documented panel cutout is 259 × 201 mm. Measure the actual opening rather than assuming the panel was originally cut to specification.
Stage 3: Installing the Replacement — Approximately 10 Minutes
- Verify the replacement model: .
- Inspect the display and rear connectors.
- Confirm the panel opening is suitable.
- Position the HMI in the existing cutout.
- Install the mounting hardware evenly.
- Reconnect the PLC communication wiring.
- Reconnect AUX/printer wiring if used.
- Check that all connectors are fully seated.
- Verify grounding and power wiring.
- Keep the original unit available until commissioning is complete.
⚠️ If repl the with a PFXGP4501TAA or PFXGP4501TMA, do not assume that the newer HMI preserves every legacy function. Pro-face confirms the panel cutout compatibility, but the newer units use a TFT color LCD and have different touch/display capabilities.
Stage 4: Power-On & Testing — 5–15 Minutes
- Perform a final wiring inspection.
- Confirm the correct supply voltage.
- Restore power.
- Observe the HMI startup sequence.
- Verify that the display initializes.
- Check touch/operator input.
- Verify PLC communication.
- Test representative screens.
- Check alarms and operator commands.
- Test AUX/printer functions if used.
- Confirm the machine-control interface before returning the equipment to service.
Commissioning Check
- model verified
- 259 × 201 mm panel cutout verified
- Power wiring checked
- PLC cable checked
- AUX/printer connections checked
- Display operational
- Touch input operational
- PLC communication operational
- Operator screens verified
- Alarm functions verified
Frequently Asked Questions (FAQ)
Q1. Isface still manufactured?
No. Pro-face lists the end of sales as July 31, 2000 and end of repair as December 28, 2005. It should be treated as a legacy/obsolete HMI.
Q2. What type of disdoes use?
The is the standard GP-450E model with an EL display and 640 × 400-dot resolution. It is a monochrome-oriented legacy display rather than a modern TFT color HMI.
Q3. Wh the panel cutout size?
The documented panel cutout is 259 × 201 mm. This dimension is important when evaluating a replacement because Pro-face specifically identifies some replacement models as having the same cutout while others require panel modification.
Q4. What software was used tgram ?
Pro-face identifies GP-PROII V3.20 or later as compatible screen-creation software for the GP-450E. A legacy replacement project may therefore depend on recovering the original GP-PROII project rather than simply transferring a modern HMI project.
Q5. What is the recommended replac for ?
Pro-face lists PFXGP4501TAA and PFXGP4501TMA as GP4000 replacement options with the same panel cutout. PFXGP4501TADW is another option, but it has a different panel cutout and requires a DC power supply.
Q6. Can I directllace with PFXGP4501TAA?
Mechanically, the panel cutout is documented as compatible. Electrically and functionally, verify the complete application first. PFXGP4501TAA uses a TFT color LCD and can operate in monochrome mode, but it is a different-generation GP4000 HMI. The PLC protocol, project conversion, communication cable, and operator functions should all be checked before the production changeover.
. Is the same 450-EG11?
No. Pro-face’s documentation lists and as separate models. is specifically documented with the 10-inch EL display and 640 × 400-dot resolution. Do not order based only onGP450 family designation; verify the complete suffix.



