
 WhatsApp: +86 16626708626
 Email:
  Phone: +86 16626708626
Description
Key Technical Specifications
| Parameter | Value |
|---|---|
| Manufacturer / Brand | S2M / SKF Magnetic Mechatronics |
| Model | ELCART-0961 |
| Additional Identification | 8465A |
| Product Type | Axial power amplifier module |
| System | Active magnetic bearing control system |
| Application | Turbomachinery / turboexpander equipment |
| Amplifier Class | 300 V class |
| Configuration | Axial amplifier |
| Assembly Association | Double axial amplifier assembly |
| Technology | Active magnetic bearing power electronics |
| Installation Role | Control cabinet / magnetic-bearing electronics |
| Lifecycle | Legacy / specialized industrial equipment |
| Replacement Strategy | Exact part-number and revision verification recommended |
The available records support the 300 V power-amplifier classification, but they do not provide sufficient evidence for exact output current, input signal range, connector pinout, dimensions, or thermal specifications. Those values should therefore be verified from the physical board label, drawing, or OEM documentation rather than estimated.
Product Introduction
The S2M ELCART-0961 8465A is an axial power amplifier module used in active magnetic-bearing systems for turbomachinery. Its function is to provide the power stage between the magnetic-bearing control electronics and the electromagnetic actuator system.
The part is associated with S2M magnetic-bearing equipment used on turboexpander packages. Procurement records also identify ELCART-0961 as a 300 V power amplifier, while equipment records identify assemblies containing ELCART-0961 boards as double axial amplifier assemblies.
Installation & Configuration Guide
Stage 1: Pre-Installation Preparation — Approx. 20–30 minutes
⚠️ Safety First
This is power electronics, not a conventional PLC I/O card. Do not treat the replacement as a simple plug-in PCB swap.
- Notify operations and place the turbomachinery package in the approved maintenance state.
- Follow the site’s lockout/tagout procedure.
- Isolate the control cabinet and associated power sources.
- Verify that DC-link and other stored-energy circuits have discharged.
- Confirm zero voltage with an appropriately rated multimeter before touching the amplifier.
Tools Required
- ESD wrist strap
- ESD-safe work surface
- Digital multimeter rated for the applicable voltage
- Insulated hand tools
- Wire labels
- Camera or smartphone
- Original machine wiring drawings
- Existing amplifier documentation
Data Backup
Before removing the original unit:
- Photograph the complete assembly.
- Record ELCART-0961 and 8465A markings.
- Record PCB revision and serial number.
- Photograph every connector and terminal.
- Record the amplifier’s physical position in the magnetic-bearing cabinet.
- Determine whether the assembly is for axial or another bearing position.
❗ Do not order or install a visually similar ELCART board without checking its exact function. ELCART boards in the same equipment family can perform different functions, including data control and detection.
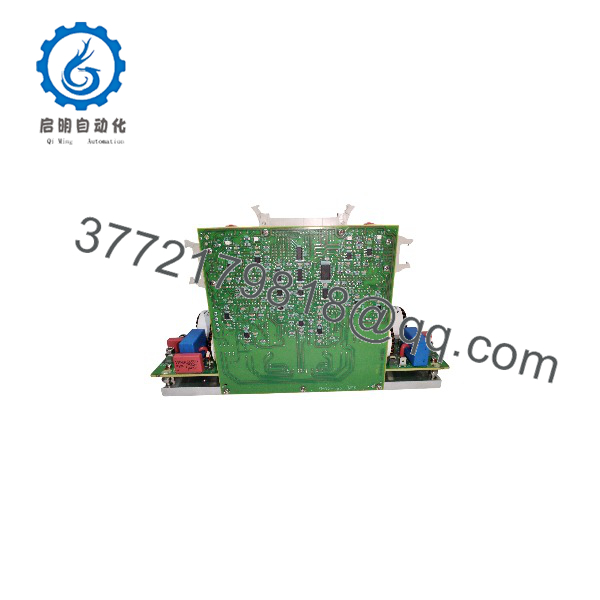
ELCART-0961 8465A
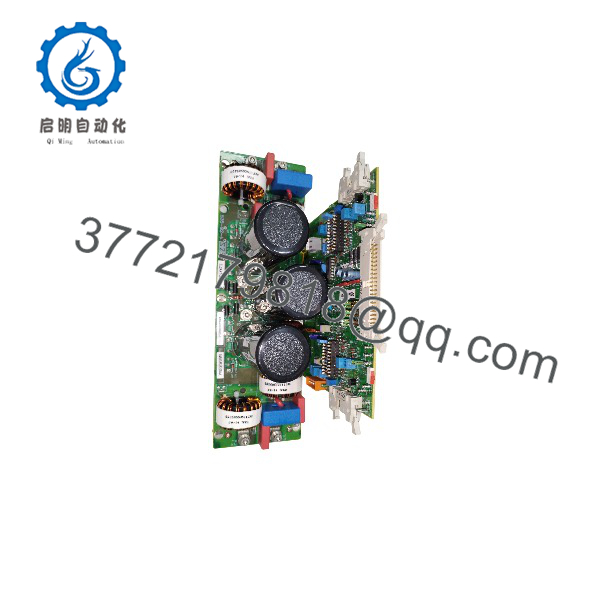
ELCART-0961 8465A
Stage 2: Removing the Old Module — Approx. 15 minutes
- Confirm that all applicable power sources are isolated.
- Verify zero voltage according to the plant electrical safety procedure.
- Photograph the original wiring from several angles.
- Label each connector before removal.
- Disconnect connectors without pulling on the wiring.
- Remove the amplifier assembly using the machine’s approved mechanical procedure.
- Inspect connectors for oxidation, contamination, loose pins, or heat damage.
- Inspect adjacent power components for evidence of overheating.
⚠️ Keep the original amplifier available during commissioning. If the replacement does not behave as expected, the original unit provides an important reference for connector position, revision, and mechanical configuration.
Stage 3: Installing the ELCART-0961 8465A — Approx. 20 minutes
- Verify the replacement identification against the original:
- 8465A
- Board revision
- Assembly position
- Confirm that the replacement is intended for the axial amplifier position.
- Use ESD protection when handling the PCB.
- Inspect the board before installation. Look for:
- Cracked components
- Corrosion
- Damaged connectors
- Burn marks
- Previous repair work
- Install the board or complete amplifier assembly according to the original mechanical configuration.
- Reconnect each connector according to the photographs and approved wiring documentation.
- Verify connector seating and mechanical retention.
Replacement Checklist
- confirmed
- 8465A identification confirmed
- Correct axial position confirmed
- Board revision documented
- Connectors correctly installed
- No visible PCB damage
- Grounding connections verified
- Adjacent equipment inspected
Stage 4: Power-On & Testing — Time Depends on Machine Procedure
Do not apply full operating power simply to determine whether the replacement powers up.
- Perform a final wiring inspection.
- Verify isolation and grounding requirements.
- Check for unintended shorts using the plant-approved procedure.
- Energize the control system according to the OEM commissioning sequence.
- Monitor diagnostic indications.
- Confirm communication between the bearing controller and amplifier system.
- Verify actuator/bearing feedback behavior.
- Perform controlled commissioning before returning the turbomachinery to normal operation.
- Record measured values and alarms in the maintenance report.
⚠️ Do not infer acceptable operation from a normal-looking PCB or an energized status indicator. A magnetic-bearing amplifier is part of a closed-loop electromechanical system. Incorrect channel assignment or an incompatible amplifier configuration can affect bearing control.
Frequently Asked Questions (FAQ)
Q1: What is the S2M 8465A?
It is an axial power amplifier module associated with S2M active magnetic-bearing systems. Equipment and procurement records identify as a 300 V-class power amplifier.
Q2: Is a PLC module?
No. It should not be treated as a conventional PLC CPU, I/O, or communication module. Its documented role is power amplification within an active magnetic-bearing system.
Q3: What does the 8465A designation mean?
Available equipment records associate 8465A with the amplifier identification and specifically list an / 8465A double axial amplifier assembly. The available public documentation does not establish enough information to define 8465A as a standalone electrical specification.
Q4: What equipment uses ?
The module is associated with S2M active magnetic-bearing systems used in turbomachinery, including turboexpander equipment. An equipment-spares listing specifically identifies modules as components of an active magnetic suspension system for a turboexpander package.
Q5: Is a 300 V amplifier?
Available trade and equipment records describe as a 300 V power amplifier. However, the exact operating voltage, output current, and protection limits for a particular 8465A revision should be verified against the machine documentation before energization.
Q6: Can I substitute another ELCART amplifier?
Do not assume compatibility based only on the ELCART prefix. The ELCART family contains boards with different functions, including data-control, detection, interface, and amplifier functions. Match the exact part number, revision, physical position, and machine application.
Q7: Is this an obsolete or legacy component?
It should be treated as a legacy/specialized industrial component for procurement planning. Current availability is primarily an inventory question rather than something that should be assumed from the original system’s installation status. One industrial parts database lists -related assemblies as discontinued, while specialized suppliers continue to list the part.
Engineering Procurement Note
For , the safest purchasing specification is not simply “300 V amplifier.” Request photographs of the actual nameplate/PCB markings and confirm , 8465A, revision, axial application, and whether the offer is for a bare board or complete double axial amplifier assembly. This distinction matters because both configurations appear in equipment records.



