
 WhatsApp: +86 16626708626
 Email:
  Phone: +86 16626708626
Description
Key Technical Specifications
| Parameter | Value |
|---|---|
| Manufacturer | SANYO |
| Model | STNM-DR-25OB |
| Product Type | Industrial control module |
| Application | Industrial automation / machine control |
| I/O Configuration | Verify from module nameplate or OEM documentation |
| Rated Supply Voltage | Not reliably established |
| Input/Output Signals | Not reliably established |
| Communication Interface | Not reliably established |
| Connector Type | Revision-dependent; verify before replacement |
| Mounting | Control-system installation; verify chassis arrangement |
| Hardware Revision | Must be checked on installed unit |
| Lifecycle | Legacy SANYO component; current OEM availability requires verification |
A web search for the exact SANYO STNM-DR-25OB model did not return an authoritative OEM datasheet or catalog entry. I therefore will not invent channel counts, voltage ratings, pin assignments, or communication protocols. For a legacy industrial module, those details need to come from the actual nameplate, manual, or machine documentation.
Product Introduction
The SANYO STNM-DR-25OB is a legacy industrial control component identified under the SANYO brand. Its exact electrical architecture is not sufficiently documented in currently indexed public sources, so the model should be treated as a system-specific replacement part rather than a generic PLC or I/O module.
For procurement, match the complete STNM-DR-25OB designation, hardware revision, connector arrangement, and installed machine/controller before substitution. Do not rely on physical appearance alone when replacing legacy SANYO control hardware.
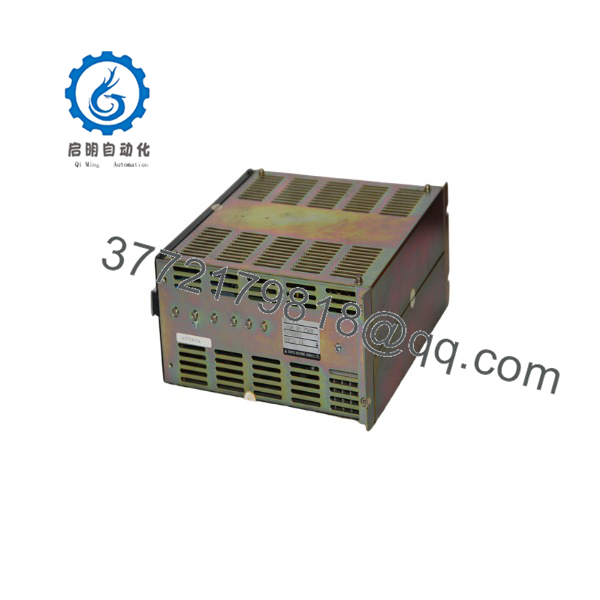
STNM-DR-25OB
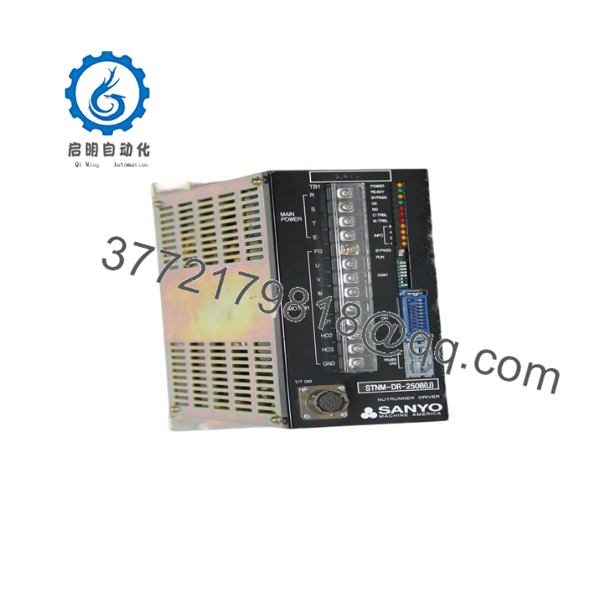
STNM-DR-25OB
Installation & Configuration Guide
Stage 1: Pre-Installation Preparation — Approximately 5 Minutes
⚠️ Safety First: Notify operations, place the machine or process in its approved safe state, and follow the site’s LOTO procedure. Do not access the control cabinet while energized unless the OEM service procedure specifically permits it.
Tools Required:
- ESD wrist strap
- PH1 screwdriver
- Digital multimeter
- Wire labels
- Smartphone/camera
- Appropriate terminal screwdriver
Data Backup:
- Record the complete SANYO STNM-DR-25OB identification.
- Photograph the front label and all visible board markings.
- Photograph every connector before removal.
- Record the controller/chassis position.
- Record machine model and control-system revision.
- Save the applicable machine/controller configuration.
⚠️ Do not assume the supply voltage or pinout. Those values need to be verified from the original hardware or machine documentation.
Stage 2: Removing the Old Module — Approximately 5 Minutes
- Confirm the machine is in a safe maintenance state.
- Isolate power according to the approved LOTO procedure.
- Photograph the installed module from several angles.
- Label every cable and connector.
- Disconnect the wiring without pulling on individual conductors.
- Release the mechanical retaining hardware.
- Remove the module straight from its mounting position.
- Inspect the mating connectors and backplane for damage or contamination.
Keep the old available until commissioning is complete.
Stage 3: Installing the New Module — Approximately 5 Minutes
- Put on the grounded ESD wrist strap.
- Verify the complete SANYO part number.
- Compare the replacement against the original PCB and label.
- Confirm the hardware revision.
- Check connector locations and keying.
- Insert the module without forcing the connector.
- Secure the module mechanically.
- Reconnect all wiring using the photographs and approved electrical drawings.
Self-Checklist:
- SANYO identification confirmed
- designation confirmed
- Hardware revision checked
- Connector arrangement matches
- Wiring verified
- Module fully seated
- Retaining hardware secured
Stage 4: Power-On & Testing — Approximately 10–15 Minutes
Pre-Power Check:
- Verify the supply circuit against the machine schematic.
- Check for shorts or reversed connections.
- Confirm the module is installed in the correct position.
- Verify field wiring before energizing the system.
Power-On Steps:
- Energize the control system according to the machine procedure.
- Observe module status indicators, if fitted.
- Check the controller for hardware/configuration faults.
- Verify that the is recognized.
- Test associated I/O or control functions individually.
- Perform a controlled dry run.
- Verify normal operation before returning the machine to production.
⚠️ If the controller reports an incompatible module, stop rather than forcing configuration changes. First compare the replacement’s hardware revision and connector arrangement with the original.
Technical Pitfalls Worth Checking
❗ 1. Exact Model Identification
With this part, the complete designation matters. should be matched character-for-character. Do not substitute an STNM-series part merely because its enclosure looks identical.
❗ 2. Hardware Revision
Legacy SANYO equipment can remain in service for many years. Record the revision and board markings from the original before purchasing a replacement.
❗ 3. Wiring and Pinout
Never assume a connector’s pinout from its physical location. Check the machine schematic or OEM documentation before applying power.
❗ 4. Power Requirements
The exact electrical rating for this specific model has not been reliably established from public documentation. Verify the original label and schematic before energizing a replacement.
❗ 5. ESD
Treat the module as an exposed electronic assembly. Use a grounded wrist strap and avoid touching connector contacts or IC pins.
Frequently Asked Questions (FAQ)
What is the SANYO ?
The is a legacy industrial control component. However, publicly indexed documentation is insufficient to establish its exact I/O architecture and electrical specifications. It should therefore be identified from the physical unit and its associated machine documentation before replacement.
What voltage does the require?
The exact supply voltage is not reliably established from the available public documentation. I would not publish a nominal voltage based solely on the model number. Check the module label and original machine schematic.
Is the a PLC CPU?
That cannot be confirmed reliably from the model number alone. The safest classification at this point is SANYO industrial control module until the physical board or documentation confirms its specific function.
Can I directly replace an existing ?
Potentially, provided the replacement has the same complete part number and compatible hardware revision. Before installation, compare the PCB, connectors, mounting arrangement, and machine/controller configuration.
Is the SANYO obsolete?
It should be treated as legacy hardware, but I would not make a definitive OEM lifecycle claim without an authoritative SANYO lifecycle document. Availability in the secondary market does not necessarily indicate current OEM production.
Will replacing the erase the machine program?
A physical module replacement does not automatically mean the entire machine program is erased. However, machine-specific configuration, calibration, or I/O mapping may depend on the control system. Back up the controller configuration before removing the original module.
What should I verify before purchasing a replacement?
At minimum, provide the supplier with:
- Complete part number
- Hardware/revision marking
- Clear front-label photograph
- Connector-side photograph
- Machine model
- Controller/chassis model
- Existing module’s application
For a production-critical spare, I would not approve the purchase from alone until those identifiers have been matched.



