
 WhatsApp: +86 16626708626
 Email:
  Phone: +86 16626708626
Description
Key Technical Specifications
| Parameter | Value |
|---|---|
| Manufacturer | Schneider Electric |
| Part Number | 140ACO13000 |
| Platform | Modicon Quantum |
| Module Type | Analog Output |
| Number of Outputs | 8 |
| Output Ranges | 0–20 mA, 0–25 mA, 4–20 mA |
| 4–20 mA Resolution | 0–4,095 counts or 0–16,000 counts |
| 0–20 mA Resolution | 0–20,000 counts |
| 0–25 mA Resolution | 0–25,000 counts |
| External Loop Supply | 6–30 V DC |
| Update Time | 5 ms |
| Setting Time | 1.6 ms to 5% of final value; 3.2 ms to ±0.1% |
| Absolute Accuracy | ±0.2% of full scale at 25 °C |
| Isolation | 1,780 V AC for 1 minute between channels and bus |
| Bus Current Requirement | 550 mA |
| Power Dissipation | 5 W maximum |
| Operating Temperature | 0–60 °C |
| Storage Temperature | −40 to +85 °C |
| Relative Humidity | 95% non-condensing |
| Weight | 0.3 kg |
| Certifications | cUL, FM Class I Division 2, UL 508 |
| Local Diagnostics | Channel, external-fault, and bus-activity LEDs |
Schneider Electric’s Quantum catalog identifies the 140ACO13000 as an 8-channel current-output module supporting 0–20 mA, 0–25 mA, and 4–20 mA ranges. The published product data specifies the 6–30 V DC external loop supply, 5 ms update time, ±0.2% full-scale accuracy at 25 °C, 1,780 V AC isolation, and 550 mA bus-current requirement.
Product Introduction
The Schneider Electric 140ACO13000 is an eight-channel analog output module for the Modicon Quantum automation platform. It generates current-loop outputs in 0–20 mA, 0–25 mA, or 4–20 mA ranges, making it suitable for control signals to valves, drives, actuators, positioners, and other analog field devices.
The module provides selectable current ranges, multiple count resolutions, 5 ms output update time, and electrical isolation between the analog channels and the Quantum bus. Schneider Electric now classifies the 140ACO13000 as discontinued and identifies BMXAMO0802 as the recommended replacement.
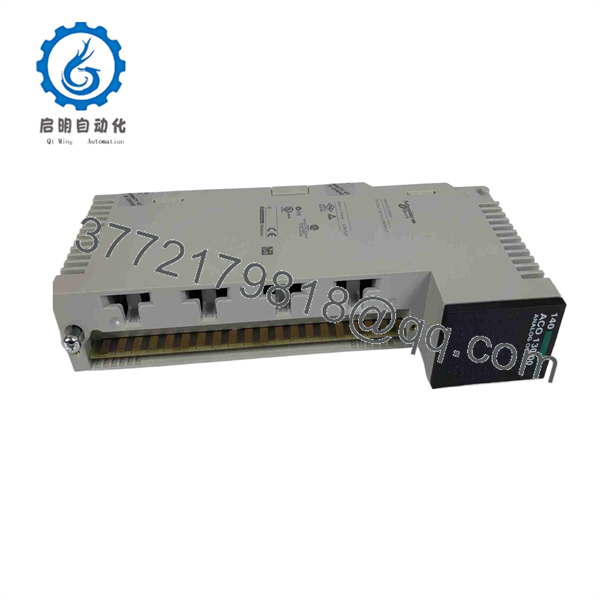
140ACO13000
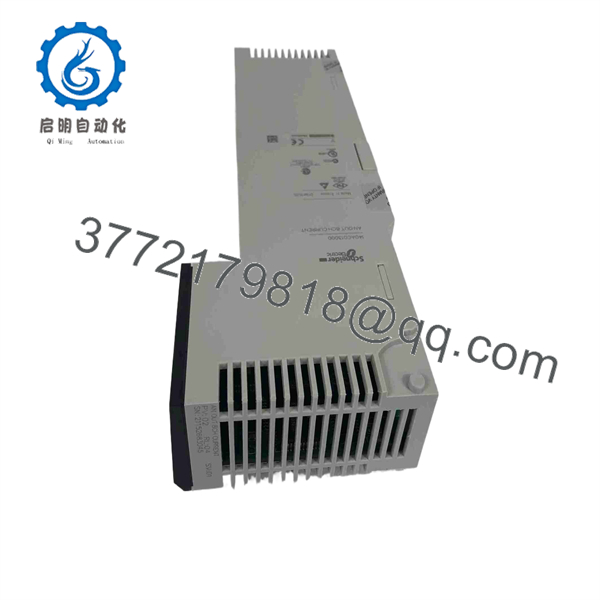
140ACO13000
Installation & Configuration Guide
Stage 1: Pre-Installation Preparation — Approximately 10 Minutes
⚠️ Safety First: Place the Quantum system in an approved maintenance state. Follow plant lockout/tagout procedures before removing the module.
Tools Required:
- ESD wrist strap
- Digital multimeter
- Appropriate screwdriver
- Wire labels
- Smartphone or camera
- Quantum configuration documentation
Data Backup:
- Record the existing module’s complete part number.
- Photograph the installed 140ACO13000 and terminal wiring.
- Record the rack slot position.
- Document the configured output ranges.
- Record field-device wiring and loop-power arrangements.
- Save the PLC application and hardware configuration.
⚠️ Do not assume every channel uses the same current range. Verify the actual application configuration before replacement.
Stage 2: Removing the Old Module — Approximately 5 Minutes
- Confirm the Quantum rack is in the approved maintenance state.
- Apply ESD protection.
- Identify the 140ACO13000 slot.
- Photograph the module and wiring.
- Label field wiring before disconnecting it.
- Disconnect the field terminal connection carefully.
- Release the module’s retaining mechanism.
- Pull the module straight out of the rack.
- Inspect the rack/backplane connector for contamination or damage.
- Retain the original module until commissioning is complete.
Stage 3: Installing the New Module — Approximately 5 Minutes
- Verify the replacement marking: 140ACO13000.
- Confirm that the module is intended for the Quantum rack.
- Inspect the module and connector.
- Maintain ESD protection while handling the board.
- Align the module with the correct rack slot.
- Seat it firmly into the backplane.
- Secure the module.
- Reconnect the field wiring according to the original documentation.
- Verify loop-power connections.
- Recheck polarity and channel assignment.
Self-Checklist:
- 140ACO13000 verified
- Correct rack slot
- Field wiring labeled
- Channel assignments verified
- Loop supply checked
- Module fully seated
- Terminal connections secured
Stage 4: Power-On & Testing — Approximately 10 Minutes
- Inspect the installation before energizing.
- Verify the external 6–30 V DC loop supply where applicable.
- Restore rack power.
- Check the module’s bus-activity indication.
- Check for external-fault or channel-fault LEDs.
- Connect the programming/configuration software.
- Verify the hardware configuration.
- Confirm each output channel’s configured range.
- Command a controlled test output.
- Measure the actual loop current with a calibrated meter.
- Verify the connected field device responds correctly.
- Return the system to service after all channels pass testing.
⚠️ Troubleshooting Note: If a 4–20 mA loop does not reach the expected value, check the external loop supply, field wiring, load resistance, channel configuration, and open-circuit condition before replacing the module.
Frequently Asked Questions (FAQ)
What is the Schneider 140ACO13000?
It is an 8-channel analog current-output module for the Modicon Quantum automation platform. Its supported output ranges are 0–20 mA, 0–25 mA, and 4–20 mA.
What external power supply does the 140ACO13000 require?
The published specification lists a 6–30 V DC external loop supply. The module itself also has a documented Quantum bus current requirement of 550 mA.
What is the output resolution?
The module supports several count ranges. For 4–20 mA, the documented configurations include 0–4,095 counts and 0–16,000 counts. For 0–20 mA and 0–25 mA, the documentation specifies 0–20,000 and 0–25,000 counts respectively.
Is the 140ACO13000 obsolete?
Yes. Schneider Electric’s current product page lists the 140ACO13000 as discontinued. The stated end-of-service date is December 31, 2030 on Schneider’s U.S. product page.
What is the recommended replacement?
Schneider Electric identifies the Modicon X80 BMXAMO0802 as the recommended replacement for 140ACO13000. The replacement is an eight-output analog module supporting 0–20 mA and 4–20 mA.
Can BMXAMO0802 simply be plugged into an existing Quantum rack?
Do not treat it as a direct mechanical plug-in replacement. BMXAMO0802 belongs to the Modicon X80 platform, whereas 140ACO13000 belongs to Modicon Quantum. Schneider identifies it as the recommended replacement, but migration requires checking the rack architecture, I/O addressing, wiring, and PLC configuration.
How do I test a 140ACO13000 after replacement?
Start with the module diagnostics, then command a known output value and measure the actual current in the field loop. Check representative points such as 4 mA, 12 mA, and 20 mA for a 4–20 mA application. Also verify the external loop supply and field-device load before concluding that the module is faulty.
What condition should I specify when purchasing a discontinued 140ACO13000?
Specify the exact condition rather than simply saying “original.” Suitable procurement descriptions include Factory Sealed, New Original / New Surplus, or Refurbished and Tested. For a discontinued Quantum module, also request the module revision and clear photographs of the nameplate before shipment.



