
 WhatsApp: +86 16626708626
 Email:
  Phone: +86 16626708626
Description
Key Technical Specifications
| Parameter | Value |
|---|---|
| Manufacturer | SEW-EURODRIVE |
| Model | DFS56L/TF/RH1M/KK |
| Compact Model Number | DFS56LTFRH1MKK |
| Product Type | Servo motor |
| Motor Family | DFS56L |
| Rated Voltage | 400 V AC |
| Phase | 3-phase |
| Rated Current | 2.4 A |
| Rated Speed | 3000 RPM |
| Feedback / Encoder Option | RH1M designation; verify exact feedback specification from nameplate |
| TF Option | TF designation; verify the exact thermal protection implementation from OEM documentation |
| KK Option | KK connection designation; verify connector/cable configuration before installation |
| Approx. Weight | 3.37 kg / 7.43 lb |
| Manufacturer Status | Discontinued |
| Condition Options Seen in Market | Never Used Original Packaging, Never Used, Refurbished |
| Warranty | Depends on seller and condition; confirm before purchase |
The published product listing gives 2.4 A, 400 V AC, 3-phase, 3000 RPM, and approximately 7.43 lb (3.37 kg). It also explicitly identifies the manufacturer status as discontinued.
Do not infer rated torque, encoder resolution, flange dimensions, shaft dimensions, IP rating, or thermal protection limits from the model string alone. Those values should be checked against the SEW-EURODRIVE documentation or the actual motor nameplate.
Product Introduction
The SEW-EURODRIVE DFS56L/TF/RH1M/KK is a three-phase servo motor for industrial motion applications. Published specifications identify the unit as a 400 V AC, 2.4 A motor with a 3000 RPM rated speed. The model is associated with SEW-EURODRIVE’s DFS56L motor family.
This is a legacy replacement component, so exact identification matters. Match the complete DFS56L/TF/RH1M/KK designation, feedback option, connector configuration, and motor data against the existing installation before ordering.
Installation & Configuration Guide
Stage 1: Pre-Installation Preparation — 10–15 Minutes
⚠️ Safety First: A servo motor can retain hazardous electrical and mechanical energy through the drive and DC bus. Place the machine in its approved safe state, isolate the drive according to site procedures, apply lockout/tagout, and verify the absence of hazardous voltage before disconnecting the motor.
Tools Required
- ESD protection where required by the drive/motor electronics
- Appropriate metric screwdrivers and hex tools
- Calibrated multimeter
- Torque wrench suitable for the mounting hardware
- Wire and cable labels
- Smartphone or camera for connector and wiring photographs
- OEM SEW-EURODRIVE documentation
Data Backup
- Record the complete motor nameplate data.
- Photograph the existing motor and all connector positions.
- Record the connected SEW-EURODRIVE drive model.
- Save drive parameters before removing the motor.
- Record encoder/feedback configuration and motor identification parameters.
- Document cable routing and shielding/grounding arrangements.
⚠️ Do not replace a servo motor by frame size alone. The feedback device and motor data must match the drive configuration.
Stage 2: Removing the Old Motor — 10–20 Minutes
- Place the machine in a mechanically safe condition.
- Isolate and verify the drive power is de-energized.
- Wait the period specified by the drive manufacturer for DC-bus discharge.
- Verify the DC bus is at the permitted safe voltage before touching connections.
- Label the motor power and feedback connections.
- Photograph connector orientation and cable routing.
- Disconnect the motor and feedback cables without pulling on the cable itself.
- Remove the mechanical mounting hardware.
- Support the motor during removal to prevent shaft or coupling damage.
- Inspect the coupling, shaft, mounting face, and cable connectors.
⚠️ Keep the original motor available until the replacement has passed electrical and motion checks.
Stage 3: Installing the New Motor — 10–15 Minutes
- Verify the replacement is specifically marked DFS56L/TF/RH1M/KK.
- Compare the nameplate data with the removed motor.
- Confirm the feedback configuration before connecting the motor.
- Inspect the shaft, flange, connector, and mounting surfaces.
- Install the motor without forcing the shaft into the coupling.
- Tighten mounting hardware to the machine/OEM torque specification.
- Connect the motor power cable.
- Connect the feedback cable.
- Verify protective grounding.
- Restore cable shielding exactly as required by the drive manufacturer’s installation instructions.
Self-Checklist
- Complete motor designation matches
- Rated voltage verified
- Motor current verified
- Feedback option verified
- Power connector secured
- Feedback connector secured
- Protective ground connected
- Mounting hardware torqued
- Coupling aligned
Stage 4: Power-On & Testing — 10–20 Minutes
- Do not immediately command full-speed operation.
- Energize the drive according to the approved startup sequence.
- Check the drive for motor-identification or encoder faults.
- Verify the configured motor parameters against the replacement nameplate.
- Confirm feedback status with the drive diagnostics.
- Jog the motor at low speed.
- Check rotation direction.
- Verify position feedback and zero/reference behavior.
- Increase speed gradually while monitoring drive current and fault status.
- Run the machine through a controlled production-cycle test.
⚠️ If the drive reports an encoder or motor-identification fault, stop the test. Check the feedback connector, motor parameter set, feedback option, and cable before changing drive parameters.
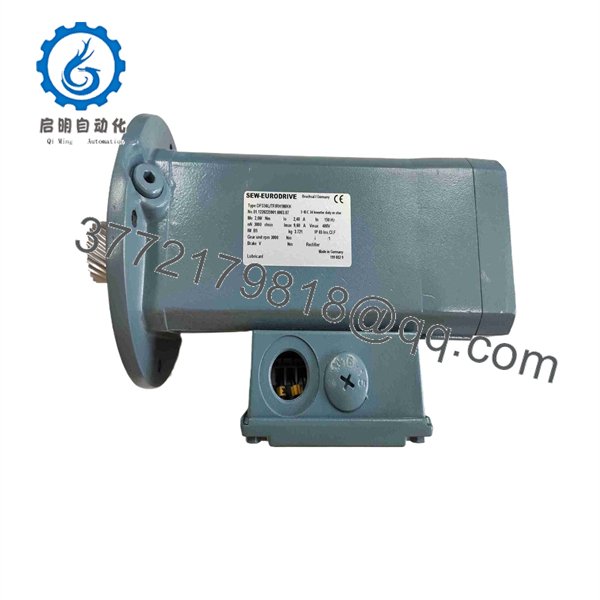
DFS56LTFRH1MKK
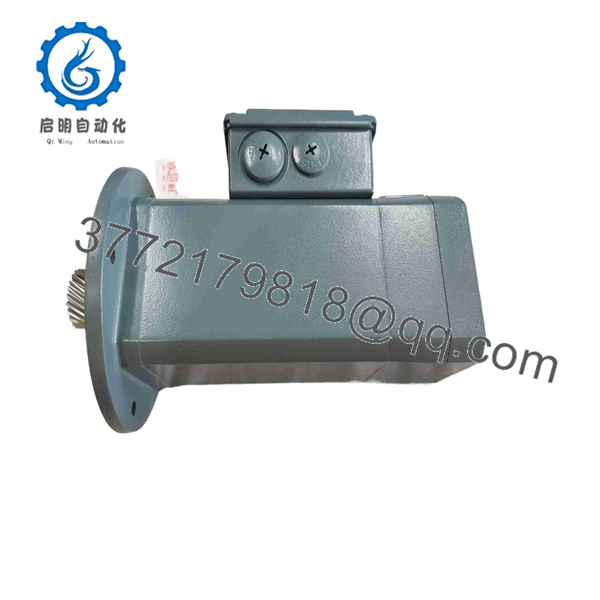
DFS56LTFRH1MKK
Frequently Asked Questions (FAQ)
Can the DFS56LTFRH1MKK be hot-swapped?
No. Treat it as a power-off mechanical replacement. The motor connects to a servo drive and contains hazardous electrical and mechanical energy. Follow the drive manufacturer’s isolation and DC-bus discharge procedure before disconnecting it.
Is the DFS56LTFRH1MKK obsolete?
Available industrial parts references explicitly list /TF/RH1M/KK as discontinued by the manufacturer. That makes remaining inventory condition and traceability important when sourcing a replacement.
Is /TF//KK the same model as DFS56LTFRH1MKK?
Yes. The compact listing DFS56LTFRH1MKK corresponds to the formatted SEW-EURODRIVE designation /TF//KK used in parts databases.
Can I substitute another motor?
Not automatically. The complete option code matters. In particular, verify the TF, , and KK options, motor electrical data, feedback device, connector arrangement, and compatibility with the installed SEW-EURODRIVE drive.
What are the confirmed electrical specifications?
Published listings identify this specific model as a 3-phase, 400 V AC, 2.4 A, 3000 RPM servo motor.
Is a new motor genuinely available?
Market listings currently show multiple condition categories, including never-used original packaging, never-used stock, and refurbished units. That does not mean every seller has factory-sealed inventory. Ask for photographs of the actual nameplate and packaging before purchasing.
Will I need to change the servo drive parameters after replacing the motor?
Potentially. If the replacement is an exact motor and option-code match, the existing configuration may already correspond to it. However, verify the motor identification, rated current, speed, feedback configuration, and other drive parameters before enabling motion. Do not copy parameters blindly from another motor simply because the mechanical frame looks identical.



