
 WhatsApp: +86 16626708626
 Email:
  Phone: +86 16626708626
Description
Key Technical Specifications
| Parameter | Value |
|---|---|
| Model | DEP232.1 |
| Part Number | 029.223003 |
| Internal / Assembly Reference | E0066.004.01 |
| Manufacturer / Legacy Platform | ALSTOM / ALSPA |
| Product Type | Digital electronic input module |
| Application | Industrial controller digital signal acquisition |
| Associated Controller Family | ALSPA C80-HPC |
| Input Type | Digital / discrete input |
| Nominal Field Voltage | 24 V class; verify exact input specification against the module label/manual |
| Backplane Interface | ALSPA controller rack/backplane; exact electrical interface should be verified |
| Configuration | System-dependent; verify rack position and controller configuration |
| Replacement Status | Legacy component; OEM production status should be confirmed |
| Firmware Requirement | Verify against the installed ALSPA controller configuration |
| Condition | Confirm as New Original, New Surplus, or Refurbished before purchase |
The available component listings consistently associate 029.223003 with DEP232.1 and identify it as a digital input module. However, the public sources reviewed do not provide enough primary-source information to safely state the exact channel count, input current, isolation specification, dimensions, or complete electrical threshold table. Those values should be taken from the OEM documentation or the nameplate of the specific revision being replaced.
Product Introduction
The ALSTOM DEP232.1, part number 029.223003, is a legacy digital electronic input module used with ALSPA controller hardware, including the C80-HPC platform. Its job is to acquire discrete field signals and make those states available to the controller for monitoring, interlocking, and sequence logic.
For replacement work, the important issue is not simply matching “DEP232.” Confirm the complete 029.223003 / E0066.004.01 identification, rack compatibility, field-voltage requirements, and installed controller configuration before energizing the replacement.
Installation & Configuration Guide
Stage 1: Pre-Installation Preparation — Allow 10–15 Minutes
⚠️ Safety First: Notify operations, place the controlled process in its approved safe state, and follow the site’s lockout/tagout procedure. Do not remove the module from an energized rack unless the OEM documentation explicitly permits live replacement.
Tools Required
- ESD wrist strap and ESD-safe work surface
- PH1 screwdriver or the correct driver for the installed hardware
- Calibrated multimeter
- Wire labels
- Smartphone or camera for configuration photographs
- OEM ALSPA documentation and current system drawings
Data Backup
- Record the existing DEP232.1 / 029.223003 identification.
- Photograph the module, rack position, terminal wiring, and any address/configuration markings.
- Record controller diagnostics before removing the module.
- Save the current controller configuration and application program where the system architecture permits.
- Record the existing firmware/configuration revision of the controller and associated I/O system.
⚠️ Do not assume a visually identical DEP232 is electrically interchangeable. Legacy ALSPA hardware can contain revision-specific configurations.
Stage 2: Removing the Old Module — Allow 5–10 Minutes
- Place the controller system in the approved maintenance state.
- Isolate power according to the site’s electrical safety procedure.
- Verify the absence of hazardous voltage with an appropriate meter.
- Remove the front cover or retaining hardware as applicable.
- Label every field connection before disconnecting it.
- Photograph the wiring from several angles.
- Release the rack/module retaining mechanism.
- Pull the module straight out without twisting it against the backplane.
- Inspect the connector and backplane for bent contacts, contamination, oxidation, or mechanical damage.
⚠️ Keep the removed .1 beside the replacement until commissioning is complete. It provides the most reliable physical reference for terminal placement and revision identification.
Stage 3: Installing the New Module — Allow 5–10 Minutes
- Put on the grounded ESD wrist strap.
- Verify that the replacement marking matches .1 / 029.223003.
- Compare the replacement against the old module before inserting it.
- Verify the internal reference E0066.004.01 where applicable.
- Check the connector arrangement and mechanical keying.
- Insert the module straight into the correct rack position.
- Engage the retaining mechanism completely.
- Reconnect field wiring using the original photographs and drawings.
- Check every terminal against the approved wiring diagram rather than relying solely on wire labels.
- Inspect the module for proper mechanical seating.
Self-Checklist
- Model and part number match
- Rack position confirmed
- Connector fully seated
- Field wiring verified
- Retaining hardware locked
- ESD precautions maintained
- Controller configuration backed up
Stage 4: Power-On & Testing — Allow 10–20 Minutes
- Before energizing, check the relevant supply rails for unintended shorts.
- Energize the controller rack according to the site’s approved startup sequence.
- Observe the module and controller diagnostic indicators.
- Check the controller’s I/O diagnostic page.
- Confirm that the channel states correspond to known field conditions.
- Perform a controlled dry-run of the connected digital signals.
- Verify alarms, permissives, interlocks, and sequence logic.
- Monitor the system for communication or I/O diagnostic faults.
⚠️ Do not use LED status alone as proof that the input circuit is correct. A module can power up normally while a field terminal, common connection, voltage threshold, or channel assignment remains incorrect.
For a supplier-side replacement unit, a sensible QC process should include visual inspection, serial/part-number traceability, electrical checks, ESD handling, and functional testing on an appropriate genuine ALSPA test environment where available. Record the firmware/configuration information and issue a test report. Test photographs and videos can then be supplied with the unit rather than claiming testing that was not actually performed.
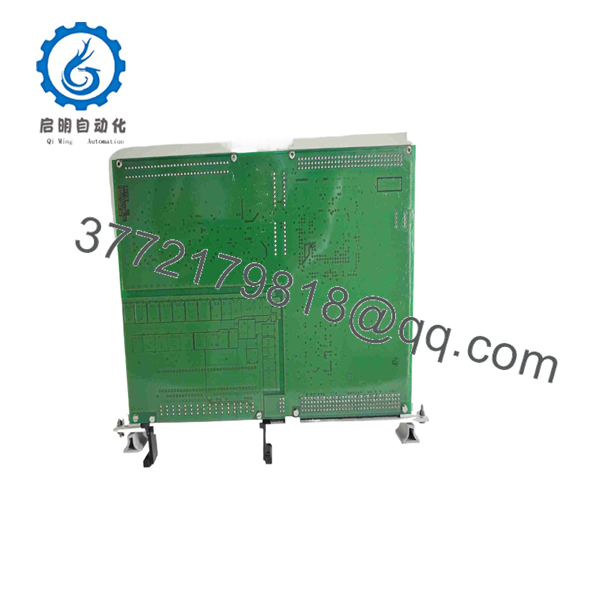
DEP232 029.223003
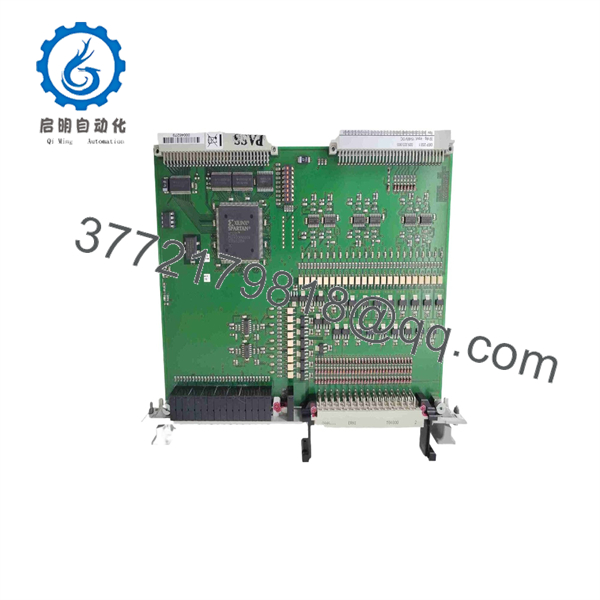
DEP232 029.223003
Frequently Asked Questions (FAQ)
Can the .1 029.223003 be hot-swapped?
Do not assume it can. The public documentation located for this specific part does not establish hot-swap capability. Treat the module as a power-down replacement unless the applicable ALSPA system manual explicitly specifies live replacement for your exact rack and hardware revision.
Is .1 029.223003 obsolete?
It is a legacy ALSPA component, and current replacement availability is stock-dependent. Public parts databases still list .1 / 029.223003, including references to ALSPA C80-HPC equipment. That does not establish current OEM production status.
Is 029.223003 the same part as ?
Available component references identify with 029.223003 and internal reference E0066.004.01. Because legacy equipment can have hardware revisions, compare the complete identification on the existing module before ordering.
Will removing the old module erase my PLC or controller program?
Removing an I/O module does not normally mean that the controller application is automatically erased. However, the system can enter a fault state if the expected I/O module disappears. Back up the controller configuration before replacement and confirm the I/O configuration after installation.
Can I use another digital input module as a direct replacement?
Not based on the model number alone. A substitute must match the mechanical rack interface, electrical input characteristics, channel assignment, controller configuration, and system revision. A module with the same general “digital input” function can still be electrically incompatible.
What should I verify before purchasing a replacement?
Send the supplier a clear photograph of the module nameplate showing .1, 029.223003, and any additional revision or serial information. Also provide the controller/rack model if available. This is particularly important for legacy ALSPA equipment because public listings do not expose every revision-specific electrical parameter.
Why can a legacy cost less than an original OEM replacement?
Legacy industrial parts may come from surplus inventory, plant decommissioning, distributor stock, or tested used equipment. Do not treat “new” and “refurbished” as equivalent conditions. Before purchasing, get the exact condition in writing: Factory Sealed, New Original/New Surplus, or Refurbished/Tested. Also request the applicable test report if the seller claims functional testing.



