

 WhatsApp: +86 16626708626
 Email:
  Phone: +86 16626708626
Description
ey Technical Specifications
| Parameter | Specification Value |
| Manufacturer | Bently Nevada (Baker Hughes) |
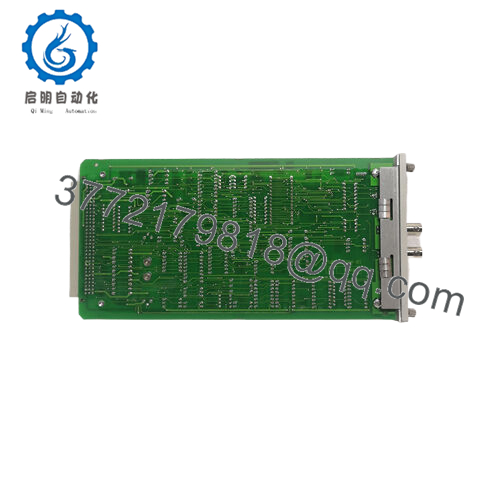
| Part Number | 125744-02 / PWA 125744-02 |
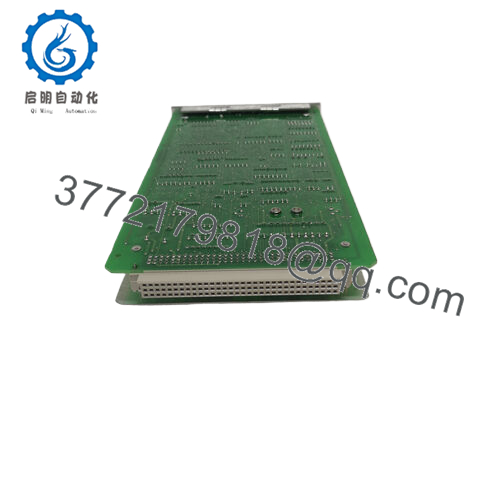
| Module Type | 3500/20 Standard Rack Interface Module (RIM) |
| Chassis Location | Dedicated to Slot 1 (adjacent to power supplies) |
| Serial Communication | RS232 and RS422 protocol formats |
| Baud Rate Maximum | 38.4 k baud via serial connections |
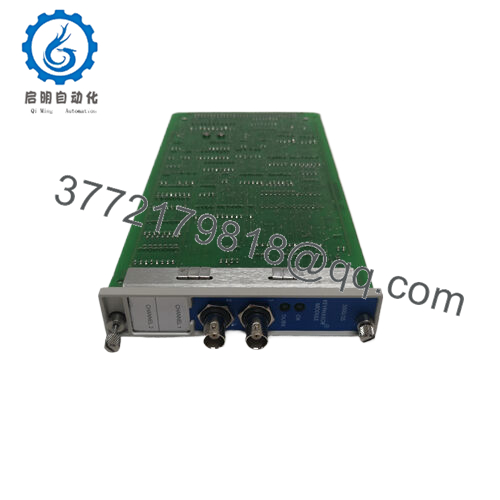
| Onboard Controls | Front panel rack reset button | Configuration keylock switch |
| Rack Addressing | Hardware switches supporting up to 63 distinct addresses |
| Relay Outputs | 1 OK Relay (Rated 5 A @ 24 V DC / 120 V AC, normally energized) |
| Operating Temperature | −30 to +65 °C (−22 to +149 °F) |
| Dimensions (H x W x D) | 241.3 mm x 24.4 mm x 241.8 mm (9.5 in x 0.96 in x 9.52 in) |
Product Introduction & Supply Chain Strategy
The Bently Nevada 125744-02 acts as the foundational 3500/20 Standard Rack Interface Module (RIM) within the 3500 Series Machinery Protection System. Installed exclusively in Slot 1 of the monitoring chassis, this piece of hardware executes all primary configuration tasks, diagnostics, and external systemic data retrieval operations. While it operates outside the active emergency machinery trip path, it represents the single processing bridge needed to interface the entire rack layout with host Distributed Control Systems (DCS), Programmable Logic Controllers (PLC), and 3500 Rack Configuration Software.
Procuring this component under a New Surplus strategy forms an essential part of minimizing the Total Cost of Ownership (TCO) across predictive maintenance programs. Since Bently Nevada 3500 architectures face tightening supply lines, choosing cheap refurbished components can mean dealing with dried-out on-board capacitors and micro-fractures inside the critical configuration keylock circuitry. Keeping 1–2 units of this factory-sealed module on-site acts as a secure insurance policy against communication failures, keeping your rotating assets and machinery fully protected.

- 125744-02
Installation & Configuration Guide
Stage 1: Pre-Installation (Prep & Safety)
- Verify that the 3500 monitoring system rack power supplies are completely turned off and isolated using lock-out/tag-out guidelines.
- Put on an ESD-safe grounding wrist strap and attach the clip directly to an unpainted section of the system enclosure frame.
- Record the current position of the hardware rack address DIP switches located on the existing circuit board assembly.
Stage 2: Removal
- Turn the front panel configuration keylock to “RUN” mode and remove the physical key to prevent mechanical interference during extraction.
- Unfasten the upper and lower thumb screws on the face of the Slot 1 module using a flathead tool.
- Use the integrated ejector tabs to slide the 125744-02 module straight outward along the chassis card guides, ensuring you do not twist the board.
Stage 3: Installation (Clone & Seat)
- Configure the hardware address switches on the new surplus 125744-02 board to match the exact system address recorded from the old unit.
- Align the replacement module within the card guide tracks of Slot 1, keeping the circuit components square with the backplane connections.
- Slide the card firmly inward until the backplane pins are fully seated, then hand-tighten the upper and lower panel securing screws.
Stage 4: Power-On & Testing
- Re-energize the 3500 rack power supply units and verify the internal DC voltage rails stabilize properly.
- Confirm the green “OK” LED on the module front panel illuminates steadily, indicating the internal self-test completed without faults.
- Connect your configuration laptop to the front port to check that communication links and data retrieval pathways are fully restored.
Firmware/Software Versions & Upgrade Notes
The 125744-02 Standard RIM card handles system communication using firmware chips mounted directly to the printed circuit board assembly. Revision jumps (such as integrating older Rev N layouts with newer Rev P software) can introduce configuration issues when working with modern versions of the 3500 Rack Configuration Software.
Before removing an operational module, verify the active software baseline via your local connection port. Forcing a mismatched firmware version into an established multi-module protection framework can disrupt data logs or block configuration adjustments. When replacing a standard unit, make sure the replacement board matches your existing software setup to avoid communication dropouts with external data networks.
Frequently Asked Questions (FAQ)
Q: Why is this New Surplus module priced higher than typical used variants on online marketplaces? A: This module is an authentic, completely unused OEM part that has never been deployed in an active industrial plant. Refurbished or used cards are often pulled from decommissioned machinery and suffer from thermal stress or worn out keylocks. Investing in a factory-sealed unit provides an expected 10–15 year operating lifespan and avoids the risk of unexpected system communication loss.
Q: Does this specific 125744-02 card support Triple Modular Redundant (TMR) monitor voting setups? A: No. The 125744-02 is the Standard Rack Interface Module. If your 3500 safety layout requires continuous monitor channel comparison and TMR voting verification, you must procure the dedicated TMR version under part number 125744-01 instead.
Q: Can this 3500/20 module be hot-swapped while the machinery protection system is running? A: Yes, the module is designed to be hot-swappable, but it is not recommended unless necessary. Because the RIM handles rack-wide settings and interface functions, removing it live will temporarily drop all external DCS communications and serial data streams until the replacement unit is installed and fully booted.
Q: What is the purpose of the built-in configuration keylock switch on the faceplate? A: The keylock switch acts as a physical security barrier. Placing the switch in “RUN” mode locks down the rack settings and prevents any unauthorized remote or local configuration changes. Turning the switch to “PROGRAM” allows engineers to modify system logic or update module settings using the configuration utility.
Q: Does this module require specialized parameter calibration during replacement? A: The board itself does not store your specific sensor calibrations, as those parameters live inside the individual monitor modules. However, you must match the hardware address switches on the side of the 125744-02 board to your old unit so the host network can identify the rack.
Q: What type of warranty coverage applies to this New Surplus product? A: We provide a 1-year operational replacement warranty starting from the date of shipment. This warranty ensures your hardware is free of manufacturing defects and will operate reliably within your facility’s critical monitoring framework.


