
 WhatsApp: +86 16626708626
 Email:
  Phone: +86 16626708626
Description
Key Technical Specifications
| Parameter | Value |
|---|---|
| Manufacturer | B&R Industrial Automation |
| Material Number | 5AP920.1505-01 |
| Product Family | Automation Panel 900 |
| Panel Model | AP920 |
| Product Type | Industrial HMI display and touch panel |
| Display Size | 15 in |
| Display Technology | Color TFT |
| Display Resolution | XGA |
| Touch Technology | Analog resistive, single-touch |
| Supply Voltage | 24 V DC |
| Maximum Current | 3.2 A maximum |
| Maximum Power Consumption | 24 W maximum |
| Front Protection Rating | IP65 |
| USB Interfaces | 3 × USB 2.0 |
| Automation Panel Link | Integrated slot / insert |
| Upgrade Options | Display Link card or PPC300 plug-in card |
| Cooling Method | Fan-free operation |
| Installation Depth | Reduced-depth panel design |
| Plug-In Card | Not included; ordered separately where required |
| Associated Terminal Blocks | 0TB103.9 screw-clamp or 0TB103.91 cage-clamp terminal block, depending on installation |
| Product Status | Legacy platform; confirm current stock and exact unit condition before purchase |
B&R identifies the 5AP920.1505-01 as an Automation Panel AP920 with a 15 in XGA color TFT display, analog resistive touch screen, three USB 2.0 ports, IP65 front protection, 24 V DC supply, and an Automation Panel Link insert. The manufacturer also specifies that a plug-in card is separate, so do not assume the display panel itself includes a PPC or Display Link card.
Product Introduction
The B&R 5AP920.1505-01 is a 15 in Automation Panel AP920 operator interface for B&R Automation Panel 900 installations. It provides an XGA color TFT display, analog resistive touch input, three front-accessible USB 2.0 interfaces, and IP65 front protection for machine HMI applications. It operates from 24 V DC and uses a fan-free mechanical design.
This panel is selected when an installed AP920 display assembly has a failed backlight, damaged resistive touch layer, broken front glass, intermittent USB access, or physical front-panel damage. It can work with compatible Automation Panel Link and PPC configurations, but the plug-in processing card is a separate item. Verify the installed PPC, Display Link arrangement, terminal block, panel cutout, and project compatibility before ordering.
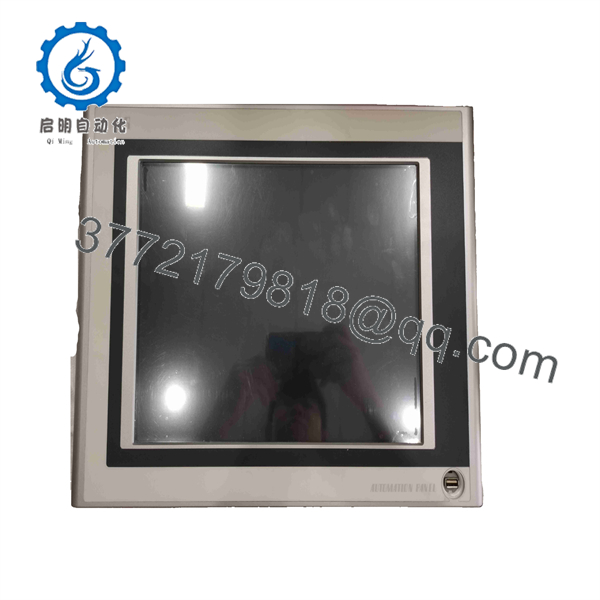
5AP920.1505-01
Troubleshooting Quick Reference
| Symptom | Possible Cause | Relevance to This Part | Quick Check Method | Recommendation |
|---|---|---|---|---|
| No display and no front LEDs | Missing 24 V DC supply, blown upstream fuse, wiring fault, failed HMI | ✅ Medium | Measure 24 V DC directly at the panel’s supply terminal block; check polarity and voltage drop while the panel attempts to start | Check the cabinet PSU, fuse, and terminal wiring before replacing the panel |
| Display is dark but touch reacts | Failed backlight, brightness parameter, display-link issue, panel hardware failure | ✅ High | Shine a flashlight across the screen at an angle; check for a faint image and verify brightness settings from the host system | A faint image usually points to backlight or display hardware; confirm host video output before replacement |
| Panel powers up but stays blank | Missing PPC300 or Display Link card, loose internal card, host-PC fault, damaged display interface | ✅ High | Isolate power, inspect the installed plug-in card and connectors, then compare the configuration against the old unit | Verify that the correct PPC or Display Link card is installed; the base panel is not a complete standalone controller |
| Touch activates the wrong button area | Resistive touch calibration drift, damaged overlay, HMI project scaling mismatch | ✅ High | Run the installed HMI calibration routine; test target accuracy at all four corners and center of the screen | Recalibrate first; replace the panel if the touch layer has dead zones or cannot retain calibration |
| Touch does not respond anywhere | Touch cable fault, failed analog resistive touch layer, host configuration issue | ✅ High | Confirm the display is operating, inspect touch connections during powered-down service, and test whether a USB mouse works with the host | If mouse control works while touch remains dead, the touch layer or touch interface is the likely fault |
| USB device is not detected | Bad USB device, cable issue, operating-system driver issue, damaged USB connector | ✅ Medium | Test with a known-good low-power USB keyboard or flash drive; inspect the port for bent contacts and review host logs | Test device and software first; replace the panel only if multiple known-good devices fail at every port |
| HMI restarts during machine operation | 24 V DC brownout, undersized PSU, loose terminals, excessive connected USB load | ✅ Medium | Log the panel supply voltage under load; check for dips below the permitted operating range and disconnect nonessential USB devices | Correct power-distribution problems before replacing the HMI; use a supply sized for the complete panel and attached devices |
| Water or coolant enters the front bezel | Damaged gasket, loose mounting clamps, cracked touch overlay, incorrect panel cutout | ✅ High | Inspect the front seal, mounting pressure, bezel, and cutout edges; look for moisture tracks behind the panel | Replace damaged panel or sealing components and correct cabinet washdown exposure; IP65 applies to the front only when correctly installed |
| HMI project does not appear after panel replacement | Missing storage card, host PPC issue, wrong project deployment, incompatible firmware | ❌ Low to Medium | Back up the existing project and removable storage before removal; verify host processor card, boot media, and project deployment path | The display panel does not normally hold the whole control application; restore the project through the installed PPC or host system |
At 3:00 AM, do not condemn the panel until you have measured the incoming 24 V DC under load and confirmed whether the PPC or Display Link hardware is present and operating. I have seen technicians replace an expensive front panel when the actual fault was a loose 24 V terminal or a dying cabinet supply that dipped only during contactor pickup. Take photos of the old unit, plug-in card, terminal block, and screen behavior before removal.
Frequently Asked Questions (FAQ)
Is the B&R 5AP920.1505-01 a complete Panel PC?
No. The 5AP920.1505-01 is primarily the Automation Panel AP920 display and touch assembly. It has a slot or insert arrangement for Automation Panel Link and can be equipped with compatible Display Link or PPC300 hardware, but the plug-in card is sold separately. Check the existing panel carefully before ordering because the installed processor or interface card may need to be retained and transferred.
Can I directly replace an existing 5AP920.1505-01 with another 5AP920.1505-01?
Usually, this is the correct starting point when the complete material number matches. Still, verify the panel cutout, terminal block, installed PPC or Display Link card, connector condition, and project architecture. Do not treat it as a simple screen swap if your machine uses a PPC300, Automation Panel Link, CompactFlash boot media, or a remotely located controller. Photograph everything before removal.
Can I hot-swap this HMI panel?
No. Do not hot-swap it. Remove 24 V DC power first, then wait for the system to shut down before disconnecting the panel or internal plug-in hardware. Pulling an energized display panel can damage connectors, corrupt removable storage, interrupt a running machine sequence, or create a safety issue. Lock out the machine according to site procedure before opening the enclosure.
Will I lose my HMI program when replacing the display panel?
Not necessarily, but do not assume the program is safe. The project may reside on the installed PPC300, CompactFlash media, another connected industrial PC, or a controller on the network. Before replacement, back up the Automation Studio project, make an image of removable storage where permitted, document firmware versions, and photograph card orientation and DIP-switch settings. I have seen a system sit idle because the replacement screen was fine but the original CompactFlash card was moved incorrectly.
Why is the touch screen inaccurate or activating buttons beside my finger?
The analog resistive touch layer may need recalibration, or it may be worn or damaged. First, run the site’s touch-calibration procedure and test the corners and center of the screen. If it still misses targets, has dead areas, or changes behavior with pressure, the touch overlay may be at end of life. Resistive panels are practical in glove-use environments, but they do wear over time.
Is the front of the 5AP920.1505-01 suitable for washdown environments?
The front is rated IP65 when correctly installed, which provides dust protection and resistance to water jets at the front face. It does not mean the rear enclosure, power terminals, plug-in card area, or cabinet interior is washdown-rated. Inspect the gasket, mounting clamps, and panel cutout; a cracked bezel or uneven clamp pressure defeats the seal.
Why might a New Surplus panel cost less than a current factory-supplied HMI?
New Surplus usually comes from unused project spares, plant inventory reductions, discontinued machine inventory, or distributor overstock. The price can be lower because it is legacy inventory rather than a current factory channel item. Ask for actual-unit photos, original B&R labels, serial-number images, packaging condition, proof of power-on testing, warranty terms, and confirmation of whether any plug-in PPC or Display Link card is included.
What should I verify before ordering this B&R HMI?
Verify the complete part number, including punctuation and suffix: 5AP920.1505-01. Then confirm the existing panel size is 15 in, the resolution is XGA, the touch type is analog resistive, and the system uses the Automation Panel 900/AP920 mechanical format. Also document the installed plug-in card, 24 V DC terminal-block style, front-panel cutout, firmware, project-storage location, and any connected USB peripherals. Keep these checks in mind and you will save yourself most of the typical rework time.



