
 WhatsApp: +86 16626708626
 Email:
  Phone: +86 16626708626
Description
3. Key Technical Specifications
| Parameter | Value |
|---|---|
| Display Size | 8.4 inch TFT |
| Resolution | 640 × 480 (VGA) |
| Touch Type | 4-wire analog resistive |
| Supply Voltage | 24 V DC |
| Power Consumption | ~12–15 W (typical for this class) |
| Memory | 64 MB onboard |
| Operating System | Windows CE / CoDeSys runtime |
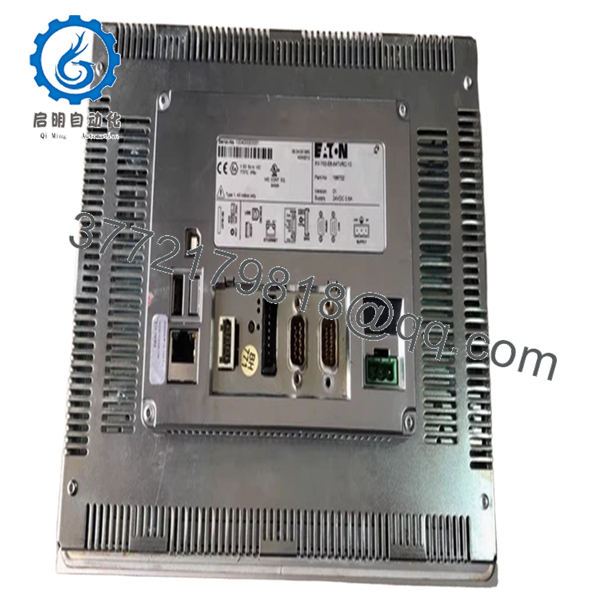
| Communication Ports | Ethernet, RS232/RS485, USB, CANopen |
| Fieldbus Options | SmartWire-DT, CANopen, optional Profibus |
| Mounting | Panel mount |
| Operating Temperature | 0 to +50 °C |
| Front Protection | IP65 (typical installed condition) |
| Programming Software | XSoft-CoDeSys-3 |
4. Product Introduction
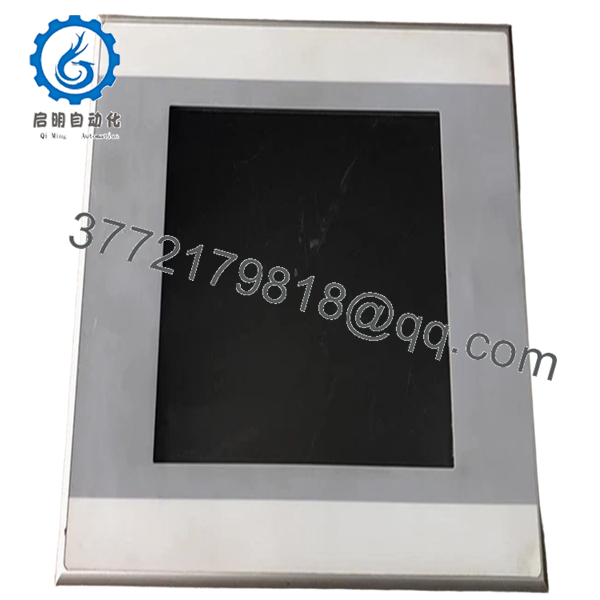
The Eaton XV-152-E6-84TVRC-10 is an 8.4-inch VGA HMI panel from the XV100 series, combining operator interface functionality with optional embedded PLC control. It is widely used in OEM machinery, packaging systems, and distributed control skids where panel space and component count must be minimized.
In real deployments, this model is chosen when you need both visualization and logic execution in a single device. Built-in Ethernet, serial, and CANopen interfaces allow direct integration with drives, remote I/O, and SmartWire-DT networks without external gateways.
5. Installation & Configuration Guide
Stage 1: Pre-Installation Preparation (Estimated: 10 minutes)
- ⚠️ Safety First: Notify operations, stop the machine, apply lockout/tagout, wait 5 minutes for discharge.
- Tools Required: ESD strap, PH1 screwdriver, multimeter, labeling tags, smartphone.
- Data Backup:
- Export HMI/PLC project from XSoft-CoDeSys
- Record IP address and fieldbus settings
- Photograph wiring and communication ports
Stage 2: Removing the Old Module (Estimated: 5–10 minutes)
- Remove rear mounting clamps.
- Label all cables (power, Ethernet, serial, CAN).
- Disconnect connectors carefully — no twisting.
- Push unit out from rear of panel.
- Inspect panel cutout and gasket surface.
⚠️ Note: Keep the old unit powered off but available for reference.
Stage 3: Installing the New Module (Estimated: 10 minutes)
- Wear ESD protection before handling.
- Confirm exact model match — XV-152 variants differ in interfaces.
- Insert unit into panel cutout and seat gasket evenly.
- Secure clamps uniformly to maintain sealing.
- Reconnect wiring:
- 24 V DC (check polarity)
- Ethernet
- Serial/CAN connections
Self-Checklist:
- Voltage correct
- All connectors fully seated
- Gasket intact
- Mounting pressure even
Stage 4: Power-On & Testing (Estimated: 10–15 minutes)
Pre-Power Check:
- Verify 24 V DC rail stability with multimeter
Power-On Steps:
- Power up HMI only.
- Observe boot screen and backlight behavior.
- Connect via CoDeSys or Galileo tools.
- Confirm IP and communication parameters.
- Download project if needed.
- Test touch response and field communications.
⚠️ Troubleshooting Note:
- No display → check backlight or supply drop
- No comms → verify subnet and CAN node ID
- Runtime error → firmware/runtime mismatch

- XV-152-E6-84TVRC-10
- XV-152-E6-84TVRC-10
6. Frequently Asked Questions (FAQ)
Q1: Can this unit be hot-swapped?
No. This is not designed for hot swap. Removing under power risks damaging the internal power stage and communication ports.
Q2: Is this model obsolete?
Yes, the XV100/XV-152 line is in the late lifecycle stage. OEM supply is limited, and most availability comes from surplus or project stock. Plan migration if this is critical infrastructure.
Q3: What is the direct replacement?
There is no drop-in replacement. Newer Eaton XV300/XV102 platforms require:
- Different panel cutout
- Different software environment
- Project conversion
Expect engineering effort.
Q4: Will my PLC logic be retained after replacement?
No. Logic and HMI project reside in internal memory. If you don’t have a backup, recovery is unlikely.
Q5: Why are these units often out of stock?
Lead times are long because production has slowed. Many distributors list it as backorder with future ship dates.
Q6: Does it support modern protocols like OPC UA?
No. This generation supports Modbus, CANopen, and Ethernet-based proprietary comms. OPC UA requires external gateway or system upgrade.
Q7: What’s the typical failure mode?
Backlight degradation and touchscreen wear. After ~40,000 hours, brightness drops noticeably — I’ve replaced many units for exactly that reason.
SOP Quality Transparency (Inspection & Testing Process)
1. Inbound Inspection & Traceability
- Verified against OEM labeling and part number (166702)
- Serial number checked for authenticity
- Visual inspection: no LCD burn-in, no corrosion, no connector wear
- Accessories checked (mounting hardware, seals)
2. Live Functional Testing
- Powered using regulated 24 V DC supply
- Boot sequence verified (no delay or flicker)
- Ethernet tested via Modbus TCP simulation
- RS485 loopback test executed
- CANopen node communication verified
- Touchscreen tested across full surface grid
- Continuous runtime: >24 hours
3. Electrical Parameter Testing
- Insulation resistance >10 MΩ @ 500 V
- Ground continuity verified
- Voltage stability under load confirmed
4. Firmware & Configuration Verification
- Firmware/runtime version recorded
- Default communication settings documented
- Interface ports validated individually
5. Final QC & Packaging
- QC sign-off with traceable ID
- Anti-static ESD packaging
- Foam-protected double-wall carton
- QC Passed label with date
Test reports, boot videos, and inspection photos available upon request.
Technical Pitfalls & Survival Guide
❗ 1. Firmware / Runtime Mismatch
This is a common failure point. A newer runtime may not execute older CoDeSys projects.
Avoidance: Keep the original project archive and runtime version.
❗ 2. CANopen Node Address Conflict
Default node IDs often clash on existing networks.
Avoidance: Match node ID before installation.
I’ve seen full machine networks go offline due to one duplicate node.
❗ 3. Panel Cutout Misalignment
XV-152 units are larger than XV-102.
Avoidance: Verify mechanical dimensions before ordering.
Field modification of panels wastes hours.
❗ 4. Power Supply Stability
These panels reboot if voltage dips below tolerance.
Avoidance: Use a regulated 24 V supply with 20% margin.
Intermittent reboots are almost always power-related.
❗ 5. ESD Handling Damage
Touch panels are sensitive to static discharge.
Avoidance: Always use grounding strap and ESD-safe surface.
I’ve personally seen a unit fail instantly after installation due to static.


