
 WhatsApp: +86 16626708626
 Email:
  Phone: +86 16626708626
Description
3. Key Technical Specifications
| Parameter | Value |
|---|---|
| Manufacturer | General Electric |
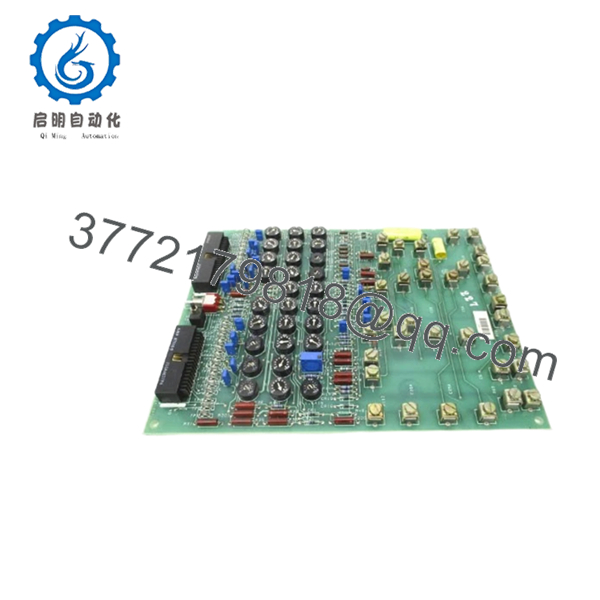
| Model | DS3800DGRC1B1C |
| Product Type | Turbine Regulator Card |
| Series | GE Mark IV DS3800 |
| Primary Function | Generator voltage regulation |
| Platform | GE Speedtronic Mark IV |
| Configuration Method | Jumper-based settings |
| Connector Type | Dual onboard connectors |
| Board Components | Capacitors, resistors, configurable jumpers |
| Typical Application | Generator and turbine regulation |
| Product Status | Legacy / Obsolete |
| Availability | Surplus and refurbished inventory |
| Warranty | Typically 12 months on tested inventory |
The DS3800DGRC1B1C is identified as a regulator circuit board used within GE Speedtronic Mark IV turbine control systems. The board performs voltage regulation functions and includes configurable jumpers for board-level setup.
4. Product Introduction
GE DS3800DGRC1B1C is a regulator circuit board used in GE Mark IV Speedtronic turbine control systems. Its primary role is maintaining stable generator voltage behavior and interfacing with control circuitry inside gas turbine applications.
In field deployments of older Speedtronic systems, regulator boards often stay installed for decades. Plants frequently replace individual boards rather than migrate entire control systems because redesign work introduces shutdown risk, I/O validation effort, and commissioning delays.
5. Installation & Configuration Guide
Stage 1: Pre-Installation Preparation (Estimated: 10 minutes)
⚠️ Safety First: Notify operations personnel. Confirm safe shutdown state. Apply lockout/tagout procedures and isolate cabinet power. Wait at least 5 minutes for capacitor discharge.
Tools Required
- ESD wrist strap
- PH1 screwdriver
- Fluke 115 multimeter
- Wire labels
- Smartphone for documentation photos
- Flashlight
Data Backup
- Record cabinet and slot position.
- Photograph jumper positions.
- Photograph all connectors.
- Record board labels and revision markings.
- Document surrounding module positions.
I’ve seen technicians remove a DS3800 board and assume jumpers were “factory standard.” Two hours later they were comparing blurry maintenance photos trying to recover settings.
Stage 2: Removing the Old Module (Estimated: 5–10 minutes)
- Remove cabinet access panels.
- Label every connector.
- Disconnect wiring carefully.
- Release retaining hardware.
- Pull the board straight out.
⚠️ Never rotate or angle the board while removing it.
Backplane damage on Mark IV hardware creates intermittent faults that are difficult to diagnose because they often appear only during operation.
Inspect:
- Bent pins
- Dust buildup
- Heat marks
- Oxidation
- Connector wear
⚠️ Keep the removed board available until startup verification is complete.
Stage 3: Installing the New Module (Estimated: 10 minutes)
- Wear ESD protection.
- Verify DS3800DGRC1B1C exactly matches.
- Configuration Clone (Crucial): Replicate all jumper settings from photographs.
- Insert board evenly.
- Confirm complete seating.
- Reconnect wiring.
Self-check:
- Jumpers copied
- Wiring secured
- Connectors seated fully
- Retention hardware locked
❗This is the most common rookie mistake, and experienced technicians still make it.
Take photographs before removing anything.
Stage 4: Power-On & Testing (Estimated: 10–15 minutes)
Pre-Power Check
Use a multimeter and verify no short condition exists on power rails.
Power-up procedure:
- Energize rack only.
- Observe LED indicators if installed.
- Verify startup condition.
- Check regulator operation.
- Confirm communication and signal behavior.
- Perform dry-run validation before returning process load.
⚠️ Troubleshooting Note: Immediate faults after startup often indicate revision mismatch or jumper configuration errors.
I watched a site replace three boards chasing alarms.
The issue turned out to be one jumper position.
Quality Verification SOP
1. Inbound Inspection & Traceability
- OEM packing verification
- Serial number validation
- Anti-counterfeit inspection
- Visual inspection for scratches, corrosion, UV yellowing, and repair marks
- Accessory audit
2. Live Functional Testing
Test environment:
- Genuine GE Mark IV rack or simulator platform
Procedure:
- Power-on verification
- Startup sequence inspection
- Communication handshake tests
- I/O simulation
- Continuous operation exceeding 24 hours with thermal monitoring
Official Test Report generated.
3. Electrical Parameter Testing
- 500 V Megger insulation test (>10 MΩ target)
- Ground continuity verification
- Hipot testing where applicable
4. Firmware & Configuration Verification
- Revision recording
- Jumper documentation
- Configuration photographs
5. Final QC & Packaging
- QC sign-off
- ESD anti-static packaging
- Bubble protection
- Heavy-duty corrugated packaging
- QC date labels
Test photos and videos available upon request.
Technical Pitfall & Survival Guide
❗ Firmware Revision Mismatch
Record existing revision information before removal.
I’ve seen replacement hardware create communication alarms for nearly two days.
Hardware looked identical.
Revision differences caused the issue.
❗ DIP Switch / Jumper Errors
Take photos.
Do not rely on memory.
Factory settings often differ from field settings.
❗ Terminal and Connector Assumptions
Even similar GE Mark IV boards can shift connector assignments.
Always verify drawings.
Do not wire from memory.
❗ Power Supply Margin Errors
Maintain at least 20% spare power capacity.
Legacy cabinets often run close to limits.
❗ Electrostatic Discharge
I watched an engineer install a board during winter without a wrist strap.
Powered it up.
Immediate smoke.
That lesson cost several thousand dollars.
Keep these checks in mind and you’ll save yourself 90% of typical rework time.

- DS3800DGRC1B1C
- DS3800DGRC1B1C
6. Frequently Asked Questions (FAQ)
Q1: Can I hot-swap this module?
No.
Mark IV systems were not designed for live insertion of regulator cards. Pulling the board under power risks damaging connectors and introducing control instability.
Power down first.
Q2: Is DS3800DGRC1B1C obsolete?
Yes.
This is a legacy GE Mark IV product and current inventory typically comes from surplus stock or tested refurbished inventory rather than active factory production.
Q3: Is inventory genuinely new?
Sometimes.
“New Original” generally means unused surplus inventory stored after manufacturing ended.
Ask for actual board photos before issuing a purchase order.
Q4: What does this board actually regulate?
The board functions as a regulator circuit for maintaining stable operating voltage conditions within generator and turbine control systems.
Q5: Will replacing this board erase programming?
Normally no.
Regulator boards typically do not contain plant application logic.
Still create backups.
No experienced controls engineer regrets making one.
Q6: Why is surplus inventory cheaper than OEM pricing?
You are generally purchasing excess inventory or tested legacy stock instead of active production material.
Availability drives pricing.
Q7: What warranty is typical?
Most tested inventory carries 12-month warranty coverage, although warranty duration varies by supplier and inventory condition.


