
 WhatsApp: +86 16626708626
 Email:
  Phone: +86 16626708626
Description
3. Key Technical Specifications
| Parameter | Value |
|---|---|
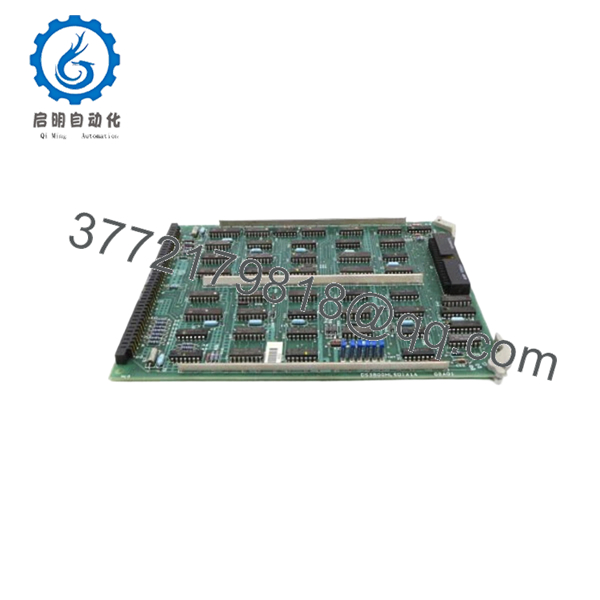
| Model Number | DS3800HLSD1A1A |
| Manufacturer | GE General Electric |
| Product Type | Data Link Slave Board |
| Series | GE Speedtronic Mark IV DS3800 |
| Primary Function | Data link communication processing |
| Board Architecture | Slave communication PCB |
| Integrated Circuits | More than 30 onboard ICs |
| Jumper Count | 6 configurable jumpers |
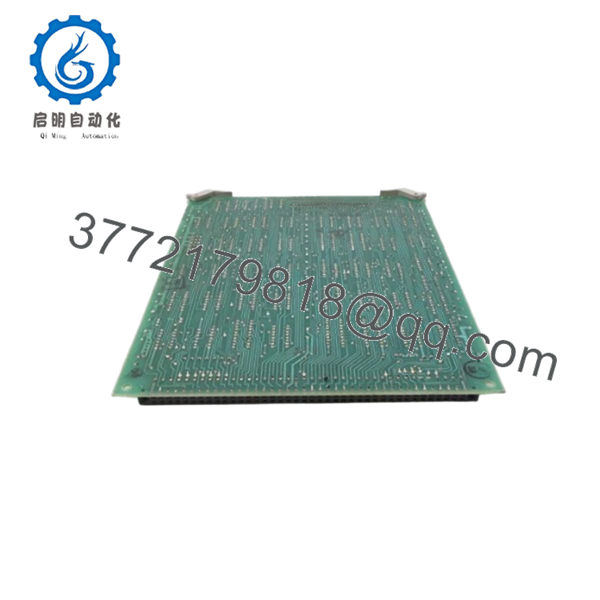
| Backplane Interface | Right-angle backplane connector |
| Front Interface | Front-edge right-angle connector |
| Mechanical Features | Extractor clips and board stiffeners |
| Approximate Weight | 1.0 lb |
| Installation Type | Rack-mounted control PCB |
| Product Status | Legacy / Discontinued |
The DS3800HLSD1A1A functions as a Data Link Slave Board within GE Mark IV turbine control systems and includes configurable jumper hardware and communication circuitry used by Speedtronic architectures.
4. Product Introduction
The GE DS3800HLSD1A1A is a Data Link Slave Board designed for GE Speedtronic Mark IV turbine control systems. It handles communication functions between subsystems and participates in distributed control data exchange inside Mark IV architectures.
In field deployments of Mark IV systems, communication boards become difficult components to replace because hardware revisions and jumper settings often evolved over years of maintenance activity. Since Mark IV hardware moved into legacy status long ago, plants typically maintain validated spare inventory to avoid extended outages.

- DS3800HLSD1A1A
- DS3800HLSD1A1A
5. Installation & Configuration Guide
Stage 1: Pre-Installation Preparation (Estimated Time: 10 minutes)
⚠️ Safety First: Notify operations of planned downtime. Verify turbine shutdown and safe process conditions. Apply lock out/tag out procedures and wait 5 minutes minimum for capacitor discharge.
Tools Required
- ESD wrist strap
- PH1 screwdriver
- Fluke 115 multimeter
- Wire labels
- Smartphone for photos
- Flashlight
Data Backup
- Export configuration files if available.
- Record communication settings.
- Photograph cable locations.
- Photograph jumper positions.
- Record revision labels and board identifiers.
⚠️ Mark IV systems often survive multiple plant upgrades and undocumented modifications. Cabinet drawings and actual installation details are not always identical.
Stage 2: Removing the Old Module (Estimated Time: 5–10 minutes)
Steps:
- Remove cabinet access panels.
- Label all attached connectors.
- Disconnect cables carefully.
- Release retaining hardware.
- Use extractor clips and pull straight outward.
- Inspect backplane connections.
Check for:
- Bent pins
- Dust accumulation
- Corrosion
- Heat discoloration
- Connector wear
⚠️ Keep the removed board until startup completes successfully.
I’ve seen engineers remove a board and immediately send it for repair, then realize they forgot to document jumper settings.
Stage 3: Installing the New Module (Estimated Time: 5–10 minutes)
Steps:
- Wear grounded ESD protection.
- Verify exact model DS3800HLSD1A1A.
- Configuration Clone (Crucial): Match all six jumper settings exactly.
- Insert board evenly into guide rails.
- Confirm board seating.
- Reconnect all cables.
Self-Checklist:
- Jumpers verified
- Wiring secured
- Connectors seated
- Retainers locked
❗This is the most common rookie mistake, but experienced technicians still do it. Take photos before removal. I can’t stress this enough.
Stage 4: Power-On & Testing (Estimated Time: 10–15 minutes)
Pre-Power Check
Use a multimeter to verify no short exists on the 24 V rail.
Power-up sequence:
- Energize cabinet only.
- Observe startup sequence.
- Connect engineering workstation.
- Verify communication status.
- Restore parameters if required.
- Perform dry-run communication checks.
⚠️ Troubleshooting Note: If communication alarms appear immediately after startup, suspect revision mismatch or jumper configuration errors.
I’ve seen projects lose two shifts because a replacement board carried the correct base number but different jumper assumptions from previous site modifications.
6. Frequently Asked Questions (FAQ)
Q1. Can I hot-swap this module?
No.
Do not remove or install the DS3800HLSD1A1A while energized. Mark IV systems were not designed for live replacement. Pulling communication boards under power can damage the backplane and create intermittent faults.
Q2. Is DS3800HLSD1A1A obsolete?
Yes.
This board belongs to the GE Mark IV family and is considered legacy hardware. OEM manufacturing ended years ago and current supply usually comes from surplus inventory or refurbished tested units.
Q3. Does the A1A suffix matter?
Absolutely.
GE revision identifiers are not cosmetic. Hardware revisions can affect timing behavior, jumper arrangements, and communication operation. Match the complete part number.
I’ve seen “close enough” substitutions create communication faults that consumed two days of troubleshooting.
Q4. Will I lose programming logic when replacing this board?
Usually no.
The DS3800HLSD1A1A functions as a communication slave board rather than the primary controller. Application logic normally resides elsewhere in the Mark IV architecture.
Still, create backups before touching anything.
Q5. Why is your price lower than historical OEM pricing?
Because OEM production no longer exists.
Current pricing depends on:
- New surplus availability
- Repair history
- Functional testing documentation
- Warranty period
- Inventory source
Used market pricing can vary significantly. Recent listings showed wide pricing variation for used inventory.
Q6. How are these boards tested before shipment?
Standard verification process:
Inbound Inspection & Traceability
- Source verification using available documentation
- Serial inspection
- Anti-counterfeit checks
- Visual inspection for corrosion and rework marks
Live Functional Testing
- Testing on compatible GE hardware where available
- Power-up verification
- Communication checks
- Simulated operation
- Continuous runtime >24 hours
Electrical Testing
- 500 V insulation resistance testing (>10 MΩ)
- Ground continuity verification
- Hipot testing if required
Firmware & Configuration Verification
- Revision documentation
- Jumper configuration recording
Final QC
- Inspector sign-off
- ESD packaging
- Bubble wrap protection
- Heavy-duty corrugated shipping box
Test videos and photos are available upon request.
Q7. What installation mistake causes the most downtime?
❗Jumper configuration mistakes.
The DS3800HLSD1A1A contains six configurable jumper switches used for board customization. Pull the board without documenting them and you create your own outage.
Keep these checks in mind and you’ll save yourself 90% of typical rework time.


