
 WhatsApp: +86 16626708626
 Email:
  Phone: +86 16626708626
Description
3. Key Technical Specifications
| Parameter | Value |
|---|---|
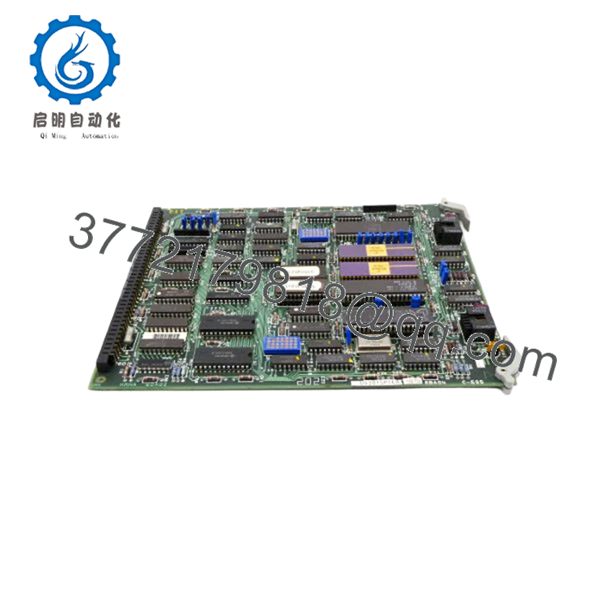
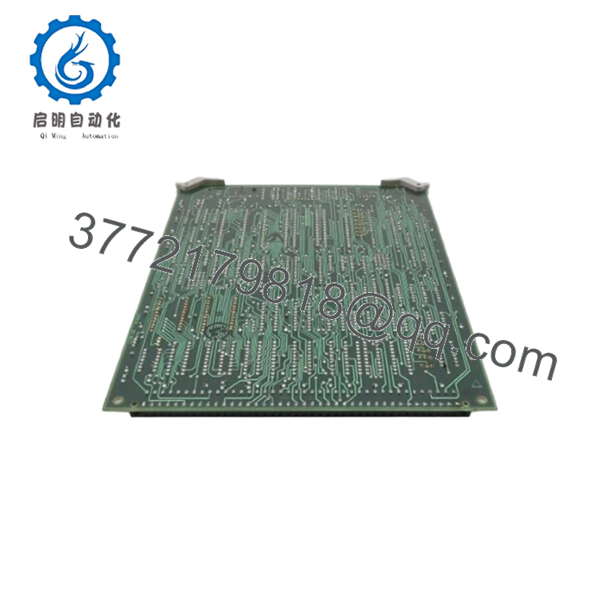
| Model Number | DS3815PCLA1E1D |
| Manufacturer | General Electric |
| Product Category | Processor Control Board |
| System Platform | GE Speedtronic Mark IV |
| Application | Gas and steam turbine control |
| Installation Type | Rack-mounted PCB |
| Board Family | DS3815 control series |
| Function | Signal processing and control interface |
| System Use | Legacy turbine automation cabinet |
| Cooling Method | Passive cabinet airflow |
| Product Lifecycle | Obsolete |
| Available Conditions | New Surplus / Refurbished (tested) |
| Typical Deployment | Turbine protection and control subsystems |
The DS3815 family appears in GE Mark IV installations supporting legacy turbine control architecture. Current inventory availability largely comes from industrial surplus channels and tested spare inventories.
4. Product Introduction
GE DS3815PCLA1E1D is a processor and control circuit board used within GE Speedtronic Mark IV turbine control systems. It performs internal processing and control functions associated with turbine operation and subsystem coordination in gas and steam turbine environments.
In field deployments of Mark IV systems, these boards often remain in operation decades beyond original design life. The biggest concern usually is not function—it is replacement availability. Plants supporting older turbine assets frequently stock tested spare boards because outage delays cost far more than carrying inventory.
5. Installation & Configuration Guide
Stage 1: Pre-Installation Preparation (Estimated: 10 minutes)
⚠️ Safety First: Notify operations of planned downtime. Confirm turbine equipment has reached a safe state. Apply lockout/tagout procedures. Remove control power and wait 5 minutes minimum for discharge.
Tools Required:
- ESD wrist strap
- PH1 screwdriver
- Fluke 115 multimeter
- Wire labels
- Smartphone for photos
- ESD work mat
Data Backup:
- Export control logic and settings where available.
- Record active alarms.
- Photograph all wiring and cable positions.
- Photograph board labels and revision markings.
- Record any jumper or switch settings.
I’ve walked into outage work where someone assumed they would remember connector positions. Three hours later everyone was tracing cables through the cabinet.
Stage 2: Removing the Old Module (Estimated: 5 minutes)
- Remove cabinet access covers.
- Label and disconnect all wiring.
- Release board retaining clips.
- Pull the board straight out.
- Inspect connector pins and mating surfaces.
⚠️ Do not rock the board side-to-side.
Older GE backplane connectors do not tolerate rough handling.
⚠️ Keep the original board until startup completes successfully.
Stage 3: Installing the New Module (Estimated: 10 minutes)
- Attach ESD protection before handling the board.
- Verify exact model number: DS3815PCLA1E1D
- Configuration Clone (Crucial): Match jumper positions and any board configuration settings exactly.
- Insert board evenly and fully seat into the rack.
- Confirm retention hardware engages.
- Reconnect wiring.
Self-Checklist:
- Model verified
- Wiring secure
- Connectors seated
- Retention clips locked
- ESD precautions followed
⚠️ This is the most common rookie mistake, but it happens constantly. Take a picture before you pull it. I can’t stress this enough.
Stage 4: Power-On & Testing (Estimated: 10 minutes)
Pre-Power Check
Use a Fluke meter and verify no shorts exist on the 24 V rail.
Power sequence:
- Apply rack power only.
- Observe status indicators.
- Connect diagnostic software if available.
- Verify communication status.
- Run dry I/O verification.
⚠️ Troubleshooting Note: Solid fault LEDs after installation frequently point toward configuration or revision mismatch before hardware failure.
I’ve seen maintenance crews chase a hardware fault for two days only to discover a board revision difference.
Technical Pitfall & Survival Guide
❗ Firmware Revision Mismatch
Issue: Replacement hardware revisions may not align with older cabinet configurations.
Avoidance: Record firmware and board revisions before removal.
I’ve seen projects where technicians swapped a newer module into a legacy rack and spent two days chasing “Communication Timeout” alarms.
❗ DIP Switch / Jumper Misconfiguration
Issue: Factory defaults often differ from field configuration.
Avoidance: Photograph every switch position.
Night-shift troubleshooting usually starts here.
❗ Terminal Block / Wiring Incompatibility
Issue: Similar GE board families sometimes vary internally.
Avoidance: Compare documentation and physical layouts.
Never wire from memory.
❗ Power Draw Specifications
Issue: Cabinet power supplies may already operate near limits.
Avoidance: Maintain at least 20% power reserve.
For example, older turbine cabinets loaded with analog cards and processors can quietly exceed available margin.
❗ Electrostatic Discharge (ESD)
Issue: Damage occurs before installation.
Avoidance: Ground yourself and work on ESD surfaces.
I once watched a replacement board get unpacked during dry winter weather without a strap. Immediate smoke after startup. Expensive mistake.
Keep these checks in mind and you’ll save yourself 90% of typical rework time.

- DS3815PCLA1E1D
- DS3815PCLA1E1D
6. Frequently Asked Questions (FAQ)
Q1: Can I hot-swap this module?
No.
Mark IV hardware was not designed for hot insertion. Pulling boards live risks backplane damage and unpredictable faults.
Q2: Is GE DS3815PCLA1E1D obsolete?
Yes.
This belongs to GE’s legacy Speedtronic platform. Most inventory today comes from surplus warehouses and tested spare stock.
Q3: Is this genuinely new?
Usually “New Original” means unused surplus inventory held in industrial stockrooms.
For legacy GE products, factory packaging may not survive decades of storage. Request photographs and serial verification.
Q4: What is the direct replacement if inventory becomes unavailable?
Honestly, this design can become difficult because exact suffix compatibility matters.
Verify replacement paths with system documentation before ordering.
Q5: Will I lose programming if I remove the board?
Possibly.
Control data storage depends on overall cabinet architecture and revision. Before touching anything, back up the existing logic and configuration.
Q6: Why is pricing lower than historical GE OEM pricing?
OEM production ended years ago.
Current pricing depends on inventory age, condition, testing records, and market availability.
Q7: How do you test surplus inventory?
Our inspection SOP follows documented engineering procedures:
- OEM source verification and serial traceability
- Counterfeit inspection and visual examination
- Inspection for corrosion, UV yellowing, and repair marks
- Functional verification on compatible GE hardware where available
- Communication testing
- 500 V Megger insulation test (>10 MΩ)
- Hardware revision documentation
- QC signoff with ESD packaging
Test photos and videos are available upon request.


