
 WhatsApp: +86 16626708626
 Email:
  Phone: +86 16626708626
Description
Key Technical Specifications
| Parameter | Value |
|---|---|
| Manufacturer | HIMA Paul Hildebrandt GmbH |
| Model | F7130A |
| Product Type | Power supply module |
| System Compatibility | HIMA PES H41q |
| Input Voltage | 24 VDC |
| Input Voltage Tolerance | -15% to +20% |
| Input Ripple Requirement | <15% peak-to-peak |
| Output Voltage | 5 VDC ±0.25 V |
| CPU / I/O Output Current | 10 A maximum |
| HIBUS Output Current | 1 A maximum |
| Conversion Type | Isolated DC/DC converter |
| Electrical Isolation | Input and output electrically isolated |
| Protection Functions | Overvoltage protection, current limitation, short-circuit protection |
| Primary Fuse | 5 A gL |
| Efficiency | ≥70% |
| Module Size | 4 SU |
| Status Indicators | Input voltage LED, 5 V CPU/EA LED, 5 V HIBUS LED |
| Mounting Type | HIMA rack plug-in module |
| Application Standard | HIMA H41q safety automation systems |
Product Introduction
The HIMA F7130A is a power supply module designed for the HIMA PES H41q safety automation system. It converts a 24 VDC cabinet supply into regulated 5 VDC power for the central processing unit, I/O modules, and HIBUS interface. The module uses an isolated DC/DC converter design with overvoltage protection, current limitation, and short-circuit protected outputs.
The F7130A remains in service in legacy HIMA safety installations where maintaining the existing H41q architecture is required. Replacement work requires verification of input supply quality, rack compatibility, output loading, and system power distribution before returning the safety controller to operation.
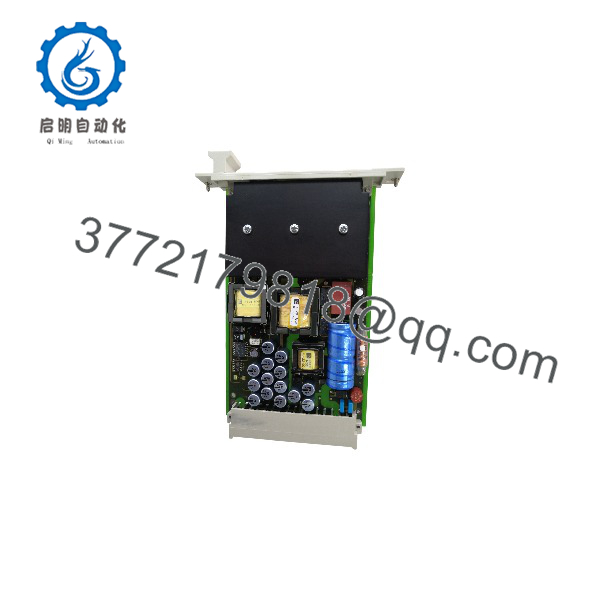
F7130A
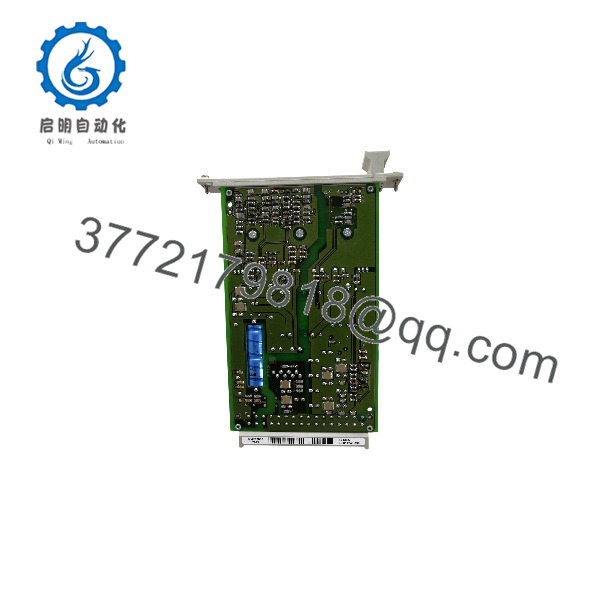
F7130A
Installation & Configuration Guide
Stage 1: Pre-Installation Preparation (Approx. 15 minutes)
⚠️ Safety First
- Notify operations before removing the HIMA power supply module.
- Confirm the safety system can enter an approved maintenance state.
- Apply lockout/tagout procedures to the 24 VDC cabinet supply.
- Wait at least 5 minutes for stored energy discharge.
- Verify zero voltage before handling the module.
Tools Required
- ESD wrist strap
- PH1 screwdriver
- Digital multimeter
- Wire labels
- Smartphone for wiring photos
- HIMA system documentation
Data Backup
Before removal:
- Record the existing module identification label.
- Document:
- Rack location
- Slot position
- Input voltage source
- Output distribution points
- Photograph:
- Terminal wiring
- LED status
- Module position
- Measure and record existing 5 VDC output voltage.
Stage 2: Removing the Old Module (Approx. 10 minutes)
- Remove cabinet access covers if required.
- Confirm the 24 VDC supply is isolated.
- Label power input and output connections.
- Disconnect terminals carefully.
- Release module locking hardware.
- Pull the F7130A straight out from the HIMA rack.
Inspect:
- Backplane connector pins
- Rack contacts
- Signs of overheating
- Dust contamination
⚠️ Note: Keep the removed module until the replacement has completed power verification. The original unit provides a reference for wiring and rack position.
Stage 3: Installing the New Module (Approx. 15 minutes)
- Wear an ESD strap before handling the replacement unit.
- Verify:
- Model: HIMA F7130A
- System: PES H41q
- Input: 24 VDC
- Output: 5 VDC
⚠️ Configuration Clone — Critical Step
- Confirm the replacement matches the original power distribution:
- CPU/I/O 5 VDC supply connection
- HIBUS 5 VDC supply connection
- Monitoring supply connection
- Insert the module into the correct rack position.
- Ensure the connector is fully seated.
- Secure the retaining mechanism.
- Reconnect power terminals.
Self-Checklist
- Correct F7130A model verified
- Rack position confirmed
- 24 VDC polarity checked
- Output wiring matched
- Module locked securely
Stage 4: Power-On & Testing (Approx. 20 minutes)
Pre-Power Check
- Measure resistance between power rails and ground.
- Confirm no short circuit exists.
- Verify 24 VDC input polarity.
Power-On Steps
- Energize the 24 VDC supply.
- Observe front LEDs.
- Measure:
- 5 V CPU/EA output
- 5 V HIBUS output
- Confirm voltage remains within specification.
- Power the H41q CPU and I/O modules.
- Verify controller startup and diagnostics.
⚠️ Troubleshooting Note
- No 5 V output: Check input fuse, 24 VDC supply, and module seating.
- CPU restart issues: Check 5 VDC voltage stability and total current demand.
- HIBUS communication faults: Verify the dedicated HIBUS power output.
Frequently Asked Questions (FAQ)
Can the HIMA be hot-swapped under power?
No. The is the main power conversion module for the HIMA PES H41q system. Removing it while energized can interrupt CPU and I/O power rails. Always isolate the 24 VDC supply before replacement.
What is the main function of the HIMA ?
The converts 24 VDC input power into regulated 5 VDC outputs for the H41q central device, I/O modules, and HIBUS interface. It provides separate power paths for different system sections.
Is the HIMA obsolete?
The is a legacy HIMA H41q power supply module. It remains used in existing safety systems, but availability depends on remaining industrial spare inventory. H41q users often maintain replacement modules because migration to newer safety platforms requires engineering evaluation and validation.
Can the replace the HIMA F7126 power supply module?
Not directly. The is designed for the H41q platform, while F7126 belongs to the H51 system family. Verify the exact HIMA platform and approved spare-part list before replacement.
Will replacing the erase the HIMA safety program?
No. The only provides system power. The safety application remains stored in the controller system. However, unstable power during operation can cause controller faults or unexpected shutdowns.
Why is the priced differently from current power supplies?
Legacy safety power modules are often sourced from New Original stock, New Surplus inventory, or tested refurbished units. Price differences depend on condition, testing records, availability, and documentation.
What should I verify before ordering an HIMA ?
Confirm:
- HIMA platform: PES H41q
- Exact model:
- Input voltage: 24 VDC
- Output requirement: 5 VDC
- Rack compatibility
- Current demand of connected CPU and I/O modules
How should a surplus be tested before installation?
A proper inspection process should include:
- Verify OEM label and serial number.
- Inspect housing and connectors.
- Test on a genuine HIMA H41q rack.
- Verify 24 VDC input operation.
- Measure 5 VDC CPU/I/O and HIBUS outputs.
- Monitor operation under load.
- Generate a functional test report.
Test photos and inspection records should be retained for maintenance traceability.



