
 WhatsApp: +86 16626708626
 Email:
  Phone: +86 16626708626
Description
Key Technical Specifications
- Manufacturer: Honeywell Process Solutions
- Part Number: CC-TAIX01
- Product Description: High-level analog input Input/Output Termination Assembly (IOTA)
- System Family: Honeywell Experion PKS Series C
- Associated I/O Module: CC-PAIH01 high-level analog input module
- Channel Capacity: 16 analog input channels
- Input Signal Use: Voltage and current inputs; two-wire or self-powered transmitters, subject to the installed Series C I/O module and configured range
- HART Capability: Supports HART-capable analog input applications when used with the compatible Series C analog input hardware and system configuration
- Field Power Interface: Provides protected field-transmitter power distribution through the IOTA circuitry
- Termination Type: Field screw terminals with I/O-module connection through the applicable Series C I/O assembly
- Installation Location: Control cabinet or marshalling cabinet
- Mounting Method: Series C IOTA mounting arrangement; verify the specific carrier, rack, and assembly drawing for the installed cabinet
- Replacement Scope: Replace only with CC-TAIX01 for a like-for-like nonredundant high-level analog input termination assembly; CC-TAIX11 is the redundant counterpart and is not a drop-in substitute without system redesign
- Documentation Requirement: Confirm field wiring, jumper state, I/O module type, and cabinet drawing against the Honeywell Series C I/O User’s Guide before energizing
Honeywell identifies Series C as its Experion PKS I/O family, supporting local or remote implementation and redundant architectures where the selected hardware supports them. The CC-TAIX01 is an IOTA, not the analog-to-digital I/O module itself.
Product Introduction
The Honeywell CC-TAIX01 is a Series C high-level analog input IOTA for Experion PKS installations. It provides field termination and interface circuitry for 16 analog input channels used with the applicable Honeywell Series C analog input module, typically in transmitter loops requiring 4–20 mA, voltage, or HART-capable signal handling.
Engineers select the CC-TAIX01 when retaining an existing nonredundant Series C analog input architecture. Its value is compatibility with the installed I/O module, field cable schedule, and cabinet termination design—not standalone signal conversion. Confirm the complete assembly, including the associated I/O module and field wiring scheme, before ordering.
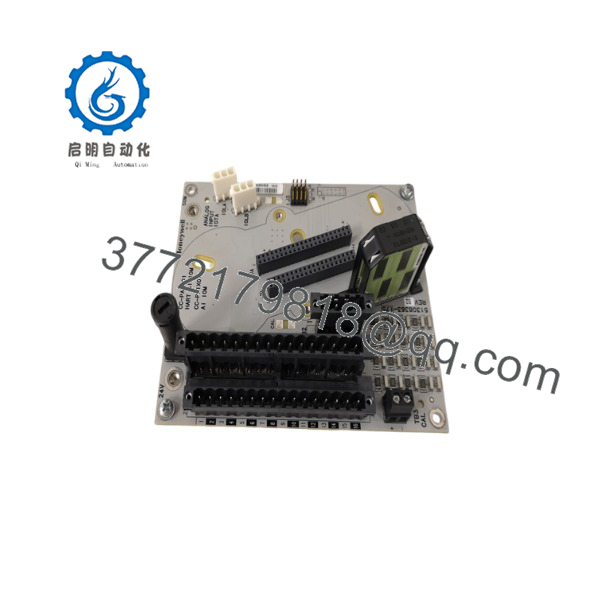
CC-TAIX01
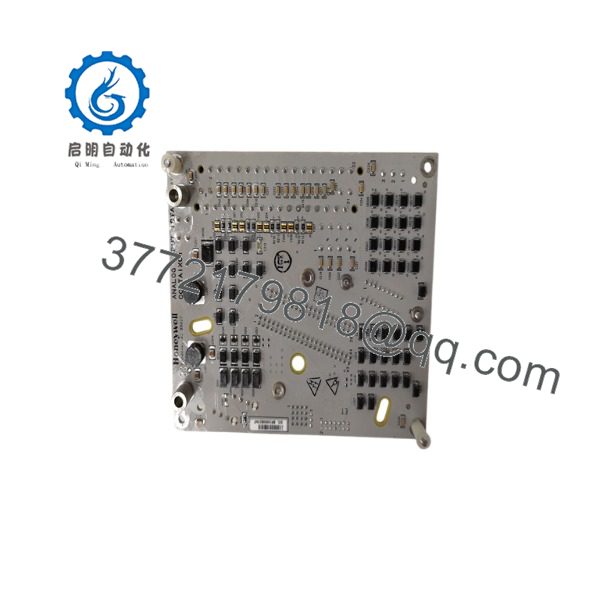
CC-TAIX01
Installation & Configuration Guide
Stage 1: Pre-Installation Preparation — 10 minutes
- ⚠️ Safety first: Notify operations, place the process in a verified safe state, and apply lockout/tagout to the relevant cabinet power sources. Wait at least 5 minutes for stored energy to discharge.
- Confirm the installed part number is CC-TAIX01, not CC-TAIX11 or another Series C IOTA variant. Similar-looking Series C assemblies are not automatically wiring-compatible.
- Gather:
- Grounded ESD wrist strap and ESD mat
- PH1 screwdriver
- Fluke 115 or equivalent digital multimeter
- Wire labels
- Smartphone or camera
- Approved cabinet wiring drawings
- Export or archive the controller and I/O configuration from the engineering workstation. The IOTA does not normally store control logic, but channel configuration, tag mapping, HART settings, and range assignments must be documented.
- Photograph all field terminations, shield connections, terminal identifiers, and any IOTA jumper or cut-link condition before disconnecting wiring.
- Record the associated Series C I/O module part number, firmware revision, channel assignments, and cabinet location.
⚠️ Critical: The CC- includes channel-specific circuitry and field-power provisions. Do not assume every terminal behaves as a simple passive marshalling point.
Stage 2: Removing the Old Module — 5 minutes
- Remove the front cabinet cover or protective bezel as required by the enclosure design.
- Verify with a multimeter that the relevant 24 V DC field-loop supply is de-energized.
- Label each field wire before removal. Preserve shield-drain and grounding arrangements exactly as documented.
- Loosen terminals carefully and disconnect wiring. Do not force terminal hardware or pull on conductor insulation.
- Release the Series C IOTA locking mechanism according to the installed carrier or mounting assembly.
- Pull the IOTA straight out. Avoid side loading that can damage mating connectors or backplane contacts.
- Inspect the mounting assembly, mating connector, and terminal area for contamination, loose hardware, heat discoloration, bent contacts, or moisture ingress.
⚠️ Note: Keep the removed CC- intact and beside the cabinet until all 16 channels have passed loop checks.
Stage 3: Installing the New Module — 10 minutes
- Put on the grounded ESD wrist strap before opening the antistatic package.
- Verify the replacement label reads Honeywell CC-. Check the physical terminal layout against the removed unit and the approved Honeywell cabinet drawing.
- Configuration clone—crucial: Replicate all documented jumper, link, and channel-specific conditions from the original IOTA. Some Series C analog input termination designs use jumpers or cut links associated with input-range resistors or special field wiring arrangements. Do not alter a factory jumper without the approved Honeywell documentation.
- Align the IOTA with its carrier or mounting interface and seat it evenly. Confirm that all retaining features engage fully.
- Reconnect field wiring one terminal at a time, using the approved torque value from the cabinet documentation.
- Restore shield termination exactly as engineered. Incorrect shield bonding causes noise, ground-loop faults, and unstable HART communication.
Self-checklist:
- Replacement part is CC-
- All terminal numbers match the photographs and drawings
- Any links or jumpers match the removed unit
- Shield/drain-wire routing is restored
- IOTA is fully seated and mechanically locked
- No exposed conductor strands are present
Stage 4: Power-On and Testing — 10 to 20 minutes
- Before energizing, use a multimeter to check for a short between the 24 V DC field-loop supply and common.
- Energize the cabinet and I/O subsystem first. Keep process devices in a safe test condition where practical.
- Observe the Series C I/O module diagnostics. The IOTA itself is primarily a termination assembly; system health indications appear through the associated I/O module and Experion diagnostics.
- Connect the engineering workstation and confirm that the configured I/O module is online and reports no channel, module, or I/O-link diagnostics.
- Verify the installed firmware and hardware compatibility against the node’s approved build record. The IOTA has no user firmware to update; focus on the associated I/O module, controller, and Experion release compatibility.
- Perform a dry loop check on each affected channel:
- Apply or simulate 4 mA, 12 mA, and 20 mA where permitted.
- Confirm the correct engineering-unit value, quality status, and alarm behavior.
- Confirm HART communication on channels configured for HART devices.
- Return field devices and process permissives to normal operation only after operations accepts the completed loop check.
⚠️ Troubleshooting note: If multiple channels fail after replacement, first compare terminal positions, shield grounding, 24 V DC field power, and IOTA type. If one channel fails, check the transmitter loop, the channel-specific wiring, and the matching I/O-module channel before suspecting the new IOTA.
Frequently Asked Questions
Can I hot-swap a Honeywell CC- under power?
No. Treat the CC- as a field-termination component, not a hot-swappable plug-in card. Removing it while energized can interrupt live 4–20 mA loops, generate false process alarms, and create a hazardous-area compliance issue depending on the installation. Honeywell’s published safety guidance states that equipment should not be connected or disconnected unless power is switched off or the area is known to be non-hazardous. Isolate the applicable field and cabinet power first.
Is CC- an analog input module?
Not exactly. The CC- is an Input/Output Termination Assembly (IOTA). It terminates field wiring and interfaces the field loops to the associated Honeywell Series C analog input I/O module. It does not independently execute analog-to-digital conversion, run control logic, or operate as a controller. This distinction matters during fault finding: an I/O-module diagnostic may point to the I/O module, field loop, termination wiring, or the IOTA.
Is the CC- obsolete, and can I still buy a genuinely new unit?
Availability varies by region, date code, and Honeywell support status. Many installed Series C systems remain in service, so new surplus and factory-sealed inventory may appear through specialized automation suppliers. Request photos of the actual label, packaging condition, serial-number traceability where available, and confirmation that the item is a CC-—not a used CC-TAIX11 or a different analog IOTA.
For a transparent purchase, ask the supplier to state one of these conditions clearly: Factory Sealed, New Original / New Surplus, or Refurbished and tested. Do not accept “new” without supporting photos and a defined warranty.
What is the direct replacement for a CC-?
The direct like-for-like replacement is another Honeywell CC-. Do not substitute CC-TAIX11 merely because it appears similar; the “11” version relates to a redundant analog-input IOTA arrangement and requires compatible redundant hardware, wiring, and configuration. A change from nonredundant to redundant architecture is a small project, not a spare-parts swap.
Will I lose programming logic when I replace the IOTA?
Normally, no. The CC- does not store your C300 control strategy or Experion configuration. However, field signal quality, HART communication, channel mapping, and alarm behavior can be affected by incorrect reconnection, a missing jumper condition, or a mismatch between the installed IOTA and I/O module. Back up the control and I/O configuration anyway. At 2 AM, the backup you took before opening the cabinet is always the one you wish you had.
Why did the replacement IOTA restore wiring but not restore the analog value?
Start with the basics: verify transmitter loop power, terminal numbers, polarity, common reference, and the 250-ohm current-input path where applicable. Then compare the old and new IOTA for channel-specific link or resistor conditions. A field technician can spend hours hunting a “bad card” when the actual fault is one wire returned to the wrong terminal after a rushed replacement.
What inspection and test evidence should a supplier provide?
For New Original or New Surplus material, request inbound traceability evidence, clear label and terminal photos, antistatic packaging confirmation, and a condition statement. For refurbished material, require a documented functional test report showing visual inspection, insulation and ground-continuity checks where applicable, terminal inspection, compatibility verification, and a controlled bench or cabinet test. Test photos and videos should be available upon request.
Keep these checks in mind and you will avoid most replacement rework: verify the exact IOTA, photograph wiring before removal, preserve jumper conditions, and loop-test every affected channel before handing the cabinet back to operations.



