
 WhatsApp: +86 16626708626
 Email:
  Phone: +86 16626708626
Description
Key Technical Specifications
- Part Number: CU212
- Manufacturer: KEBA AG
- Product Category: Central processing module
- Typical Function: PLC or machine-controller CPU module
- Primary Use: Executes control logic and manages controller communications
- Installation Method: Dedicated KEBA controller rack or base-unit slot
- System Dependency: Requires matching KEBA backplane, I/O modules, firmware, and engineering software
- Configuration Storage: Verify installed firmware, battery-backed memory status, and removable memory media before replacement
- Communications: Dependent on the complete controller configuration and associated interface modules
- Supply Requirement: Use only the voltage and current supply specified on the installed rack or module nameplate
- Replacement Rule: Match the full label, including revision, hardware version, firmware level, and any suffix code
- Obsolescence Consideration: CU212 is typically sourced through surplus or tested-used channels; confirm physical and firmware compatibility before purchase.
Product Introduction
The KEBA CU212 is a central processing module used within a KEBA industrial automation or machine-control system. It executes application logic, coordinates installed I/O modules, and supports controller-level operation through the rack or backplane architecture.
This is a replacement part for an established machine platform, not a universal PLC CPU. The critical checks are hardware revision, firmware version, application-memory compatibility, rack type, and the exact I/O and communication configuration attached to the existing controller. Available listings identify CU212 as a KEBA central processing or automation module.
Installation & Configuration Guide
Stage 1: Pre-Installation Preparation — 10 minutes
⚠️ Safety First: Notify operations, bring the machine to a safe state, lock out/tag out the main control supply, and wait at least 5 minutes for power-supply capacitors to discharge. Confirm absence of voltage at the controller power terminals before opening the cabinet.
Tools Required:
- Grounded ESD wrist strap
- ESD-safe mat
- PH1 screwdriver
- CAT-rated multimeter
- Wire labels
- Smartphone for high-resolution photos
- Laptop with the site-approved KEBA engineering software and communication cable
- Back up the running controller application, machine parameters, recipes, motion data, and communications configuration.
- Record the CU212 nameplate in full, including all hardware revision, firmware, serial-number, and suffix information.
- Photograph the complete rack, slot position, DIP switches, jumper settings, communication cards, and all field wiring.
- Document Ethernet, serial, fieldbus, and drive-network addresses before power removal.
- Verify that the replacement unit is a KEBA CU212 with compatible revision and firmware. A with a different revision may boot but still reject the installed project or fail to communicate with older expansion modules.
⚠️ Critical warning: I have seen legacy controller replacements fail because the technician copied the part number but ignored a small revision marking. The CPU powered up, but the application would not load because the firmware family was different. Photograph every label before you remove the old unit.
Stage 2: Removing the Old Module — 5 minutes
- Remove the controller cover, front bezel, or rack access panel.
- Confirm zero voltage using a properly rated multimeter.
- Label all connectors before removal, especially programming ports, network cables, memory modules, and any CPU-attached terminal blocks.
- Remove removable memory cards, batteries, or configuration media only after documenting their orientation and label information.
- Release the rack locking tab, retaining screw, or extraction mechanism.
- Pull the straight out of the rack. Do not rock it sideways; that can damage backplane contacts.
- Inspect the backplane connector for bent pins, dust, corrosion, overheating, or damaged guides.
⚠️ Note: Keep the removed CPU in an ESD bag until the replacement completes startup and the machine passes a controlled functional test. It remains your best reference for revision, configuration, and memory-media orientation.
Stage 3: Installing the New Module — 10 minutes
- Wear a grounded ESD strap and handle the only by its edges.
- Compare the old and replacement units side by side. Confirm model number, revision, connector layout, firmware label, memory-card interface, and mounting geometry.
- Transfer approved removable memory or configuration media only if the site backup procedure and KEBA documentation permit it.
- Restore every DIP switch and jumper setting exactly as documented from the old module.
- Insert the into the original rack slot, keeping it square to the backplane.
- Press firmly until the module seats fully and the retaining mechanism locks.
- Reconnect all cables and terminal blocks without forcing connectors.
- Verify that programming, Ethernet, serial, and fieldbus cables return to their documented ports.
Self-Checklist:
- model and revision verified
- Firmware compatibility checked
- Memory media orientation confirmed
- DIP switches and jumpers match
- Module fully seated in rack
- Retaining tabs or screws locked
- Network and I/O connectors secured
Stage 4: Power-On & Testing — 5 minutes
- Check the controller power rail for shorts before energizing the cabinet.
- Restore power to the controller rack only. Keep machine actuators, drives, and production equipment in a safe inhibited state.
- Observe CPU status LEDs, boot sequence, display messages, and any diagnostic indicators.
- Connect the KEBA programming or service tool and verify CPU identification, firmware version, project version, and communications status.
- Restore the approved backup only if the installed application is missing, incompatible, or explicitly requires download.
- Confirm the controller recognizes every installed I/O and communication module.
- Perform a dry-run of critical permissives, safety interfaces, inputs, outputs, and motion-enable signals before enabling automatic operation.
⚠️ Troubleshooting note: A steady fault LED or incomplete boot sequence often points to firmware or project incompatibility, not necessarily a defective CPU. If the controller boots but remote I/O does not communicate, check network addresses, bus termination, interface-card settings, and the exact project hardware configuration.
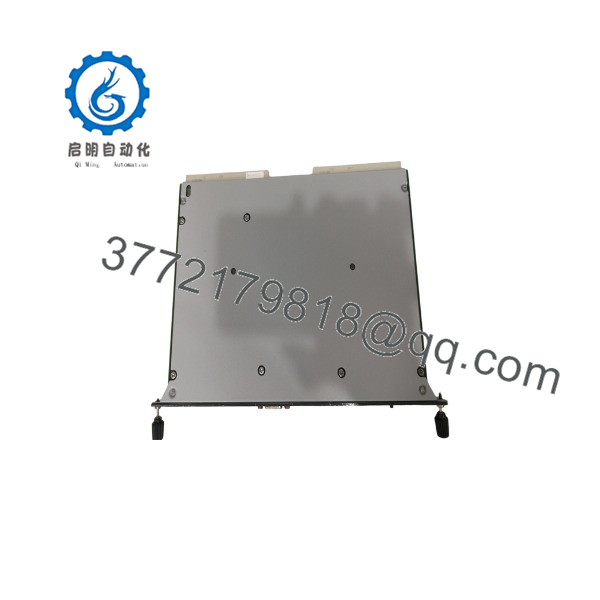
CU212
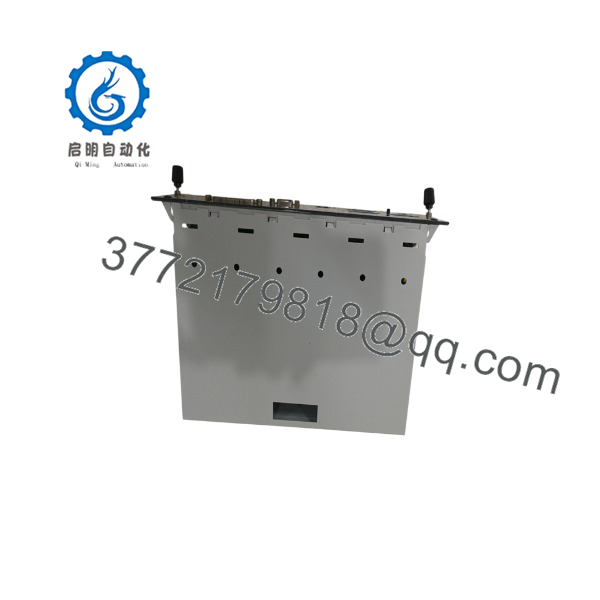
CU212
Frequently Asked Questions (FAQ)
Can I hot-swap the KEBA while the machine is powered?
No. Treat the as a non-hot-swappable controller CPU unless the exact KEBA system documentation explicitly identifies a supported hot-replacement procedure. Removing it live can interrupt backplane communication, corrupt memory, damage contacts, or cause an uncontrolled machine fault. Lock out the control supply and verify the machine is safe first.
Is the KEBA obsolete?
In most replacement scenarios, yes. It is generally a legacy automation component and may be available only as new surplus, tested used, or refurbished stock. Availability changes quickly, so confirm actual inventory, photos, revision data, and test status before issuing a purchase order. Existing market listings describe as a KEBA central processing or automation module rather than a current general-purpose PLC family.
Will I lose the machine program when I replace the CPU?
Possibly. It depends on where the application resides: internal CPU memory, a removable memory module, a project archive, or an external engineering backup. Never assume the program is safely retained. Back up the running project and machine parameters before shutdown, and document any removable memory device before transferring it.
Can any replace my existing ?
Honestly, no. The same front-label model number is only the starting point. Match hardware revision, firmware version, board layout, rack system, memory type, installed I/O family, and engineering-project compatibility. Legacy systems often fail after a “correct” swap because a newer firmware version no longer accepts the older application image.
What should I check if the replacement CPU powers up but does not communicate?
Check the project hardware configuration, CPU firmware, network address, serial settings, fieldbus termination, and communication-module configuration. Also confirm that the correct backup was loaded. A controller can show normal CPU operation while the machine remains offline because the Ethernet, serial, CAN, Profibus, or proprietary bus setup does not match the original configuration.
Is the unit new surplus or refurbished?
The condition must be stated clearly on the quotation and packing documentation. New Original/New Surplus means unused legacy inventory, usually with original labels and no installation evidence. Refurbished (tested) means the unit has been previously used and functionally tested. Request actual product photographs, serial-number visibility where appropriate, condition details, and a written warranty.
Why can surplus pricing differ from the OEM list price?
Legacy CPU pricing reflects scarcity, condition, test scope, packaging, warranty, and available inventory rather than a fixed current OEM catalog price. A lower price can be legitimate if the item is surplus stock, but it can also mean incomplete testing or undocumented condition. Ask for a precise condition classification, firmware details, test report, and warranty coverage before comparing quotations.



