
 WhatsApp: +86 16626708626
 Email:
  Phone: +86 16626708626
Description
Key Technical Specifications
- Manufacturer: Kollmorgen / Pacific Scientific E Series
- Model: E33NCHA-LNN-NS-00
- Motor Type: Hybrid stepper motor
- Frame Size: NEMA 34
- Mounting: NEMA mounting configuration
- Step Angle: 1.8° per full step / 200 steps per revolution
- Winding: Type A, 4-lead parallel winding
- Rated Current: 8.6 A, parallel connection
- Holding Torque: 6.64 Nm
- Rotor Inertia: 1.77 kg·cm²
- Shaft: Smooth shaft
- Construction: SIGMAX construction, 3-stack rotor
- Connector: MS-type connector
- Insulation: Class B
- Maximum Radial Load: Approximately 156 N
- Maximum Axial Load: Approximately 801 N
The above model-specific data is based on available E33NCHA-LNN-NS-00 component records. The 8.6 A parallel current, 6.64 Nm holding torque, 1.77 kg·cm² inertia, NEMA 34 configuration, smooth shaft, SIGMAX construction, and Class B insulation are specifically reported for this exact part number.
Important: Do not substitute voltage, current, torque, or speed values from similarly named E33, E32, or E33H motors. Several online listings contain conflicting specifications for this model. Verify the motor nameplate and the applicable Kollmorgen/Pacific Scientific documentation before commissioning.
Product Introduction
The Kollmorgen E33NCHA-LNN-NS-00 is a hybrid stepper motor from the E Series, built around a NEMA 34 mounting configuration for industrial positioning and motion-control equipment. Available documentation identifies a smooth shaft, SIGMAX construction, 3-stack rotor, Class B insulation, and four-lead parallel winding.
Its 1.8° step angle provides 200 full steps per revolution, while the specified 6.64 Nm holding torque makes the motor suitable for applications requiring substantial low-speed positioning force. The four-lead parallel winding must be matched to a compatible stepper drive and current setting.
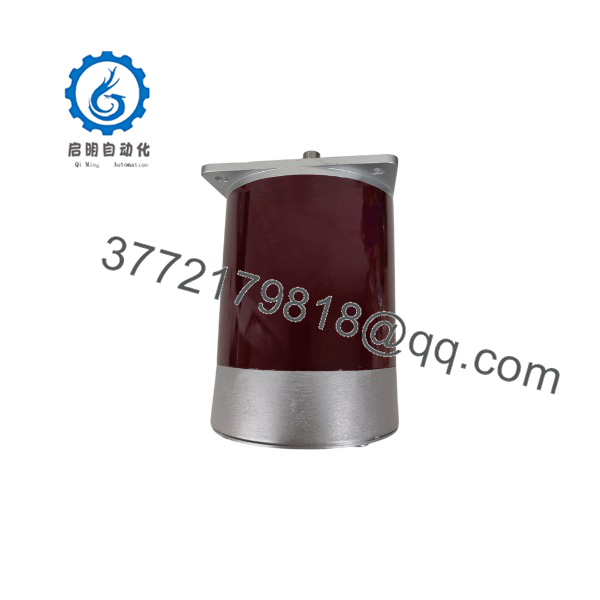
E33NCHA-LNN-NS-00
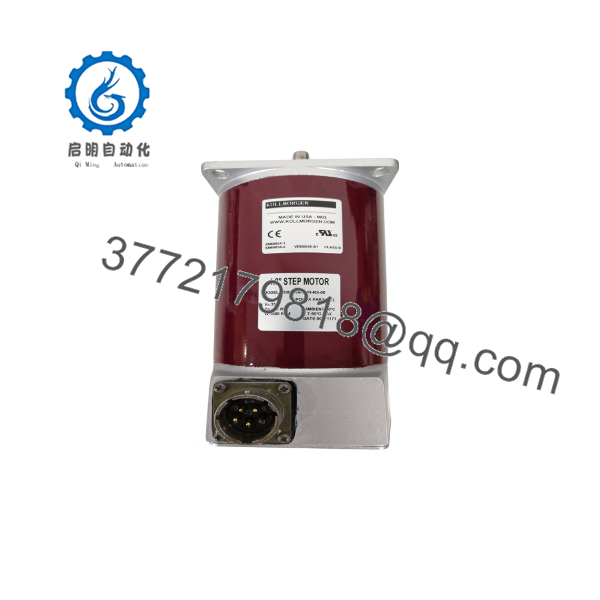
E33NCHA-LNN-NS-00
Installation & Configuration Guide
Stage 1: Pre-Installation Preparation — 5–10 minutes
⚠️ Safety First: Notify operations, place the machine in a safe state, apply lockout/tagout, and isolate motor power before touching the motor or drive wiring. Allow the drive DC bus to discharge according to the drive manufacturer’s procedure.
Tools Required:
- ESD strap
- PH1/PH2 screwdriver as applicable
- Multimeter
- Wire labels
- Smartphone or camera
- Appropriate mechanical torque tools
- Motor-drive wiring documentation
Data Backup:
- Record the existing drive model and parameter set.
- Photograph the motor nameplate.
- Photograph connector orientation and wiring.
- Record the drive’s motor-current and winding configuration.
- Record any mechanical coupling, belt, or gearbox alignment marks.
- Confirm the replacement part number is E33NCHA-LNN-NS-00.
⚠️ Do not configure the replacement from a generic “NEMA 34” motor profile. NEMA 34 identifies the mounting envelope, not the electrical characteristics.
Stage 2: Removing the Old Motor — 10–15 minutes
- Lock out motor and drive power.
- Verify the absence of hazardous voltage with an appropriately rated meter.
- Mark each motor lead before disconnecting it.
- Photograph the connector and cable routing.
- Disconnect the motor cable without pulling on individual conductors.
- Release the mechanical coupling, belt, or mounting hardware.
- Support the motor while removing the final mounting bolts.
- Remove the motor without applying side loads to the shaft.
- Inspect the coupling, mounting surface, shaft, and cable connector for damage.
⚠️ Keep the original motor available until the replacement has completed commissioning. The old unit is often the fastest reference for wiring and mechanical orientation.
Stage 3: Installing the New Motor — 10–15 minutes
- Verify the complete part number: E33NCHA-LNN-NS-00.
- Compare the replacement nameplate against the removed motor.
- Confirm the NEMA 34 mounting pattern and shaft configuration.
- Install the motor without forcing the shaft into alignment.
- Align the coupling or transmission mechanically before tightening.
- Connect the four motor leads according to the compatible drive’s wiring diagram.
- Confirm the drive is configured for the correct winding arrangement.
- Set the drive current according to the motor documentation rather than assuming the nameplate current is the correct drive setting.
- Secure the motor cable to prevent connector or terminal strain.
- Rotate the mechanism manually, where safe, to check for mechanical binding.
Self-Checklist:
- Exact model verified
- NEMA 34 mounting confirmed
- Smooth shaft confirmed
- Four-lead winding correctly identified
- Drive current configuration checked
- Mechanical coupling aligned
- Cable secured
- Mounting hardware tightened correctly
Stage 4: Power-On & Testing — 10–20 minutes
- Perform a final wiring and short-circuit check before energizing.
- Power the drive without immediately commanding full-speed motion.
- Check the drive for motor configuration or overcurrent alarms.
- Command a low-speed jog with the mechanism unloaded where possible.
- Verify the motor rotates in the intended direction.
- Check for excessive vibration, resonance, abnormal noise, or rapid heating.
- Run a short positioning test at low acceleration.
- Gradually return the machine to its normal operating profile.
- Verify repeatability under the actual mechanical load.
- Record the final drive parameters for future maintenance.
⚠️ Do not use a generic 24 V or 48 V specification found on an unrelated online listing as the basis for drive setup. Available records for this exact model show an 8.6 A parallel winding current, while another listing gives materially different electrical figures. That conflict is precisely why the motor nameplate and drive documentation should control commissioning.
Frequently Asked Questions (FAQ)
Can I hot-swap the Kollmorgen E33NCHA-LNN-NS-00?
No. This is a motor, not a hot-swappable control module. Isolate the drive and motor power before disconnecting the motor leads. Follow the drive manufacturer’s discharge and electrical-safety procedure.
Is a servo motor?
No. Available component documentation identifies it as a hybrid stepper motor in the Kollmorgen/Pacific Scientific E Series. It uses a 1.8° step angle and a four-lead parallel winding.
What is the frame size of this motor?
The uses a NEMA 34 frame and NEMA mounting configuration. The reported mounting description is approximately 3.38 × 3.38 inches at the NEMA flange.
What is the rated current?
Available documentation for the exact specifies 8.6 A with the parallel winding connection. Do not automatically program 8.6 A into every drive; the correct drive current depends on the drive architecture and manufacturer’s motor-current specification.
What is the holding torque?
The exact-part records identify 6.64 Nm holding torque. Holding torque should not be treated as available torque at operating speed. Actual usable torque falls with speed and depends on the drive, supply voltage, current waveform, acceleration profile, and mechanical load.
Is this motor still available as a new original part?
Availability varies by supplier. One current industrial spare-parts listing identifies the exact as a new original component, while another listing reports zero stock. Treat availability as supplier-specific and verify serial/condition, packaging, and nameplate photographs before issuing a purchase order.
Why are online specifications inconsistent for this model?
This is a real procurement risk with legacy industrial motors. Some listings appear to mix specifications from related E-Series models or unrelated motor configurations. For example, one source reports 8.6 A and 6.64 Nm, while another publishes different current, voltage, torque, and speed values. For a replacement, the exact part number, nameplate, original documentation, and compatible drive configuration should take priority over a generic reseller specification.



