
 WhatsApp: +86 16626708626
 Email:
  Phone: +86 16626708626
Description
Key Technical Specifications
| Parameter | Specification / Value |
| Manufacturer | KUKA Roboter GmbH |
| Part Number | 00-130-547 (KCP2 / VKCP2) |
| Controller Compatibility | KUKA KRC2, KRC2 Edition2005, VKRC2 |
| Display Type | 8.4-inch TFT VGA LCD Color Display |
| Display Resolution | 640 × 480 pixels |
| Input Interface | Integrated membrane keypad, 6D Space Mouse, softkeys |
| Safety Features | Dual-circuit E-Stop button, dual 3-position deadman/enabling switches |
| Operating Voltage | 24 VDC supplied via controller umbilical cable |
| Interface Cable Connector | Heavy-duty multi-pin round HARTING connector |
| Enclosure Rating | IP65 (dust-tight and splash-resistant) |
| Operating Temperature | +5°C to +55°C (+41°F to +131°F) |
| Weight | Approx. 1.5 kg (3.3 lbs) without cable |
Product Introduction & Supply Chain Strategy
The KUKA KCP2 00-130-547 (KUKA Control Panel 2) is the primary operator interface and handheld programming terminal for KUKA KRC2 and KRC2 Edition2005 robot controllers. Featuring an 8.4-inch color display, an ergonomic 6D Space Mouse for manual jogging, and integrated safety-rated enabling switches, the KCP2 allows technicians to program paths, adjust points, and diagnose faults directly at the robot cell.
Maintaining a New Surplus KCP2 00-130-547 on-site acts as an essential insurance policy against unexpected production line halts. Sourcing factory-fresh surplus avoids the high failure rates associated with refurbished pendants—such as worn membrane keys, cracked touchscreens, and degraded emergency stop contacts—ensuring immediate drop-in replacement, full safety compliance, and low Total Cost of Ownership (TCO).
Installation & Configuration Guide
1.Pre-Installation Safety Setup:Prerequisite & Safety Prep.
Ensure the robot cell is in a safe condition with no active automatic operations running. Put on a grounded ESD wrist strap before handling cable connections. Inspect the round HARTING connector on the cable end for any bent pins, dust, or moisture before plugging it in.
2.Legacy Pendant Removal:Cable Disconnection.
If replacing an active unit, turn the controller key switch to T1 (Manual Reduced Velocity) mode or power off the main disconnect on the KRC2 cabinet. Rotate the locking collar on the KCP cable’s heavy-duty connector counterclockwise and pull straight out to disengage it without twisting the internal pins.
3.Connection and Cable Routing:Interface & Mounting.
Align the keyway on the new KCP2 00-130-547 cable connector with the mating receptacle on the front of the KRC2 cabinet. Push the connector firmly home and rotate the locking ring clockwise until it clicks into the fully locked position. Hang the pendant securely on the cabinet holder brackets.
4.Power-On, Safety Check, and Testing:Safety & Motion Check.
Power on or reset the controller. Verify that the display boots up to the KUKA System Software (KSS) user interface. Perform a mandatory safety circuit test: depress the deadman switches halfway to test manual enable, and press the red Emergency Stop button to confirm the safety relay loop opens instantly.
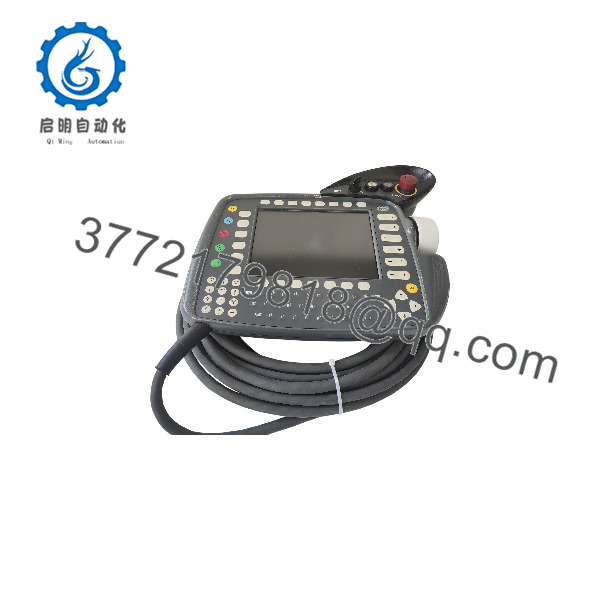
KCP2 00-130-547
Firmware/Software Versions & Upgrade Notes
- Software Compatibility: Fully compatible with KUKA System Software (KSS) V4.x, V5.x, and VKSS variants on controllers.
- Hardware Revisions: Ensure the pinout and keyboard layout match your cell requirements (standard KCP2 vs. VKCP2 VW-standard layout). The 00-130-547 is a direct drop-in hardware replacement for standard series pendants.
- Plug-and-Play Swapping: The does not store system logic or robot positioning files; all configuration data remains on the cabinet motherboard. Swapping the pendant requires no software downloads or re-licensing, provided the safety circuit bypass plug or cable interlocks match your cabinet build.
Frequently Asked Questions (FAQ)
Why should I choose a New Surplus unit over a cheaper refurbished or repaired pendant?
Refurbished pendants typically have worn 3-position deadman switches, fatigued cable strain reliefs, and faded displays that degrade under shop-floor usage. A failure in the dual-circuit deadman or E-Stop switch will cause immediate safety trips and drop the entire robot cell offline. Our New Surplus units are 100% factory-fresh, providing maximum tactile reliability and long-term operating life.
How do you confirm that this 00-130-547 teach pendant is genuine and unused?
Each unit undergoes strict inbound quality verification. We inspect the display glass for zero hairline scratches, verify crisp tactile feedback on every membrane button, check connector pins for zero insertion wear, and supply the unit in anti-static protective packaging along with a QC verification report.
Can I disconnect and reconnect the while the controller is powered on?
Disconnecting the while the controller is powered on will break the safety circuit (E-Stop loop) and trigger an emergency stop on the robot controller. To safely hot-unplug or swap the pendant, you must either power down the cabinet or use a dedicated KCP bypass plug according to official KUKA safety procedures.
Does this pendant include the connecting cable, or is it sold separately?
This part number (00-130-547) designates the teach pendant head assembly. Please check your specific requirement or contact our technical team to confirm whether you need the standalone pendant head or an assembly with an integrated 10 m / 15 m umbilical cable.
What warranty coverage comes with this New Surplus unit?
We back this New Surplus KUKA 00-130-547 pendant with a full 1-year functional replacement warranty. In the unlikely event of any hardware defect under normal operating conditions, we offer an immediate direct replacement or full refund to keep your robotics line running.



